
So here’s the good the bad and the ugly about our experience refinishing our floors. Really just the good, but I wanted to post about what we learned, and what we did, since there was not a lot of information out there when I was in the research phase.
Specifically, about choosing a stain!!
I WISH this post had existed several months ago, when my husband and I were agonizing over deciding on what color to stain our floors. And I do mean, AGONIZING. Who knew there were so many stain colors, combinations, and methods of application… not to mention, once you throw in what kind of wood floors you’re working with, there is yet another variable in the equation of figuring out how your floors will actually turn out.
Let’s start at the beginning though, shall we? Rewinding the clock back to December – Kris and I bought our house in December, and the sale closed right before Christmas. I knew, even before it was officially ours, that the first thing I wanted to do was refinish the floors.
This is a beautiful, old Victorian, and when I say it’s “old”, I mean OLD. It was built in the 1890’s, and it still has the original hardwood floors. When I found that out, I was SO excited – it is SUCH a pot of gold, but they had seen better days.
Ok that’s an understatement…
They were scratched to hell from years of abuse, and the nail pattern was VERY obvious on the light wood. Also, the nail holes looked like big dark spots as the nails had rusted at some point. There were also stains from water damage, and animal urine (which, I should note, the entire house smelled of). The areas where the furniture had sat were much darker due to sun damage on the surrounding areas. And finally, there were a few very poorly done patch jobs in recent years.
Take a look for yourself:
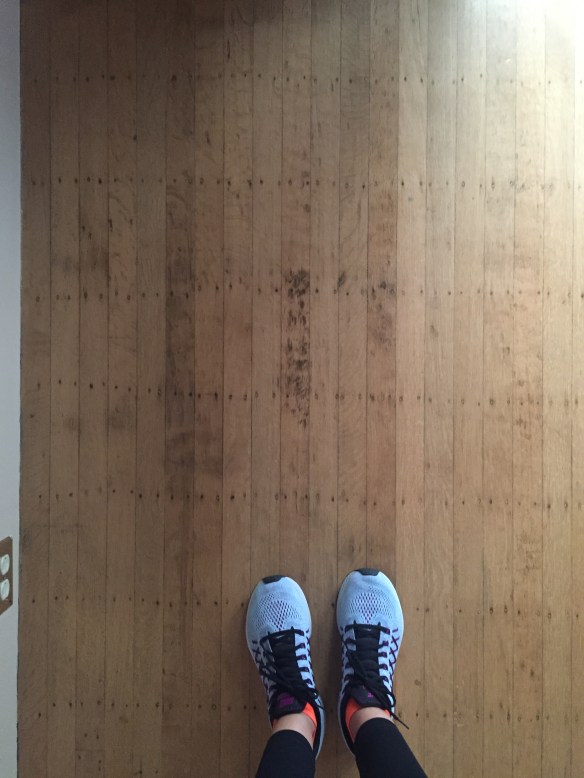
Look at all the scratches, discoloration, and the very noticeable rows of nails… also in the picture below you can really see how the sun bleached certain areas.
And here is one of the former pet’s favorite spot to go potty… so special…

The shoddy patchwork was invisible to me at first, but as soon as it was pointed out, it was all I could stare at… not only did they use a different type of wood, but they used short little nubby slats laid down next to slats that ran the entire length of the room. I mean, it’s only a few dollars more to replace it with a longer slat!! I mean, it literally would have been a difference of $50 to do it right the first time!! UGH!!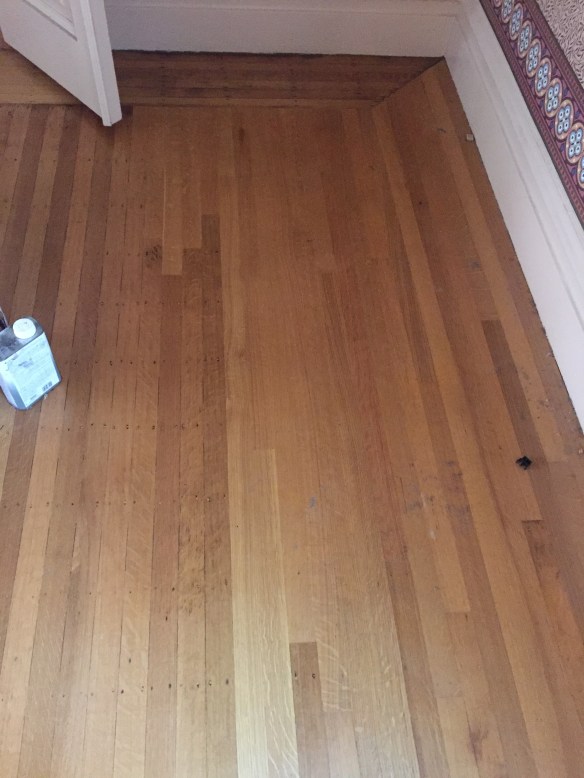
BUT, even with the damage, these floors were giving me heart eyes – they were original to the house, and made of gorgeous white oak, which is hard to come by these days. Nothing a little sanding, staining, and minor re-patching couldn’t solve.
We decided that before we moved in, we’d have the wood floors refinished, to save us the headache of trying to do it down the road after we were moved in, and I am still SO HAPPY we made that decision.
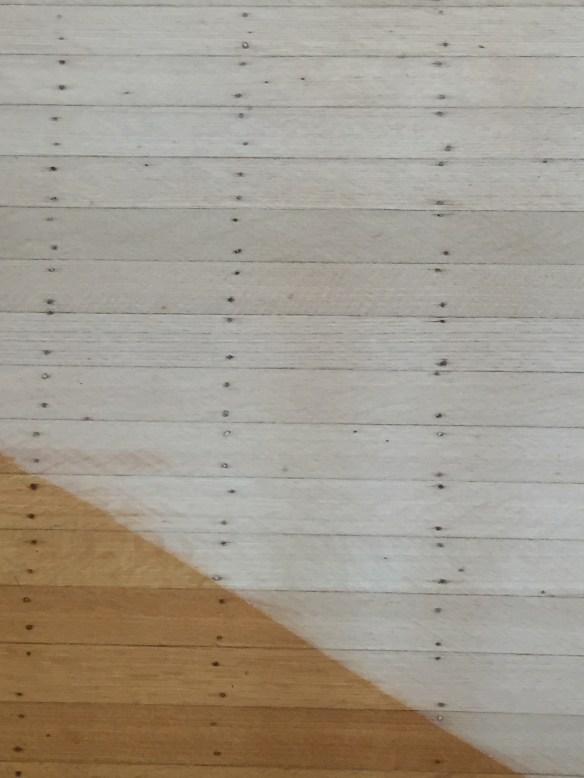
Just look at what a difference a single pass with the sander makes:


We worked with some local flooring contractors who were ROCKSTARS!! Side note: If anyone in the bay area is looking to have their floors re-done, email me, and I’ll send you their information.
Anyway, as they got to sanding, we needed to choose a stain for the floor. I kind of loved the light white look of the sanded wood, but with the nail holes, we knew we needed something darker to help camouflage them.
Our flooring guy also advised us away from anything too dark because it shows dirt so much faster than lighter colors.
As we looked online for hardwood floor inspiration, I had an aversion to anything too “red”, Kris didn’t want anything too “yellow”, and we agreed that it couldn’t be too grey and weathered because our house was traditional… and a beachy / rustic floor would not mesh well with the traditional, intricate moldings, and Victorian details running throughout.
We decided on a mid-tone brown – nothing too red, yellow, or grey… and nothing too dark or too light. I felt like Goldilocks trying to convey what we were looking for to our contractor. He probably thought we were nuts.
After articulating what we were hoping to achieve, we went back online to find floors we liked, that listed what stain color they used. Unfortunately, it was not easy to find. We kept finding:
- Floors that we liked, but that didn’t list what stain they used
- Floors that we liked, where the wood was a completely different type than ours (so it wouldn’t turn out the same on ours)
- Floors where the wood was also white oak, but the stain was not the same look that we were hoping for
We showed our contractor a bunch of pictures for reference, and since we didn’t have an exact example with stain colors we could replicate, (and seeing that I had a very “particular vision”), he decided it would be best if he laid down stain samples for us to look at in real life.
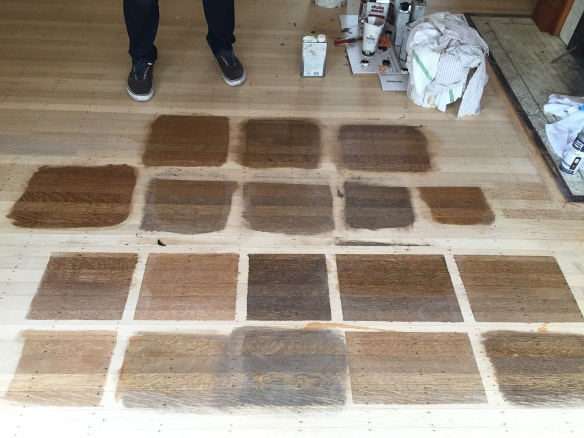
Which leads us here:
Yeahhhhhh…… almost 20 samples later, we were completely unsure which to choose.
To be fair, we started with about 5 squares… but none of them were quite right. So we sampled a few more, then a few more, then a few more. It’s like that book, “If You Give a Mouse a Cookie.” #amiright
Anyway, I may have needed 20 samples to make a decision, but I’m hoping that these pictures help someone else who is re-doing their floor because this information is hard to come by!!

If you like any of these, here’s what they each are:
Right row, bottom to top:
- Minwax: Provincal
- Minwax: Jacobean
- 1 part Minwax Jacobean, 2 parts Minwax whitewash
- 1 part Minwax Jacobean, 1 part Minwax whitewash
Middle row, bottom to top:
- 1 part Minwax Dark Walnut, 1 Part Polyurethane
- Minwax Dark Walnut (applied to dry wood floor)
- Minwax Dark Walnut (applied to wet wood floor)
- Minwax Eary American (applied to dry wood floor)
- Minwax Eary American (applied to wet wood floor)
Left row, bottom to top:
- 2 part Minwax Dark Walnut, 1 Part Polyurethane
- 1 part Minwax Jacobean, 1 part Minwax whitewash (applied to wet wood floor)
- Minwax: Provincal (applied to wet wood floor)
- Minwax Fruitwood (applied to dry wood floor)
Also, for hardwood flooring novices who are like, with water?? Polyurethane?? White wash??? What do those do?? Here’s a brief education:
Treating the raw wood with water before staining opens up the grain – the result is that the wood soaks up more stain, and ends up being darker, with a more pronounced grain. Using the same mixture on non-water treated wood is lighter, more stain wipes off than gets absorbed, and the grain is more subtle.
We really preferred how our floors looked when the stain was applied without water-treating due to the variance in wood grains – the water treatment made our floors too dark and too busy, so we liked how the stain looked when applied to dry wood.
In a few of these samples, we mixed polyurethane with the stain to lighten the color – it was like diluting the stain without changing the tone.
Adding white wash stain to the colors made them appear more grey – not a look we liked for our house, but would be really great in the right home.
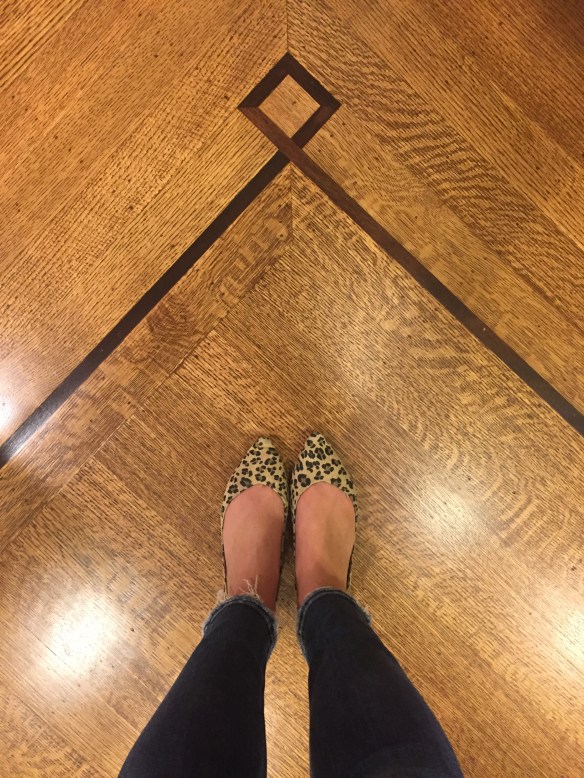
In the end, we ended up choosing 1 part Minwax Dark Walnut, 1 Part Polyurethane – middle row, bottom sample in the above – and they turned out AMAZING!! It’s really hard to capture the true color of the finished floor in photos, and I have more (better) photos to share, but for now here’s a few:
How amazing is this mahogany inlay in our kitchen?!?! I am SO obsessed. I snapped this at night with the lights on, so they look a lot more yellow and red than they do in real life…
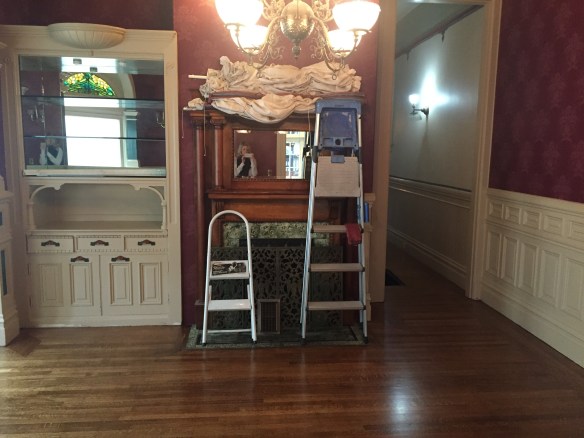
In these photos below, you kind of get a sneak peek of how our living room used to look (heavy dark red curtains, dark red damask wallpaper, beige trim, and hunter green trim). BUT, despite the really dark and awful wall paper, and low light, the floors are pretty true to color – a rich, true brown – not too dark, and not too light.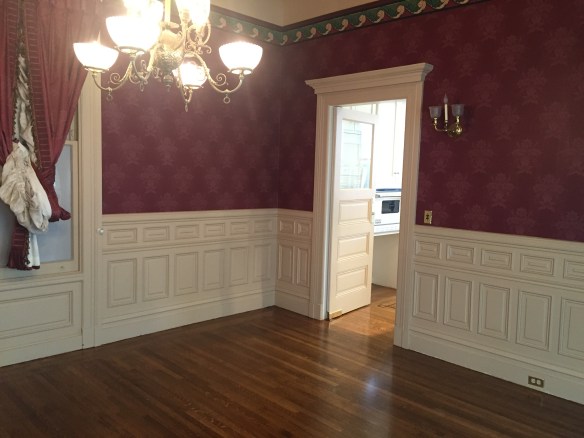
The picture below is a grainy iPhone pic, that I snapped just before the sun went down, but you can see that the floors aren’t TOO dark. Just dark enough to really camouflage some of the really bad stains, and the nail holes.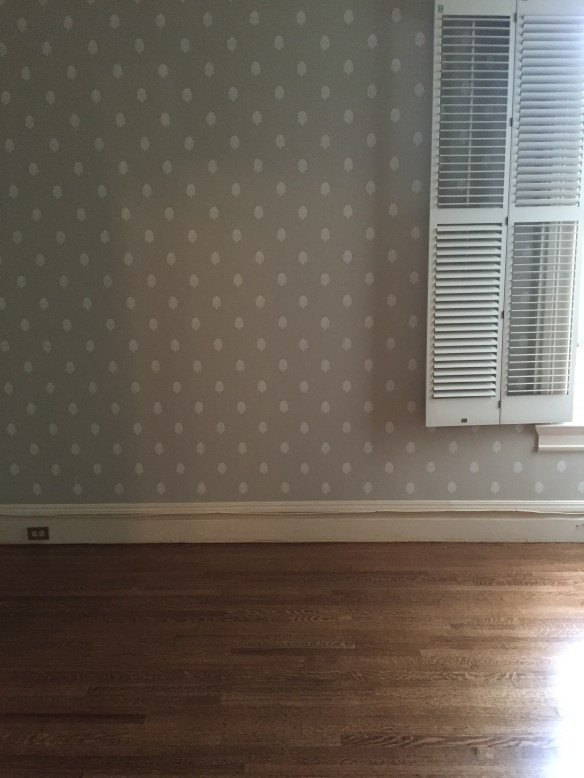
And a blurry close of of that inlay trim… so SO pretty!
And finally, just a really close up photo of the stained wood, and nail holes… they pretty much disappear from afar, but are still noticeable up close. It doesn’t bother me, and I think anyone who is buying an old home will also appreciate their history.
Despite sanding, there are still little nicks here and there (so if you are also sanding old floors, don’t expect them to look like they were just laid), but it’s part of our house’s story, and I really love how they turned out.
Since we finished the floors, we’ve moved in and this place already looks SO DIFFERENT. Keep in mind, I took these pictures back in January, and it’s almost April! In the last several months, we’ve made A LOT of progress stripping wallpaper, and painting.
More specifically, painting trim. There is A CRAPLOAD of trim… which I love… it’s just very detailed, so it takes forever to paint, which I don’t love. Some days it feels like I’ll be painting trim until I die, but I’ve made a lot of headway in recent weeks, and I can’t wait to share some before and after photos soon!!!
It’s really starting to come together, and I’m seeing parts of the house take shape, which makes me so excited for phase II… decorating 🙂
