Homemade Ice Cream Sandwiches

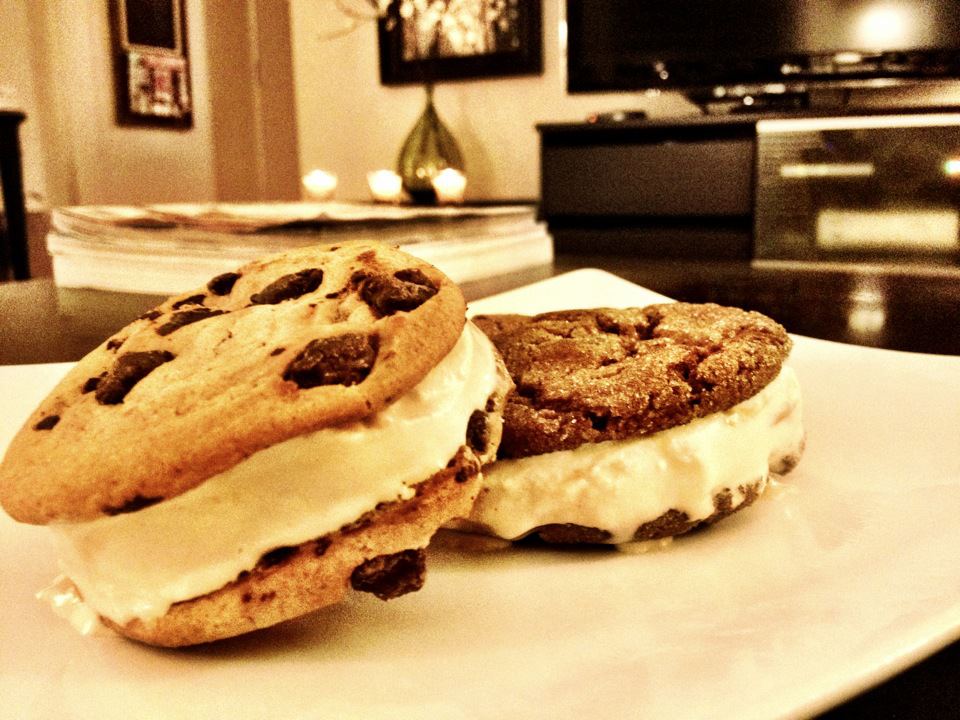
This was the scene at our house last night.  I had sweets on the brain, so between watching X Factor and Modern Family, I whipped up a batch of homemade ice cream sandwiches.

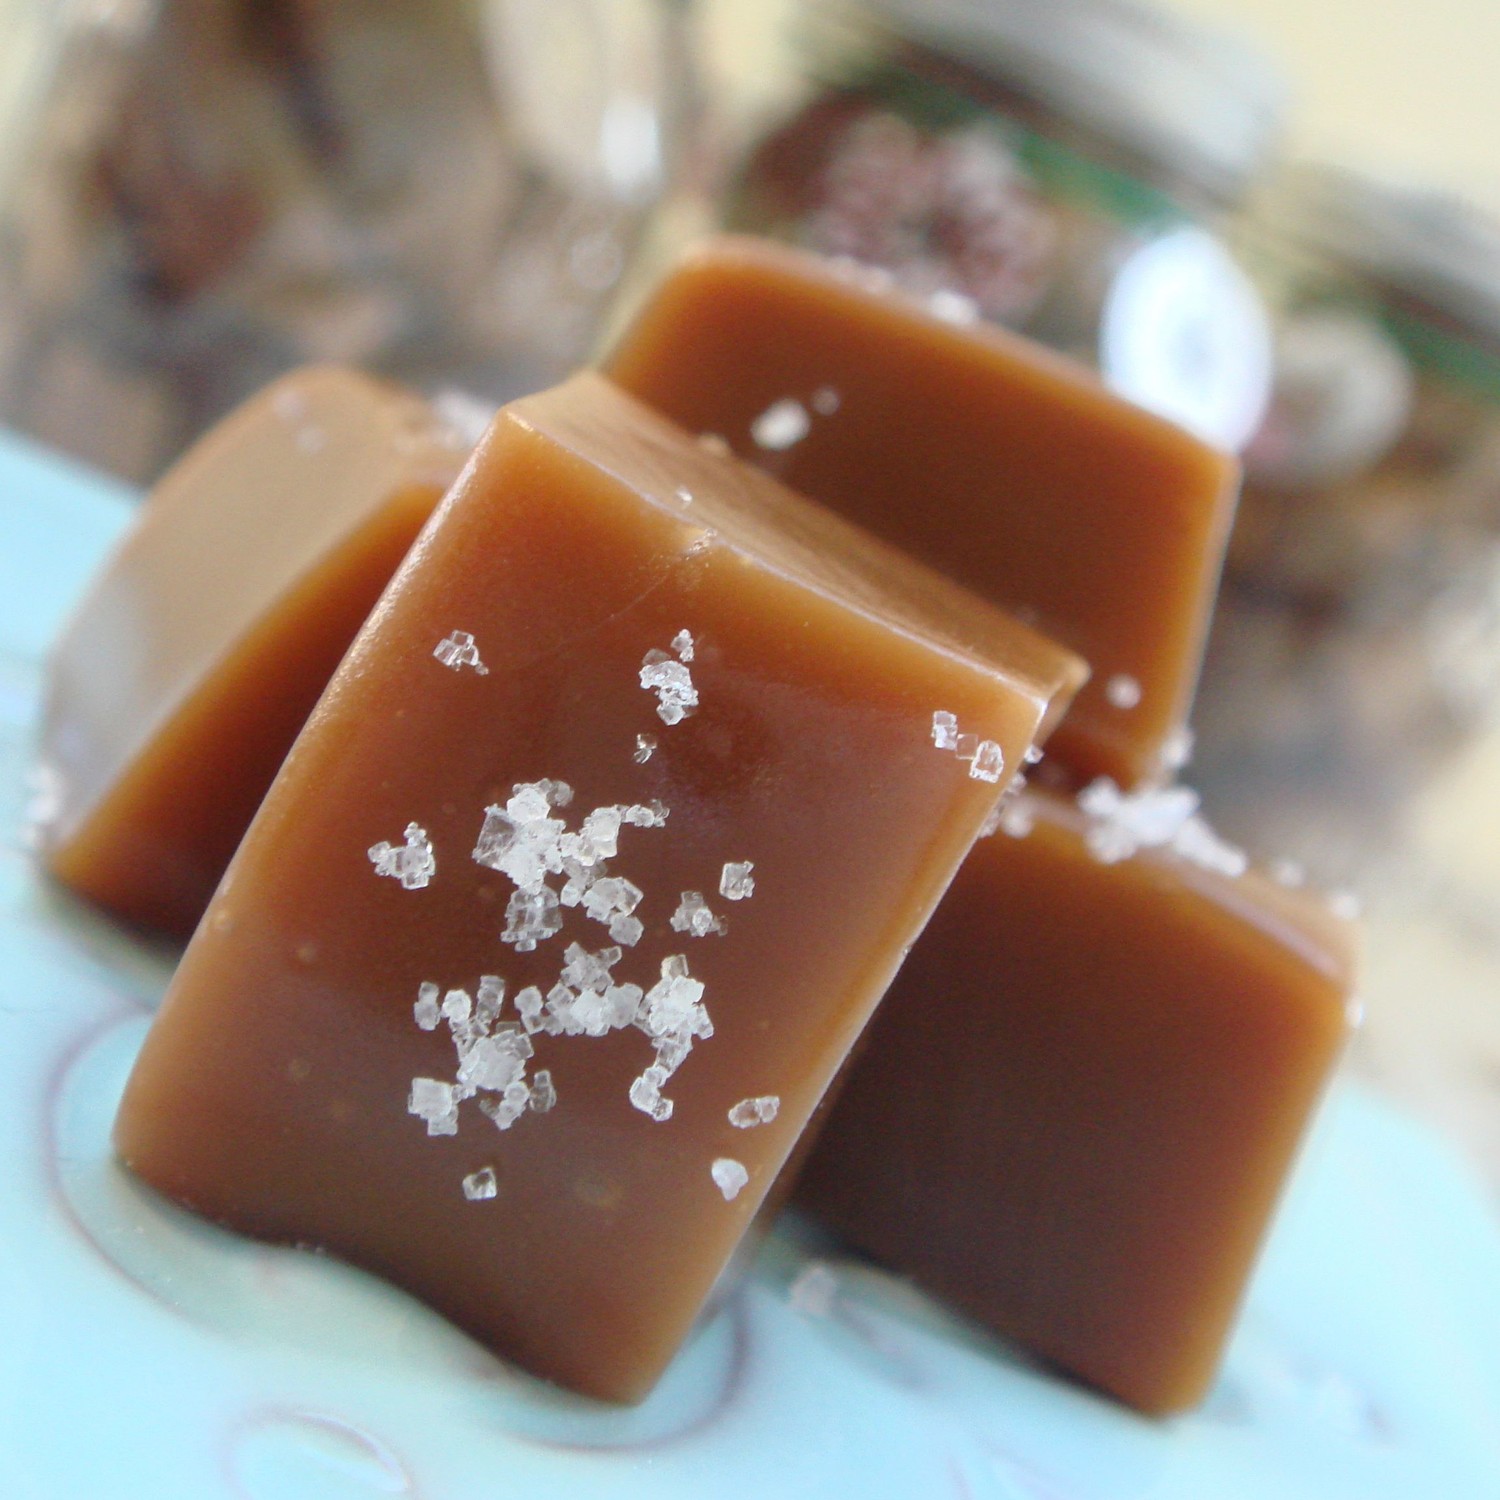
I decided on a classic chocolate chip cookie with french vanilla, and then a chewy molasses spice cookie with salted caramel ice cream.  Not to toot my own horn, but they were AMAZING!!

A few tips: to get the ice cream evenly spread, let it soften for about 10 minutes before scooping on the cookie.  Don’t spread it all the way to the edges – when you press the cookies together, the ice cream will spread out.  Also, don’t even TRY to make these when the cookies are still warm.  It will turn into a (delicious) mess, as I learned on the first batch.  Yes, I ate more of these than I’d like to admit…

Keep reading for the cookie recipes!

Chocolate Chunk Cookies (adapted from Alton Brown):
Ingredients:
8 ounces unsalted butter
12 ounces bread flour
1 teaspoon kosher salt
1 teaspoon baking soda
2 ounces granulated sugar
8 ounces light brown sugar
1 large egg
1 large egg yolk
1 ounce whole milk
1 1/2 teaspoons vanilla extract
12 ounces semisweet chocolate chips

Directions:
Melt the butter in a 2-quart saucepan over low heat. Set aside to cool slightly.
Sift together the flour, salt and baking soda onto a paper plate. Pour the butter into your stand mixer’s work bowl. Add the sugar and brown sugar and beat with the paddle attachment on medium speed for 2 minutes.
Meanwhile, whisk together the whole egg, the egg yolk, milk and vanilla extract in a measuring cup. Reduce the mixer speed and slowly add the egg mixture. Mix until thoroughly combined, about 30 seconds.
Using the paper plate as a slide, gradually integrate the dry ingredients, stopping a couple of times to scrape down the sides of the bowl. Once the flour is worked in, drop the speed to “stir” and add the chocolate chips. Chill the dough for 1 hour.
Preheat the oven to 375 degrees F and place racks in the top third and bottom third of the oven.
Scoop the dough into 1 1/2-ounce portions onto parchment-lined half sheet pans, 6 cookies per sheet. Bake 2 sheets at a time for 15 minutes, rotating the pans halfway through. Remove from the oven, slide the parchment with the cookies onto a cooling rack and wait at least 5 minutes before devouring.

**Note: The darker the sugar you use, the chewier your cookies will be.

———————————————————————-

Chewy Molasses Spice Cookies (adapted from Martha Stewart):
Ingredients:
2 cups all-purpose flour (spooned and leveled)
1 1/2 teaspoons baking soda
1 teaspoon ground cinnamon
1/2 teaspoon ground nutmeg
1/2 teaspoon salt
1 1/2 cups sugar
3/4 cup (1 1/2 sticks) unsalted butter, softened
1 large egg
1/4 cup molasses

Directions:
Preheat oven to 350 degrees. In a medium bowl, whisk together flour, baking soda, cinnamon, nutmeg, and salt. In a shallow bowl, place 1/2 cup sugar; set aside.
With an electric mixer, beat butter and remaining cup of sugar until combined. Beat in egg and then molasses until combined. 
Reduce speed to low; gradually mix in dry ingredients, just until a dough forms.
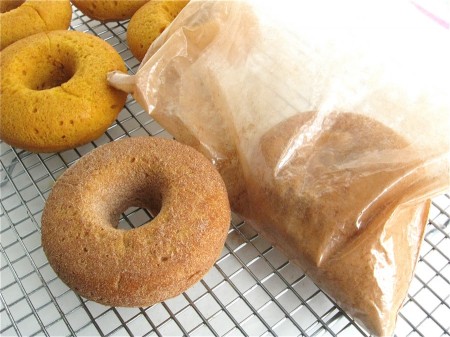
Pinch off and roll dough into balls, each equal to 1 tablespoon. Roll balls in reserved sugar to coat.
Arrange balls on baking sheets, about 3 inches apart. Bake, one sheet at a time, until edges of cookies are just firm, 10 to 15 minutes 

**Note: cookies can be baked two sheets at a time, but they will not crackle uniformly. Cool 1 minute on baking sheets; transfer to racks to cool completely.

Healthy Homemade Pumpkin Spice Latte

It sounds too good to be true, but it IS true!  Pumpkin Spice Latte’s that are as healthy as they are yummy – not just an urban myth…

I found this recipe at The Yummy Mummy Kitchen – Marina is all about creating simple healthy recipes for her family (and readers).  The recipe for this is so easy, you will saying, Why didn’t I think of this myself?!

Ingredients:
Non-fat whipped topping (like Cool Whip) – she recommends TruWhip
Canned Pumpkin
1 tablespoon Pumpkin Pie Spice
Optional: Three packets sweetener (Stevia or Splenda)

Directions:
Mix non-fat whipped topping, canned pumpkin, pumpkin pie spice, and sweetener (optional) in a large mixing bowl.  After it’s all mixed together, spread the topping in a flat pan or tray, and pop it in the freezer.  Once the mixture is frozen, use a cute pumpkin shaped cookie cutter to cut out the adorable pumpkin flavored “creamers” and drop it in your morning coffee for a creamy dreamy treat!

Or, if you are lazy like me, no need to freeze the mixture – just save it in a Tupperware in the fridge and spoon it into your to-go cup before running out of the house (trust me, her photos are way prettier than mine ended up looking this morning).

Try it out!

Fleur de Sel Caramel’s

I’ve recently become totally and utterly hooked on salted caramel.  The Fleur de Sel caramel candies from Trader Joes… the salted caramel ice cream from BiRite (if you ever come to San Francisco, a stop at BiRite in the Mission is MUST – life changing I tell you).  This girl can’t get enough!

Then, I came upon a recipe for homemade Fleur de Sel Caramels – from the Barefoot Contessa no less (god I love her) – and I am DYING to try these on my own…

Fleur de Sel Caramels (Makes 16 Caramels)

Ingredients:
Vegetable oil
1½ cups sugar
¼ cup light corn syrup
1 cup heavy cream         
5 tablespoons unsalted butter
1 teaspoon fine fleur de sel, plus extra for sprinkling
½ teaspoon pure vanilla extract
Instructions:
Line an 8-inch square baking pan with parchment paper, then brush the paper lightly with oil, allowing the paper to drape over 2 sides.
In a deep saucepan (6 inches wide x 4½ inches deep), combine ¼ cup water, the sugar and corn syrup and bring them to a boil over medium-high heat. Boil until the mixture is a warm golden brown. Don’t stir – just swirl the pan to mix. Watch carefully, as it will burn quickly at the end!
In the meantime, in a small pan, bring the cream, butter, and 1 teaspoon of fleur de sel to a simmer over medium heat. Turn off the heat and set aside.
When the sugar mixture is a warm golden color, turn off the heat and slowly add the cream mixture to the sugar mixture. Be careful – it will bubble up violently. Stir in the vanilla with a wooden spoon and cook over medium-low heat for about 10 minutes, until the mixture reaches 248 degrees (firm ball) on a candy thermometer. Very carefully (it’s hot!) pour the caramel into the prepared pan and refrigerate for a few hours, until firm.
When the caramels are cold, pry the sheet from the pan onto a cutting board. Cut the sheet in half. Starting with a long side, roll one piece of the caramel up tightly into an 8-inch-long log. Repeat with the second piece. Sprinkle both logs with fleur de sel, trim the ends, and cut each log in 8 pieces. Cut glassine or parchment papers into 4 x 5-inch pieces and wrap each caramel individually, twisting the ends. Store in the refrigerator and serve the caramels chilled.

Pumpkin Doughnuts

I am fairly certain that after the amount of eating I’ve been doing for work (elaborate dinners, lunches out, cupcakes, cheese platters, and gallons of wine in the last week) that the last thing I need is a Pumpkin Doughnut, but after finding this recipe, I’ve become convinced that I need to make these tonight.

Try to tell me that these don’t look life changing…

Yes… life changing indeed.
My first thought was, I don’t have this special pan for them… what about muffins, but as I read through the recipe, they specifically said, don’t try this as muffins.  Whelp, looks like a trip to Williams Sonoma might be in my future to pick up one of these…
As a side note, these are baked – not deep fried – so the recipe actually looks really easy!  Start by pre-heating the oven to 350 degrees.  You’ll need:
  – 1/2 cup vegetable oil
  – 3 large eggs
  – 1 1/2 cups granulated sugar
  – 1 1/2 cups pumpkin purée (canned pumpkin)
  – 1 1/2 teaspoons pumpkin pie spice, or 3/4 teaspoon ground cinnamon plus a heaping 1/4 teaspoon each ground nutmeg and ground ginger
  – 1 1/2 teaspoons salt
  – 1 1/2 teaspoons baking powder
Put all these ingrediants into a large mixing bowl, and beat everything together until it’s smooth.
Add 1 3/4 cups + 2 tablespoons (8 ounces) King Arthur Unbleached All-Purpose Flour, stirring just until smooth.
Lightly grease two standard doughnut pans, and fill the wells of the doughnut pans about 3/4 full.  Bake the doughnuts for 15 to 18 minutes, or until a cake tester inserted into the center of one comes out clean. If you’re using self-rising flour, bake for the longer amount of time.
Remove the doughnuts from the oven, and after about 5 minutes, loosen their edges, and transfer them to a rack to cool.
While the doughnuts are still warm (but no longer fragile), gently shake them in a bag with cinnamon-sugar. Or better yet, pumpkin-spice sugar, made by combining the aforementioned pumpkin pie spice (or substitute) with granulated or extra-fine sugar.
You are welcome in advance. How AMAZING do these look?!

Bacon Mac and Cheese

Photo courtesy of Blog Chef
My friends and I have started this book club, and this month I am hosting it at my house.  It’s really more of a “wine” club, or a “gossip” club, or a “amazing food” club than a book club, but we do read, and we do talk about the books… a little!

On the menu for tomorrow: Bacon Mac and Cheese, and mini Wedge Salads!
Since we are meeting on a week night, I’m not going to have the time to whip up a gourmet meal for 10 out of thin air.  That means I’m prepping all the food tonight, so when I get home from work tomorrow, I can throw the mac and cheese into the oven, arrange the salads, and be ready for everyone in no time.
I’m stealing the recipe from Tyler Florence, and it looks absolutely amazing… I’ll get back to you with the verdict tomorrow, but after reading all the reviews, I’m pretty sure it will be a hit!
Tyler Florence’s Ultimate Mac and Cheese:

Ingredients
  • Kosher salt
  • 1 pound elbow macaroni
  • 4 cups milk
  • 2 or 3 sprigs thyme
  • 4 cloves garlic, smashed and divided
  • 3 tablespoons unsalted butter
  • 3 tablespoons all-purpose flour
  • 5 1/2 cups shredded sharp white Cheddar
  • Freshly ground black pepper
  • 1/4 cup chopped flat-leaf parsley
  • 4 slices bacon, cut crosswise into thin strips
  • 1 large onion, diced
  • 2 garlic cloves, smashed
  • Leaves from 1/4 bunch fresh thyme

Directions

Bring a pot of salted water to a boil over high heat. Add the macaroni and cook for 8 to 9 minutes, until al dente. Drain.
Preheat the oven to 400 degrees F.
In a small saucepan heat the milk with the thyme sprigs and 2 garlic cloves. Melt the butter in a large, deep skillet over medium-high heat. Whisk in the flour and cook for about 1 minute, stirring constantly, to keep lumps from forming. Strain the solids out of the milk and whisk it into the butter and flour mixture. Continue to whisk vigorously, and cook until the mixture is nice and smooth. Stir in the 4 cups of the cheese and continue to cook and stir to melt the cheese. Season with salt and pepper. Add the cooked macaroni and the parsley and fold that all in to coat the macaroni with the cheese mixture. Scrape into a 3-quart baking dish and sprinkle with the remaining 1 1/2 cups cheese. Bake for 30 minutes, or until hot and bubbly.
While that bakes, heat a saute pan. Add the bacon, render the fat and cook until crispy. Add onion, garlic and thyme leaves and cook for about 5 minutes to soften the onion. Season with salt and pepper.
To serve, scatter the bacon mixture over the mac and cheese. Use a big spoon to scoop out servings, making sure you get some of the smoking bacon mixture on each spoonful.

Nutella Pudding

Gluten-free treat with hazelnuts and chocolate

Yeahhh… do I even need to say more?!  Unfortunately, it’s not as easy as mixing Nutella with milk and gelatin, but Food52 has a seriously awesome recipe that I REALLLLLY want to try.

Nutella Pudding (Serves 8)
Ingredients
          1 1/2 cup whole hazelnuts
          2 cups whole milk
          1 cup half and half
          vanilla bean
          extra-large egg yolks
          3 tablespoons cornstarch, sifted
          1/2 cup sugar
          large pinch salt
          3 tablespoons butter
Instructions
–  Heat the oven to 350 degrees F.  Spread the hazelnuts on a baking sheet and toast for 10 minutes. Let cool. When cool, put in a clean towel and rub vigorously to remove skins (you can also just use your fingers). It’s okay if some skin is left on — you’re going to strain later.

–  Chop the cooled hazelnuts to a coarse crumb in a food processor.

–  Make the hazelnut-infused cream: Put the milk and half and half in a heavy-bottomed saucepan. Split the vanilla bean lengthwise, scrape out the seeds and add both the bean and seeds to the milk. Add the hazelnuts and heat to scalding over medium-low heat. Remove from the heat and set aside to infuse for 20 minutes.

–  In the meantime, whisk the egg yolks, cornstarch, sugar and salt together in a large bowl until thick and pale yellow.

–  In a small saucepan, melt the chocolate and butter over low heat, stirring until smooth. Set aside to cool.

–  Strain the milk-hazelnut mixture into the egg yolk mixture, half a cup at a time, whisking after each addition until you’ve added about a cup and a half. Then strain and whisk in the rest of the milk. Return to the saucepan over medium heat and cook, whisking constantly, until the custard is thick and starts to bubble, about 3 minutes.

–  Strain the thickened custard into a clean bowl. Stir in the melted chocolate-butter mixture.

–  Optional, but highly recommended: Scrape the entire pudding into a blender or food processor and process for about 30 seconds, until silky-smooth. I learned this from Dorie Greenspan’s pudding recipes, and it really gives the pudding a wonderful lightness.

–  Spoon the pudding into small ramekins or dessert cups, cover with plastic wrap and chill, overnight if possible. 

–  DO NOT eat it unchilled — right after you make it the flavors will not have blended and will taste a little off.
– — – — – — – — – — – — — – — – — — – — – — — – — – — — – — – — — – — – — — –

Voila!  Aren’t they so pretty with a little sprinkle of shaved chocolate and cocoa powder on top (let’s be honest, mine will probably have just a little cocoa powder… shaving bits of chocolate sounds like more work than I’m willing…)

Gluten-free treat with hazelnuts and chocolate
This is a picture of the end result… scraped clean 🙂
Enjoy!

Gluten-free treat with hazelnuts and chocolate

Guilty Pleasures

Let me introduce you to my new friend – the brownie cookie with salted caramel icing – a gourmet oreo if you will…  I have recently become overwhelmingly obsessed with BiRite’s Salted Caramel Ice Cream, so imagine my delight when I stumbled upon this recipe that added brownie cookies to the mix.

Diet?? What Diet?!  Please enjoy, and in advance… you are welcome!
Preparation: Heat oven to 350 degrees. Line bake sheet with parchment paper.

Ingredients:

Brownie Cookie (adapted from Donna Hay) :
12 oz. chocolate, chopped
3 tablespoons butter
2 eggs
⅔ cup sugar
1 teaspoon vanilla extract
¼ cup all-purpose flour, sifted
¼ teaspoon baking powder, sifted

Salted Caramel 
Creme Filling:
1 cup butter
2 cups confectioner sugar
1/4 teaspoon salted
1/4 cup caramel (Make sure caramel is cooled if making homemade. Click here for homemade caramel sauce recipe)

Instructions:

To make brownie cookies:
Place 7oz. of the chocolate and the butter in a saucepan over low heat and gently stir until melted and smooth. Set aside.

Place the eggs, sugar and vanilla in the bowl of a stand mixer fitted with a paddle attachment and beat for 15 minutes or until pale and creamy. Add in flour, baking powder, melted chocolate mixture, remaining 5 oz. of chocolate and mix to combine. Set aside to to stand for 10 minutes. Spoon 2 tablespoonful of the mixture, onto parchment lined bake sheet. Bake for about 8–10 minutes or until puffed and cracked. Allow to cool completely on trays.


To make caramel 
creme filling:
Place butter in a bowl and beat until creamed. Add in confectioner sugar and salt and beat until light combined. Add in caramel and beat until combined.

Assembly:
Spread a teaspoon and a half of caramel creme on underside of one brownie cookie and place a second brownie cookie bottom side down on top frosting.

Photo and recipe by 
Bakers Royale
Makes 24 one-and-a-half inch sandwich cookies | 

Pinterest Recipe

Ok, I am totally guilty of this Pinterest phenomenon – pinning to pin!  I mean, there are just so many pretty, yummy, inspiring, funny things on Pinterest – it’s become quite the addiction!  The problem?  I’ve never actually done any of the DIY projects I’ve pinned, or made any of the recipe’s.  That must change immediately!
I decided to start out small with a simple side dish I’d pinned a while back.  Summer is nearly here, and in California it means amazing produce.  A quick trip to the grocery store later, three mid-size summer squash zucchini’s were all mine!  Trust me when I say that this recipe for Squash Chips is easy as pie, and soo delish.
Squash Chips:
Ingredients:
  – Squash – this works with any kind here
  – Extra Virgin Olive Oil
  – Salt
  – Pepper
  – Chili Flakes
  – Parmigiano Reggiano Cheese

Instructions:
  – Slice squash into thin rounds
  – Coat in Olive Oil
  – Move rounds to flat baking sheet – no overlapping
  – Sprinkle tops with salt, pepper, and red chili flakes to taste
  – Bake at 375 for 30 minutes until golden brown
  – Top with Parmigiano Reggiano Cheese, and place under broiler for an additional 5 minutes until crispy (watch them – don’t want to burn them in the final 5 minutes!)

Sore Throat Remedy

Sore Throat Remedy

I’ve been feeling under the weather this week with a spring-time cold, and went hunting for a natural remedy for a sore throat.  I’ve done the Dayquil /Nyquil / Cough Drop combo, and while it does help ease the symptoms, I hate the idea of continually taking medicine.

Wooden Nest reprinted a recipe for a natural remedy to help soothe the throat without medicine.  I am heading straight home to test it out, but with lemon and honey, I’m pretty sure it’s going to be awesome.

Sore Throat Remedy (originally printed on Homelife)

2-4 slices of lemon
2cm piece of ginger, thinly sliced
A handful of mint sprigs
1-2 cinnamon sticks
Freshly boiled water
Teapot or boil-resistant jug
Honey, to taste
Infuse the lemon, mint, ginger, and cinnamon in boiling water for 5 minutes. Pour into mug and add honey to sweeten and soothe the throat. 

Best Meatballs You’ll Ever Have

A CUP OF JO: The Best Meatballs You'll Ever Have

Not to totally re-post, but I saw the most AMAZING meatball recipe on Cup of Jo today, and I just had to share.  Not only does this recipe sound fairly easy (who can’t put meatballs in the oven) but it sounds perfect when cooking for a big group!  You can even make these ahead of time and store in the freezer for an easy dinner.

Now, all I need is a great recipe for homemade tomato sauce!

Check out the full post and recipe on Joanna’s blog 🙂