
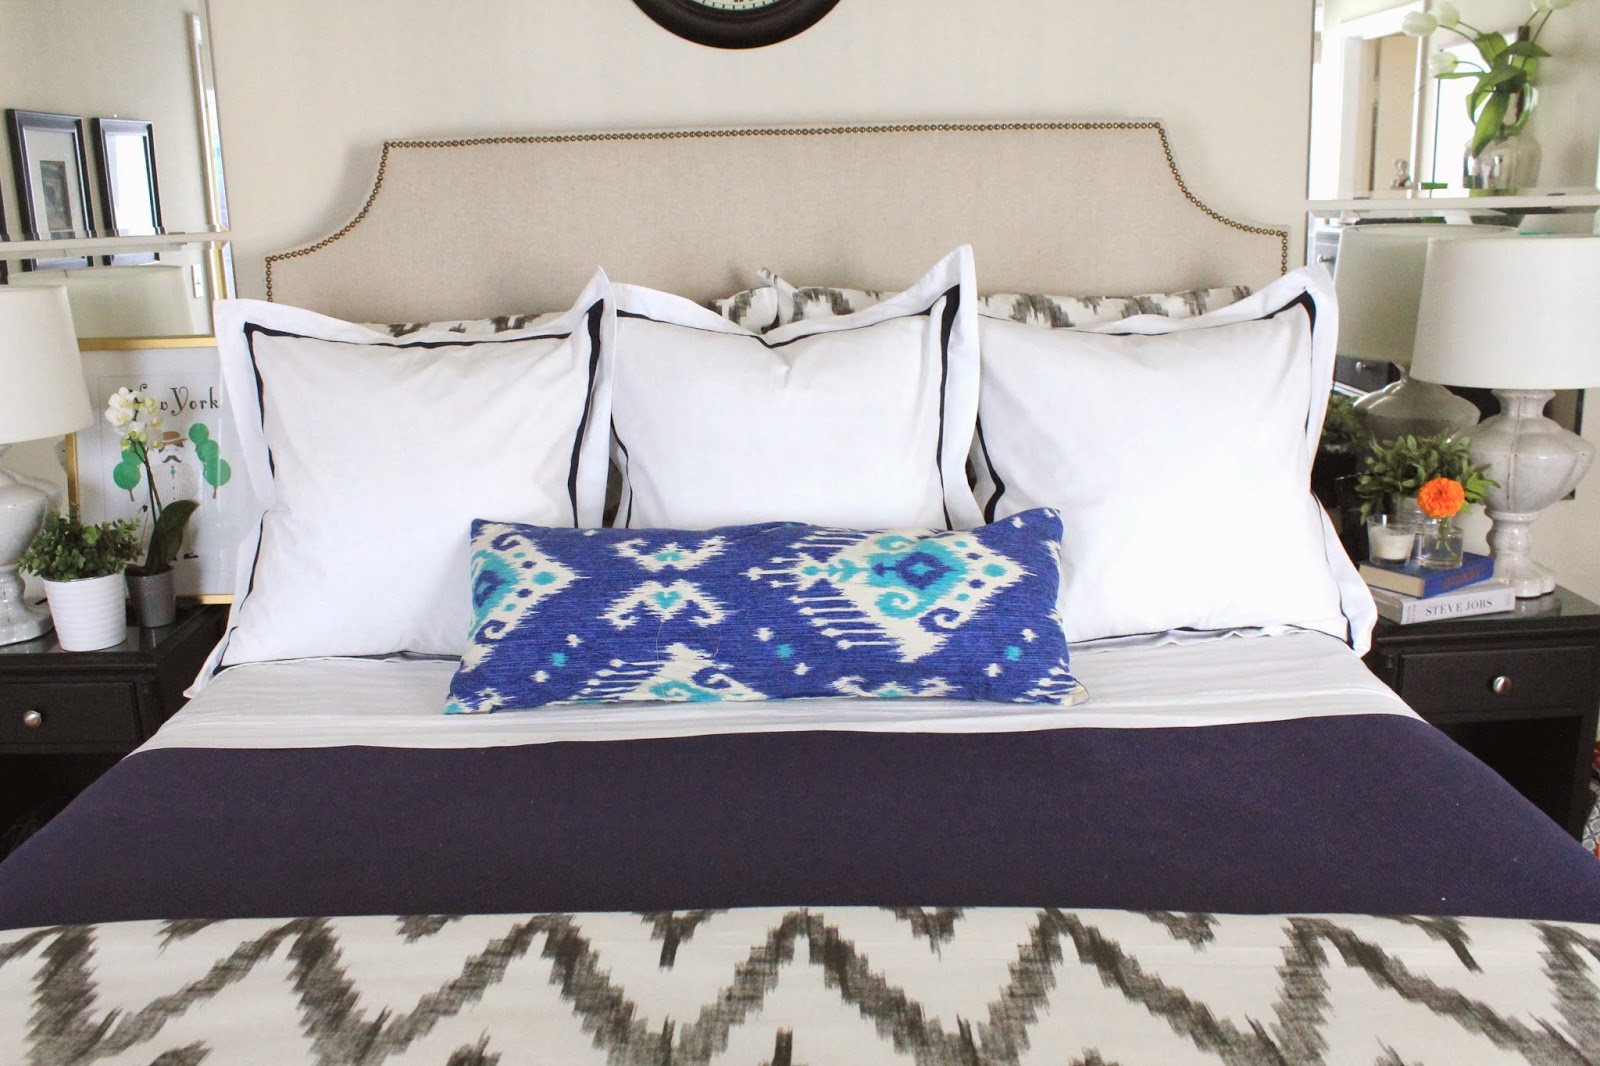
Our bed got a mini update last week – nothing earth shattering, but a definite improvement…

It’s probably not very noticeable to most people, but we FINALLY got some euro shams for our bed, and I did a little hotel bedding DIY on them.
I’ve been wanting actual hotel bedding pretty much since we moved in here a few years ago, but its SO expensive. Even just 3 euro shams from Restoration Hardware run several hundred dollars, and I was not about to pay that for just a few decorative pillow cases. Thanks, but no thanks.
I’d been digging on Overstock, eBay, and Amazon for other options… I looked at a few at Macys, Bloomingdales (yep, they sell bedding online!), and Lands End, but either the options were still really pricey, poor quality, or the wrong colors. I wanted either navy, or a dark grey (black seemed more limiting since we have a lot of navy going on in here)…
So I decided to experiment with a little project.
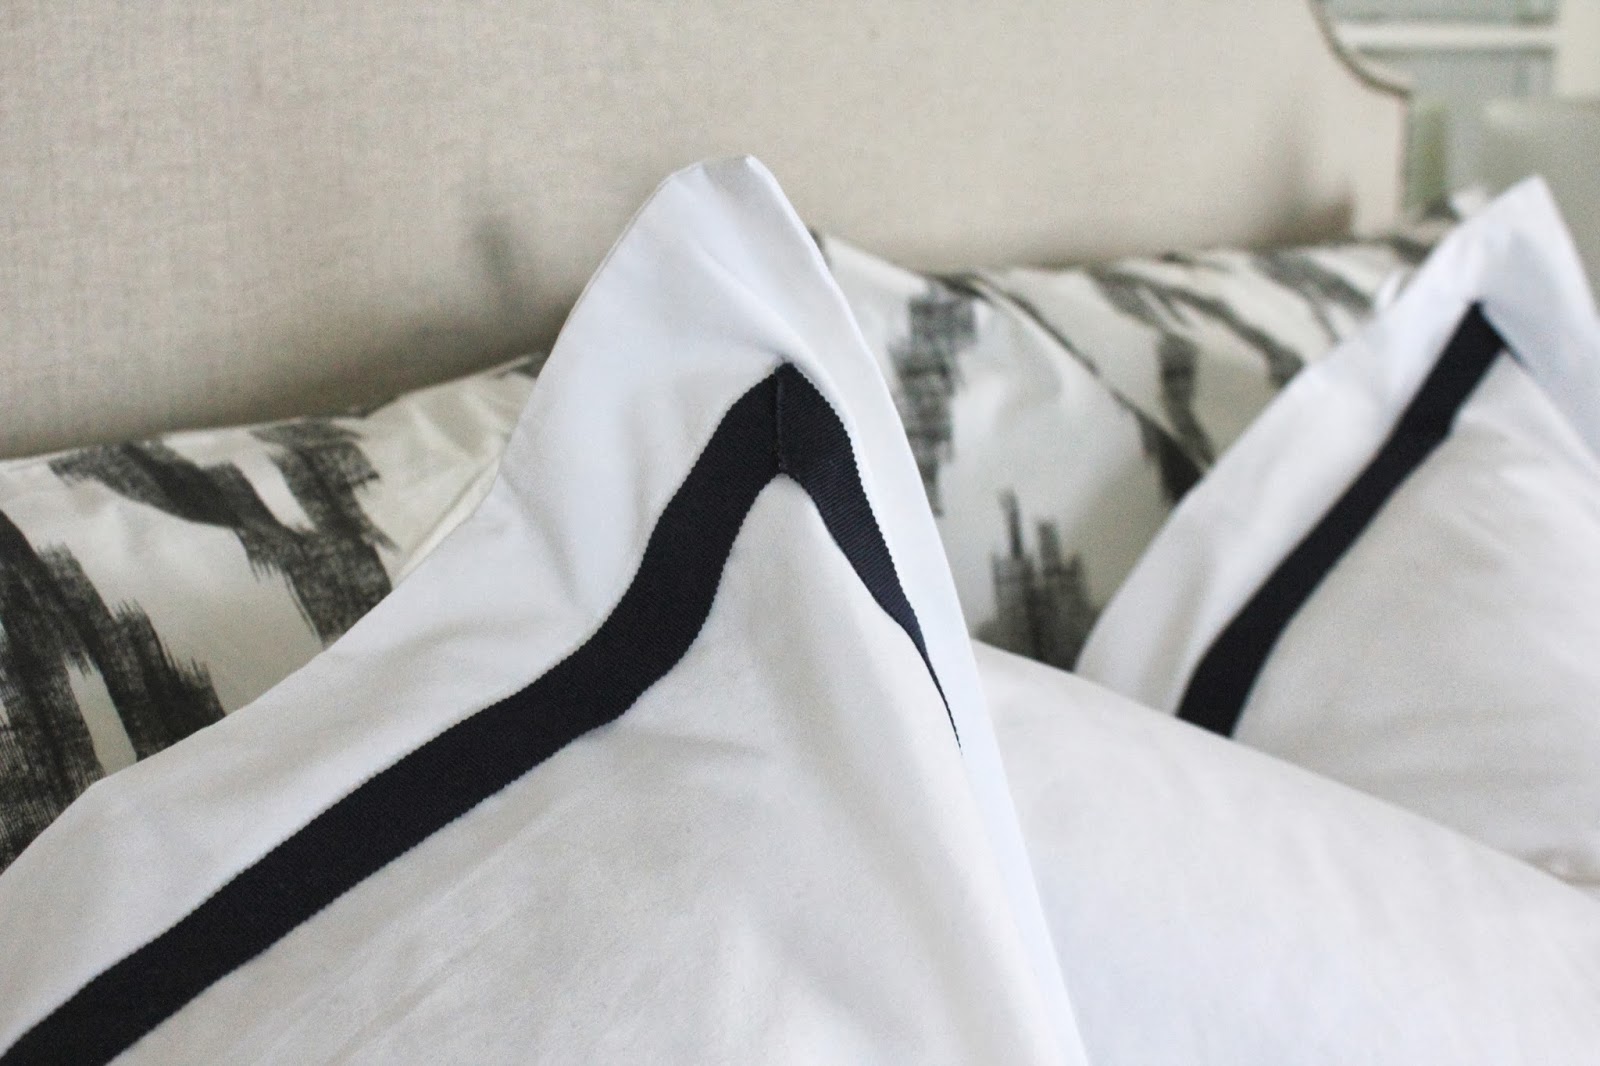
I’d seen projects online where people had used grosgrain ribbon to trim out curtains, so I figured the same could be done with pillow cases.
I started by ordering some fairly inexpensive plain white euro sham pillow cases off of Overstock. I ordered these ones in case you’re interested. They look nice, but aren’t the best quality to be honest. I don’t really care since we’re not sleeping on them, but I wouldn’t recommend them for anything other than a decorative euro sham.
Once I got the shams in the mail, I went to the fabric store and bought 10 yards of their 1″ cotton grosgrain ribbon. Our euro pillows are 26″, so I needed a minimum of 8 2/3 yards, and in case I messed up a bit, I wanted extra yardage.
A word of warning – do not go with a synthetic grosgrain ribbon. When you iron it, it crinkles up, so be sure you pay the extra few dollars for the 100% cotton (learned that the hard way folks).

Anyway, the project was really simple – once I had the ribbon and the pillow shams, I got out my stitch witchery (iron on adhesive tape) and went to work ironing the pieces of ribbon on.
If I were to go back in time and do this again, I’d also invest in a REALLY sharp straight edge, and something to measure a perfect 45 degree angle for the angled cuts for each corner, but live and learn. I found that my sewing scissors weren’t quite as sharp as I would have liked, so it was more difficult to get a perfectly clean cut on a 45 degree angle. A few of the corners aren’t perfect, but its not that noticeable.
Live and learn.
Anyway, I still need to go back with a paintbrush and a dab of glue to all the cut edges to seal them and ensure they don’t fray, but the project only took me about 45 minutes to iron everything down, and get it on the bed. It also cost me maybe $80 total for all three pillows and the ribbon – SO much less than any other option, where the pillows ran close to $50 each.
I’m really happy with how it all turned out (clearly), and our bedroom just feels so much more finished. Like I said – a small change, but it’s one more thing to check off the list!

Happy Monday!

Looks great! xo
LikeLike
Thanks chica!!
LikeLike
Wow, from the photos you'd never know that they were DIY. They look really expensive. Well done!
LikeLike
They really look very nice – I think the navy was a good choice. Use Fraycheck on the edges – you can get it at JoAnn's or grab it when you stop by next time.
LikeLike
Mama knows best. Thank you xoxo
LikeLike
That makes me SO HAPPY to hear 🙂 Thanks Wendy!
LikeLike
One of the wonderful things about staying in a nice hotel room is the quality of the linen and the bed making. Hotel visitors simply don't apply the finer points of bed making at home.
LikeLike
I have seen very hotel bedding but i thins this is really wonderful. i really appreciate your collection of hotel bedding. thanks for sharing such a nice post.
LikeLike
Thanks for stopping by!!
LikeLike