Unknown's avatar

About Simply Styled

Hey there! I'm Becky, a design obsessed California girl, who lives in San Francisco. I have an eye for anything pretty, I love a good DIY, and I'm passionate about finding inventive ways to recreate a space on a budget. I love fashion almost as much as I love food, and I believe a good glass of wine can cure almost anything.

Will You be my Bridesmaid?


I am not engaged, but I am shamelessly obsessed with weddings – I know it, my parents know it, and Kris knows it.  (To add on to my Valentine’s Day love note to him… I love him because he sees how crazy I am for everything bridal, and he a) isn’t scared off b) doesn’t judge me c) thinks it’s sweet and endearing)

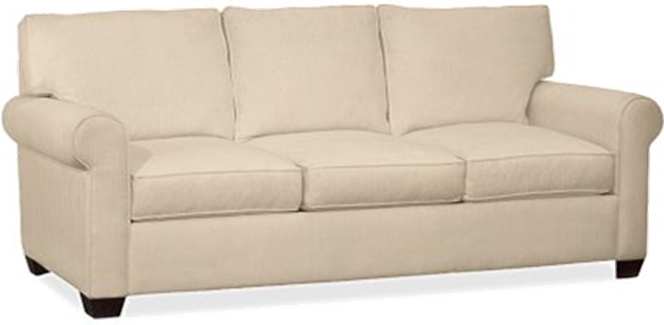
To that end, I saw the most adorable, creative way to ask your girlfriend’s to be a part of your wedding.  This “Will you be my Bridesmaid” box was originally featured on The Wedding Chicks whose awesome creativity inspires me daily.

I am TOTALLY going to do this when I am engaged, so I pray my best friends do not read this.  Here is the tutorial on how to create a super personal, super sweet, “will you be my bridesmaid” box:

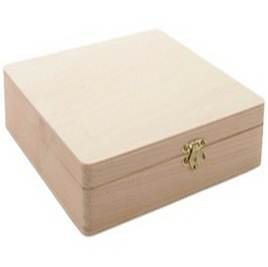
Step 1: Buy cigar boxes from JoAnn’s ($4.99 online)
These are extremely inexpensive, but there is some labor involved so if you are thinking of having more than 5 bridesmaids, this could start getting quite labor intensive…

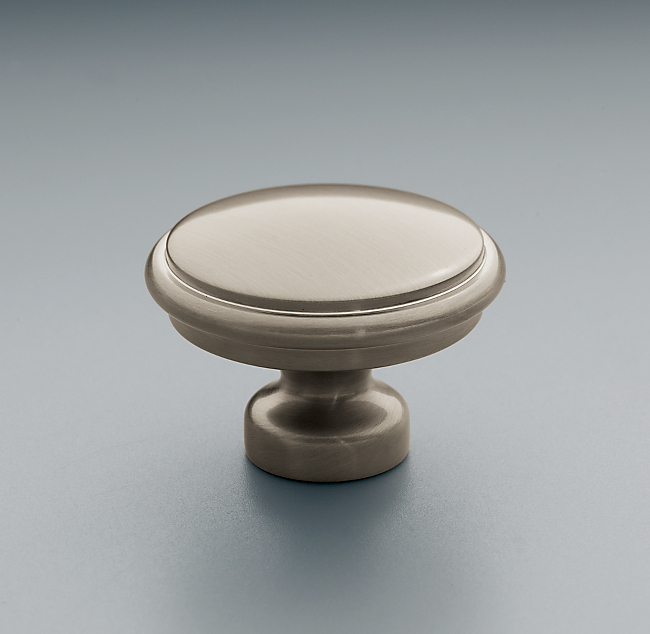
Step 2: Remove hardware, lightly sand, and paint box the colors of your choice.  
Here, they used Sweet Cream and Blue Bahama.  I love this color combo since I always think of the saying “Something Old, Something New, Something borrowed, Something Blue” but this would look equally lovely with earth tones (creme and taupe) or girly hues (creme and peach) or if that’s not your thing, go wild with bright colors.  Heck, its your wedding! I am not quite as artistically inclined, so for the cute scalloped detail inside, I will most definitely be using the stencil provided here.

Here, the “be my maid” is done with calligraphic adhesive letters – these are available at any craft store (Joann, Michael’s, etc.)  They encourage two coats of satin varnish over everything to protect and finish the look.  How essential is this? I’m not sure, but since you are putting in the work, you might as well put in the extra few minutes so it looks “finished.”

Step 3: Get the inside of the box looking as pretty as the outside
Here the box is lined with a vintage handkerchief, but you can use graphic fabric, lace… whatever you think is pretty.


Step 4: Get to work on the contents of the box
To lay out the details of the wedding, the bride-to-be created progressively longer postcard messages – one to outline the day, their role, the other girls and the dresses.  By making each note card longer than the last, the bride was able to cut and bundle the scalloped cards into a sweet stack.

You don’t have to copy her notes word for word, but this is a good guideline for what to include:

Our Day: 
Gabe and I are getting hitched! Our wedding will be small, about 50 guests, but I promise you, we’re still bringing the funk! (in a fun way).  We’ve rented out the vineyard’s three houses from June 27 – July 1 and reserved your space for our bridal party (plus your hubby or guest). You can stay as long as you want without worrying about a hotel
t
My Girls:
Let’s hope you all say yes or this could get awkward.

Becky: matron of honor – best friend extraordinaire, keeper of my most embarrassing stories, most likely to stop the ceremony to save a butterfly.
Dana: bridesmaid – amazeballs sister, logical ying to my emotional yang, most likely to call foul if I go bridezilla, ironically also most likely to cry a lot
Andrea: bridesmaid – kindergarten homie of two decades, witness to my most tragic hair years, most likely to bring me to tears by saying something ultra sweet and sentimental

t

Your Role: 
I hear weddings can become a lot of work for bridesmaids.  Please don’t worry about showers or bachelorette parties, gifts or anything like that.  Your presence on my wedding day is all I need, truly.
As my bridesmaid, your only job is to feel beautiful, hold some gorgeous flowers, wipe away my happy tears, understand how much your presence is appreciated, and know how much I love you.
Basically you’re to have a complete blast, and maybe challenge me to a cake eating contest.


t

Your Dresses:
More than anything, I want each of you to feel comfy and gorgeous! You are all beautiful in so many ways – what you wear should reflect it.
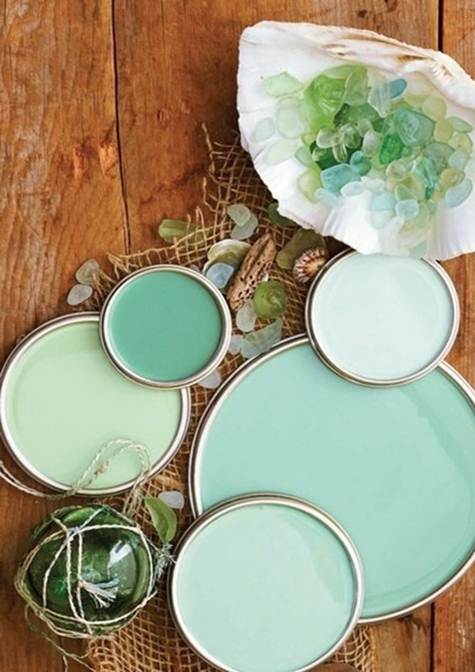
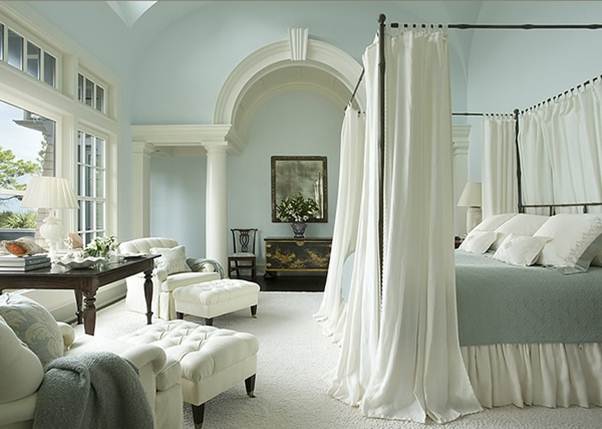
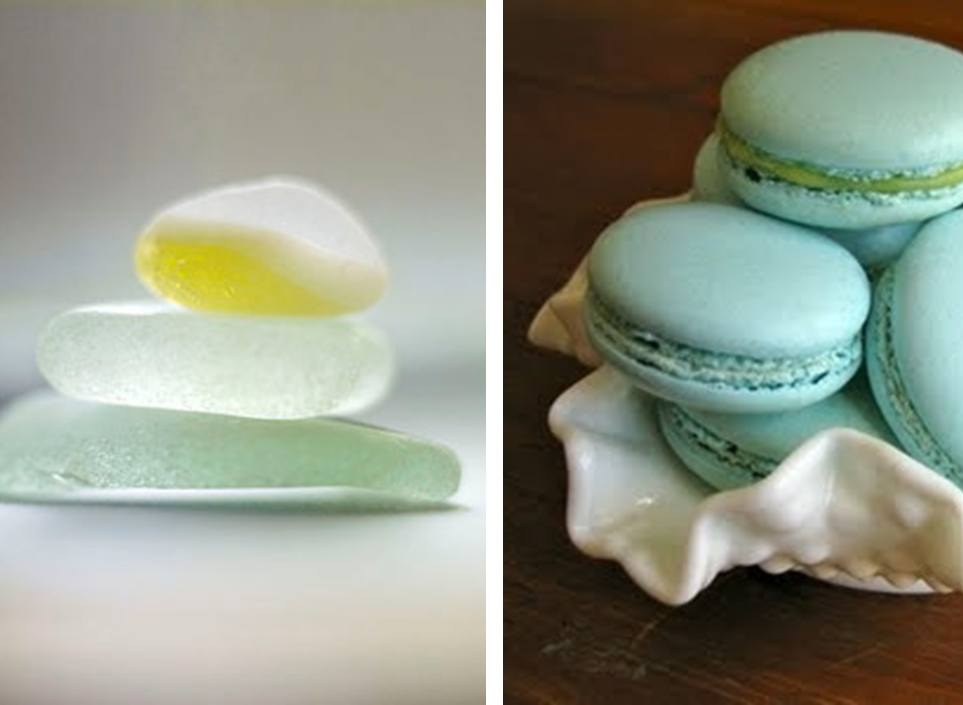
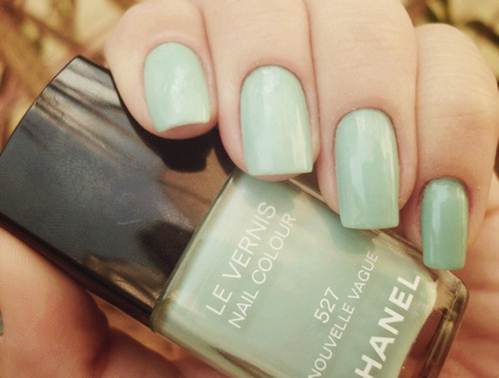
And who’s better suited to pick out your dress than you? Each of you will pick a dress that says “you” – I’m onboard for an eclectic mix of dresses if it means my best girls will feel fabulous.  Enclosed you’ll find a few paint chips to give you a feel for the colors I dig.  Dreamy aquas and blues.  Any shade within that color family will work for me.  I’ve included a few sample photos just to get your wheels spinning about styles but your options are pretty limitless – just a few guidelines to use while shopping:
   – Keep it short, around knee length, give or take a few inches
   – Go sleeveless – you have the right to bear arm
   – Try for vintage inspired look for feminine details like flirty lace, or a retro silhouette, anything that makes it sweet and breezy.
Also, we know that traveling to and being a part of weddings can add up, so Gabe and I would love to pick up the cost of your dress.  I’ve enclosed a gift card for $150 towards your dress and accessories – if you have any trouble using it, please let me know.
I’m still fence sitting on accessories and shoes, but will be sure to keep you informed!

Step 5: Get to work on the contents of the box

To complete the boxes, put photos for inspiration (inspiration for the dresses as well as the overall look and feel of the day), and paint chips as a guideline to the color scheme.  I hate to add this in, but I must – if you have a friend that is known to be overtly sexy, over-the-top, or has a “I’ll do what I want” attitude, I would take special care to emphasize the look you are going for if a ton of cleavage or mini dresses don’t fit in the vision you have for your wedding day.
So that’s it!  (that’s “it”… ha) – it is a lot of work, but what a special way to ask your bridesmaids to be a part of your big day. LOVE

Living Room Inspiration


While I have made a lot of progress on the apartment, the living room is pretty much at a standstill from my last post about the living room “transformation” (aka hanging curtains).  The living room has pretty much turned into my work-space, where I sand, spackle, buff, prime, and paint.  I’ve been logging some serious hours painting the bedroom furniture (armoire and nightstands) and since I’m putting in the time, I’ve decided to replace the hardware.

I don’t think I mentioned it before, but this furniture belonged to my grandmother, so obviously I adore it for sentimental reasons, but also just love the look.  The pieces have very classic lines and lovely details that you just can’t find anymore.  They are sturdy and gorgeous, however the original hardware was NOT gorgeous.  They looked identical to these:

That said, the handles left the drawers with two holes, and though I hunted high and low for different pulls, my grandmother had splurged for custom size handles… what did this mean for me? It was going to cost me some serious money to custom order 14 individual handles in varying lengths.

Solution?? Plug the holes… and get updated single knob pulls like this:
Lugarno Knob
Thus ensued my Tim the Toolman Taylor escapades in the living room.  That said, the project is nearing the finish line which means that the armoire, both nightstands, and all twelve drawers will no longer be hanging out in the living room.  Hooray!  I’ve got one more nightstand and the armoire to sand and paint, but it should be an quicker process than the drawers! (knock on wood)

So once the bedroom furniture project is finished… then what? Great question… once it’s finished and back in the bedroom, I get to have fun finishing the living room.  Much of the big pieces are in place, but its the little touches, that need some work.  One thing that has really started to bug me is the rug.  We have a lovely rug in there right now, but its just too small for the scale of the room.  New rug is a must, and I am loving the more contemporary lattice patterns (shocker, right?!)  I spent some time putting together an inspiration board for the living room, and while there are a few things that can (and probably will) change, I think this is pretty close to what the finished product will be:

My goal here was to keep the focus on how light and airy the room is.  I’m sticking to a palate of light colors – tans, grays,  yellows, and creme.  The best part? Many of the things in my inspiration board, we already have!

The coffee and side tables came as a set, and are made of dark black brown wood – very similar to the table in the photograph.  Nothing earth shattering going on there, but the set is sturdy, functional, and there is enough modernity to appease my better half.

The sofa – right now, my love seat is a two cushion version of the below, and we have been on the hunt for a second larger sofa to replace Kris’ love seat from his bachelor days.  When I first moved to the city, my mom gifted me lamps identical to the brushed aluminium below – classic and simple, and I still love them 5 years later.

As I mentioned before, I got four panels of silk curtains from Bed Bath & Beyond (a total steal), and we ordered this exact painting from Ballard Designs.  I’m actually a bit embarrassed to admit we ordered art online without seeing it in person, but it really is gorgeous.  For the size and quality, this “painting” looks amazing – even better in person than online.  Trust me!
x

My desk is one of my greatest scores – I needed a vanity at my old apartment (when it was just me, and I could be as girly as I wanted), and found this amazing Crate and Barrel desk on Craigslist.  Yup.  Fifty bucks later, it was mine!  I’m not going to lie and say that Craigslist is chalk full of amazing finds – you have to hunt in order to find the hidden nuggets of gold, but they are there.  “Why would someone sell a perfectly good brand new desk from Crate and Barrel?” one might wonder.  In this case, the girl I bought it from was moving cross country, had just bought the desk a few months prior, and didn’t want to pay to ship all her furniture to the east coast… her loss = my gain!

As for those candles – aren’t they cool?  I had seen them at Cost Plus over the holidays in their “seasonal” section, but in my opinion they are perfect year round.  They are actually wrapped in birch bark, so its not candles made to look like trees – they’re actually candles wrapped by tree bark! Ingenious!  I am looking for a small wood crate to hold them in – possibly nesting in moss.  I have them on a copper plate with sand, and its just not right.  At all.
x

So what’s left?  The good stuff – fun patterned throw pillows – Etsy is a gold mine here, and my real problem is narrowing it down to which pillows to choose?!  Should they all be different, should I do at least two of each for continuity or is it enough to have them in the same color family?  Should I have the same sets on each couch or mix them up (I am going to mix them surely).  
The owl photographs.  I love them, my best friend hates them.  Should that deter me?  It probably won’t.  
The sunburst mirrors – I LOVE, but I do not LOVE the price tag I have seen on most of them in the store (upwards of $300!)  I want a set of 3 so this could prove challenging… to say the least.
So that’s it – after visually putting it together, I am more and more excited about this room.  I have renewed energy to finish the bedroom furniture, so we can live in a home… not Santa’s Workshop.
Happy Inspiration!
xo

Happy Valentine’s Day


Picture Courtesy of Style Me Pretty
Happy Valentine’s Day to  the smartest, kindest, most wonderful man I know.

I love that you sing over every song on the radio… with your own lyrics.  I love that you eat whatever I cook for dinner… no matter what.  I love that your butt looks cute in your jeans.  I love your boyish smile, and the laugh lines around your eyes.  I love that your feet find mine in the middle of the night.  I love that you love my family.  I love that you know how to make me laugh, comfort me, and love me.

You are the love of my life, and I am so lucky I met you that fateful night 5 years ago… and again two weeks after that.

xo

Happy Weekend!

Balloons just make me happy
It’s Friday afternoon, and this weekend is going to be awesome – I can just feel it!  This afternoon, we are having our very belated office x-mas party.  We are going to be doing a walking tour of Northbeach, complete with restaurant tours and tastings, bar “tastings” and I’m sure a canolli or two snuck in there somewhere.  More updates on this next week!

Tomorrow, I am taking my best friend Taryn out for a much anticipated birthday celebration.  I haven’t seen her since last summer since we live several hours apart, and I cannot wait to see her lovely face.

Also on the itinerary this weekend, I will be wrapping up the bedroom furniture.  I am in the home stretch now since the hard part is done.  I’ve completed several rounds of spackling and sanding the drawers, so the fronts are perfectly smooth.  I just need to wipe them down, and prep for paint!

After a very long week, there is a collective sigh of relief in the office! Have a happy weekend!

Did I wake up in Paris?

Unfortunately, the answer to that question, is no, but isn’t that french tutor across the street from my apartment just gorgeous?

It’s feeling a lot like spring in San Francisco, and I’ve been keeping track of the seasonal changes based on the gorgeous cherry blossom tree across the street from our apartment.  Look at all those blooms – in one week, the tree went from a few pink tinges to a full blown cloud of cotton candy.  Anyways, every day when I leave for work, I pass by this house, and for a split second, I get to pretend that I’m trotting down the street in Paris… Bonjoir!

xoxo

Sea Glass – Color Inspiration

Lately, I have been really inspired by the color of sea glass.  It’s soothing, it’s gender neutral, and it has a really chic look to it.  It also pairs really well with a variety of colors – off whites are a natural first thought, but grey, yellow, coral, green, and brown also look really wonderful.

I am switching gears for our bedroom transformation, and TRYING to be patient as I find alternatives to the Restoration Bedding I really want… maybe this is the way to go.  Our living room has a lot of these calm blues in it, our dining room is this fabulous shade called Opal Essence – the palest of pale aqua’s – would it be too much to carry this into the bedroom as well?!

Valentine’s Day: Sweet Treats

If you aren’t looking forward to Valentine’s day, here are some sweet treats that will change your mind.  They are pretty, pink, and oh-so-adorable.  I so wish I had the time to whip up a few of these confections!
pink marshmallow bouquet, cute gift
An assorted marshmallow pop bouquet!  What could be cuter (and easier)?!  
From MommyGaga: 
Cake pops are all the rage right now. But they take so long to make, and even after many attempts at the art, my pops end up being a bit lumpy (even though delicious)! If you would like the cute cake pop look for a baby shower, birthday party or a Valentine’s Day treat but you don’t want the hassle, make Marshmallow Pops!

  1. First cut a small slit in the top of the marshmallows to allow you to insert your straw. If you skip this step you just might mash your marshmallows!
  2.  Insert the straws or Popsicle sticks and put them in the freezer for about 5-10 minutes. They do not take long to freeze and by doing this, the marshmallow is adhered more securely to the straw.
  3.  Meanwhile, melt the white chocolate in the microwave on medium heat and stir every 30 seconds. White chocolate seems to burn a lot easier than regular chocolate so watch it closely! Add your food coloring if desired.
  4.  Next up is the fun part: decorating! Dip the frozen marshmallows in the white chocolate. You will want to tap the excess white chocolate off. The frozen marshmallow will make the chocolate harden quickly so don’t wait too long before dipping them into the sprinkles

Vodka lemonade sparklers
Adult Lemonade – not for the kiddos!  To make: 2 oz. strawberry infused vodka | 2 oz. simple syrup | 2 oz. fresh lemon juice | Top with sparkling wine | Garnish with strawberries and mint

Valentines cookies...HAHA!!
Don’t even try to make these – they will never be as cute.   Just pay $30 for the professionals to “handle” these handlebar mustache cookies – LOVE

cheesecake
Cheesecake candy hearts

Ingredients:
1 cup graham cracker crumbs (15 squares)
pinch of cinnamon
1/2 stick butter (melted)
16 ounces (2 blocks) cream cheese, softened
1 cup sugar
3 large eggs
2 cups sour cream
1 teaspoon vanilla extract
food coloring – pink, purple, blue, green, yellow, and red

Supplies Needed:
stand mixer or a mixing bowl and hand held mixer
rubber spatula
Wilton Heart Shaped Silicone Molds
fine tip paint brush (new or food only brush)
roasting pan big enough to fit your heart shaped molds

Instructions:
Preheat oven to 325 degrees. You will need a water bath to bake your cheesecakes, so place your roasting pan in the oven filled with enough water to go half way up the sides of your heart molds -allow the water to heat along with the oven. Combine graham cracker crumbs, cinnamon, and melted butter, stirring until it looks like sand. Spoon out about a tablespoon of crumb mixture into each heart cavity. Press the crumbs down making an even crust. Refrigerate until ready to fill with cheesecake mixture. Note: If you are only making 12 cheesecakes, you will have some of this leftover.


In the bowl beat the cream cheese on medium high until smooth, scraping down the sides of the bowl as needed. Add sugar and beat for one minute. Add eggs and beat until creamy, 1 to 2 minutes, scraping the sides of the bowl once. Add the sour cream and vanilla and mix just to combine.

Equally divide the filling among 6 bowls. Add food coloring to create the colors you’d like. It took between five and eight drops of color to achieve the colors of my cakes. For orange, mix yellow and red together. If you prefer, you can add fruit purees instead.

Pour colored cheesecake filling into the heart shaped cavities in your Wilton silicone mold. 


If you are making 12 larger hearts, then fill the cavities to the top, if you are making 18, then only fill them about 3/4 full. If making 12, you will have a few tablespoonfuls of each color left over.  Bake for 15-28 minutes, depending on the size of your molds (45 minutes for a whole cheesecake.) When finished baking, the center of each cake should still jiggle but look set, not soupy. If you fill them 3/4 full, then go with 20-25 minutes and about 15 minutes for the mini cakes.

The easiest way to get these cheesecakes out of the molds is to freeze them for a few hours. They pop right out. I only broke off a tiny piece of crust from one of my hearts after allowing them to freeze for two hours.  Squeeze a few drops of red food coloring into a small bowl. Use a fine tip paintbrush to paint conversation heart sayings onto each cheesecake heart.  

Pink Ombre Swirl Cake.
Pink Ombre Swirl Cake – courtesy of Glorious Treats.  I don’t have the talent or the patience for this one – 
gorgeous though it is.  My advice, put in a custom order at a bakery!
.
Paradise Sugar Cookies with Magnolia Bakery Buttercream Frosting
Magnolia Bakery’s Famous Sugar Cookies.  Order them online or make them yourself:
Sugar Cookies:

1 cup granulated sugar

1 cup powdered sugar
2 cups vegetable shortening
3/4 teaspoon vanilla
1 large egg, beaten
4 1/3 cups cake flour
3/4 teaspoon baking soda
3/4 teaspoon baking powder
1/4 teaspoon salt
3 tsp. orange zest (not flavoring) optional

  1. Preheat oven to 375°.
  2. In a medium bowl, cream together the sugars and shortening using an electric mixer.
  3. Mix on slow speed 30 seconds, then scrape down the bowl with a spatula.
  4. Increase speed to medium and mix for 3 minutes.
  5. Slowly add vanilla and beaten egg while mixing.
  6. In a separate bowl, combine the flour, baking soda, baking powder and salt. Gradually add the flour mixture to the mixing bowl, mixing on slow speed until just blended. Do not overmix.
  7. Scoop with an ice-cream scoop if decorating with sugar only
  8. Place directly on cookie sheet.
  9. Bake at 375° for 9-10 minutes. Cookies are done when small cracks appear and are pale golden. Ideally, the edges do not brown.
Buttercream Frosting:
1 cup (2 sticks) unsalted butter, softened
6 to 8 cups confectioners’ sugar
1/2 cup milk
2 teaspoons vanilla extract

Place the butter in a large mixing bowl. Add 4 cups of the sugar and then the milk and vanilla. On the medium speed of an electric mixer, beat until smooth and creamy, about 3 to 5 minutes. Gradually add the remaining sugar, 1 cup at a time, beating well after each addition (about 2 minutes), until the icing is thick enough to be of good spreading consistency. You may not need to add all of the sugar. If desired, add a few drops of food coloring and mix thoroughly. (Use and store the icing at room temperature because icing will set if chilled.) Icing can be stored in an airtight container for up to 3 days.

Heaven is… a HUGE Walk in Closet

I am officially in la la land today, daydreaming the day away – our bedroom is currently in shambles, my clothes residing in cardboard boxes while I refinish my armoire.  The closet is deep, so holds two full racks of clothes, but because one rack is directly behind the other, I can really only see half my wardrobe!  First world problems? Yes.  But, I’m allowed to be a little self indulgent as a girl who is literally living out of a box.  I would give my right arm for one of these dreamy dressing rooms where all my clothes were color categorized, all my bags on display, and all my shoes out in the open to admire.  As a visual person, I think this would be not only a total luxury, but totally useful!  I’d actually end up wearing more of my clothes that are currently hanging forgotten in the back of my closet on my “tier two” rack!  Maybe Kris is onto something with his hankerings to move to the suburbs…

Enjoy the dreamy gallery of walk-ins below!

Huntington Beach contemporary closet
Traditional Living traditional closet
The Modern Glam Project modern closet
Hacienda Chic Residence eclectic closet
The Modern Glam Project modern closet
Shabby Chic Your Heart Out traditional closet
closets  closet

Shoe Closet modern closet
modern closet design
Organizational Inspiration: Neat & Beautiful Closets | Apartment Therapy DC eclectic closet
eclectic closet design by apartmenttherapy.com

Valentine’s Day Shoes

I sort of LOVE the idea of outfitting your feet for the holiday, and once again Polyvore saves the day!  The great thing about most of these shoes is that they are not Valentine’s Day specific (well with the exception of the ever fabulous Vivienne Westwood Heart pumps which I Love, love LOVE!! Imagine these shoes taking you year round – red’s and pinks can be hot in the summer and do double duty as holiday festive!

Enjoy!

Valentines Day Shoes

Christian Louboutin nude pumps, $625
Melissa shoes, £120
WALTER STEIGER high heels, $1,075
Steve Madden high heels, $110
Carvela Kurt Geiger high heels, £120
FS NY ballet flat, $198
Paul Joe ballet flat, £145
Zara platform heels, $90
Dorothy Perkins boat shoes, $35
Flat, $130