Birthday Outfit: Fashion Inspiration

Oh gosh, I’ve been trying not to think about it, but my birthday is just around the corner!  While I am lining up dates, and making plans to celebrate, I need to start thinking about what to wear.  While I’m not going to go out and buy a new wardrobe, I put together a few fun fashion inspirations to get my creative juices flowing…


DANCING THE NIGHT AWAY:
Coral and aqua… yup, I went there… again.  I just can’t get over this combo!!  It’s fun, and bright… puts you in the mood to salsa with a stranger, or party it up at a gay club (gay men seriously love me… it’s true).

Birthday Dress I

House of dereon dress, £90
BCBG Max Azria envelope clutch bag, $68
Kate Spade hardware jewelry, $48
Tear drop earrings, $38
Aqua jewelry, $35
Liz Martins Elevation Lashes, $15
Amazon.com: Revlon Super Lustrous Lipstick Creme, Just Enough Buff…, $9.99
Essie Shine Of The Times Nail Polish 15ml Health & Beauty | HQHair.com, £9.95

DINNER WITH MY HONEY BEAR:
I’m thinking candlelit and romantic – somewhere old San Francisco with a live Jazz ensemble, a manhattan in hand, and my love.

Birthday Dinner

Button up dress, $200
Zara heel pumps, $80
Zara clutch hand bag, $36
Carolee glass earrings, $28
A V Max gold bangle jewelry, $35
Supercalifragilipstick! In Adventurous Red, $24
OPI Nail Lacquer, Big Apple Red, 0.5 Ounce, $5.94

DINNER WITH CO-WORKERS:
Something fun but still work appropriate – slacks and a blouse with ruffles to draw the eye away from my full tummy 🙂

Dinner with Co-Workers

Karen Kane ruffle sleeveless top, $95
Tailored pants
Shoes, 150 AUD
Biba clutch hand bag, £116
LORD TAYLOR yellow gold jewelry, $350
Wet Seal plastic jewelry, $8.50
Animal print belt, £20

Bedroom Furniture Transformation

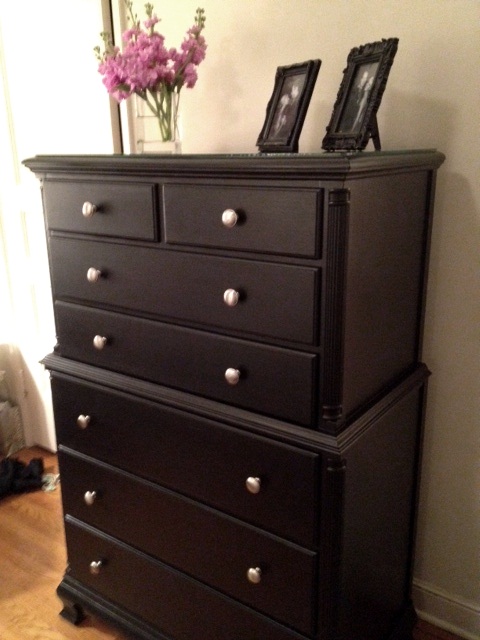
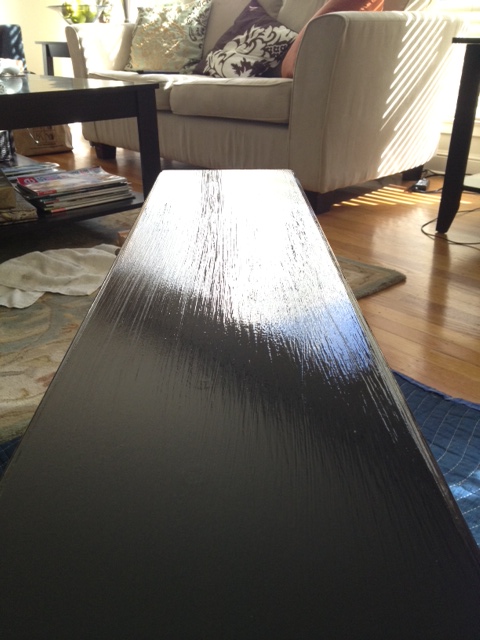
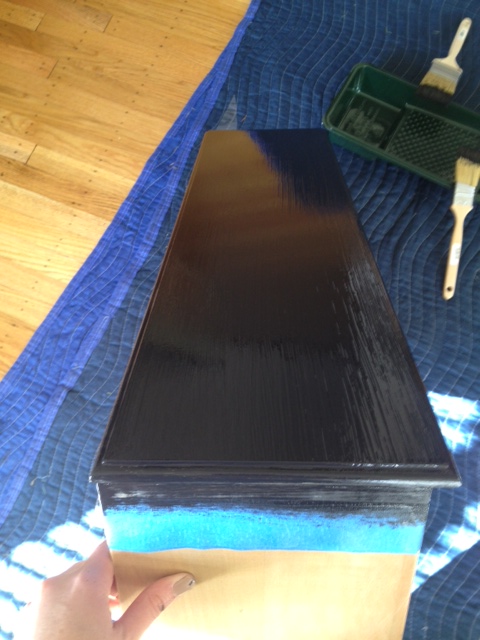
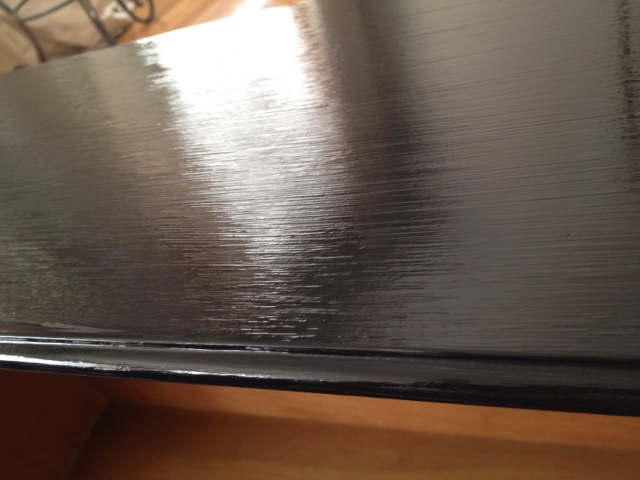
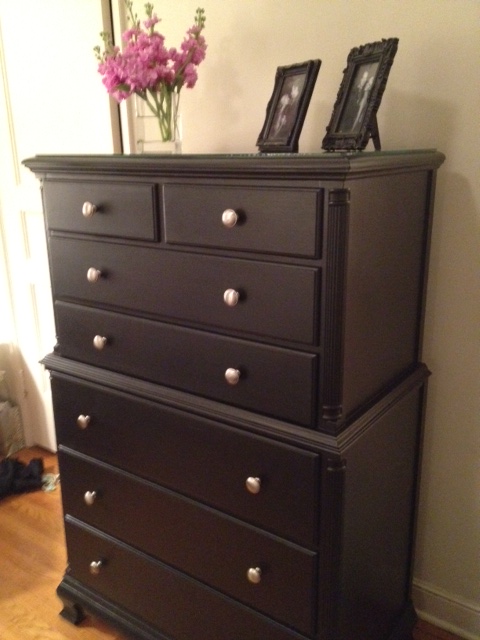
It’s done!  Wooo Hoooo!!!!  After months (literally months) of living in a fine layer of dust from continual sanding, the bedroom furniture is finished, and we no longer have 10 drawers, two nightstands, and an armoire in our living room!

You have no idea what this means, and the intense feeling of satisfaction I have at having completed this never ending project!  The pictures don’t even portray the 180 degree change that has occurred, but take look at the transformation!!
BEFORE:
AFTER:
Let’s start at the beginning, and I’ll take you through the process:
November 2011: Empty out all clothing into cardboard box from which I will live out of for the next four months.  Four. Long. Months.
Ok, moving past that…
Remove the drawers and patch the holes with a wood putty.  Be sure you are working with a clean, dry, dust free surface.  Also, be sure to invest in a putty knife – it will make the putty fill the hole tightly, and prevent the need for 3 or 4 rounds of patching.  Because the holes were pretty deep, I had to get my hands dirty, and really pack the putty in the hole (roughly 1cm deep).  The patching took some serious time as each drawer had two holes per pull.  Putty should take around 2 hours to dry, but per my dad’s suggestion, 48 hours means it is fully cured (putty in the middle of the hole will be dry as well – not just the putty on the outside of the drawer).  The drawer below has been patched once.  Because the holes were deep, they needed more than one round of putty, so below, we were looking for coverage, not perfection.
Once the first round with the wood putty dries, sand down until smooth.  Sand with a fairly heavy grade sandpaper as the goal here is to strip off the old paint, and prep the holes for another layer of putty.  You can see in the below photo, that a good amount of paint was removed around the holes.  Once the drawer is smooth, and the putty has been sanded flush with the drawer, apply a second layer of putty.  Here I used a finer grade filler than wood putty to be sure there were no visible dimples in the wood from the filled holes.  Use a putty knife to apply again, but be sure to pack the putty tight, and feather out at the edge.  
Once the second layer of putty is dry, use a fine grit sand paper or a sanding block to lightly sand down.  Be patient here, and use uniform pressure while sanding the full length of the drawer face.  By doing so, you will avoid imperfections caused by uneven sanding.  This part will be messy – the dust coming off gets everywhere so be sure to prep the area with a drop cloth, and wear clothes you don’t mind getting dirty.  By the end of the day, you will look as though you got wild with baby powder.  Also, a mask isn’t a bad idea, to avoid inhaling the dust… hindsight is 20/20.
Keep a close eye on the drawers as the putty wears down.  You will see a slight circle form around the patched hole and this indicates that its flush, or pretty darn close (the first picture below gives a good example – look at the hole on the right; it’s almost like a halo around the patch).  
Run your fingers over the holes to gauge when the patch is flush with the drawer.  I found it helpful to close my eyes when running my fingers over the holes – by eliminating sight, I was better able to feel any imperfections.  There were several instances (especially in the beginning) where I over-sanded and had to go re-patch and re-sand the hole, but one do-over early is better than going back after its been painted and you see the dimple of the original hole.  Trust me.

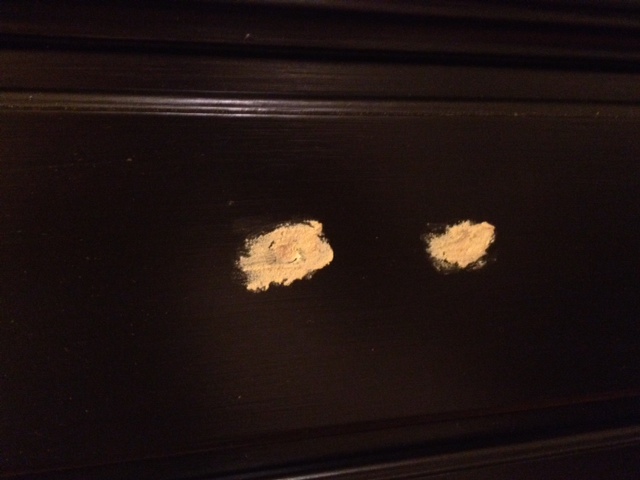
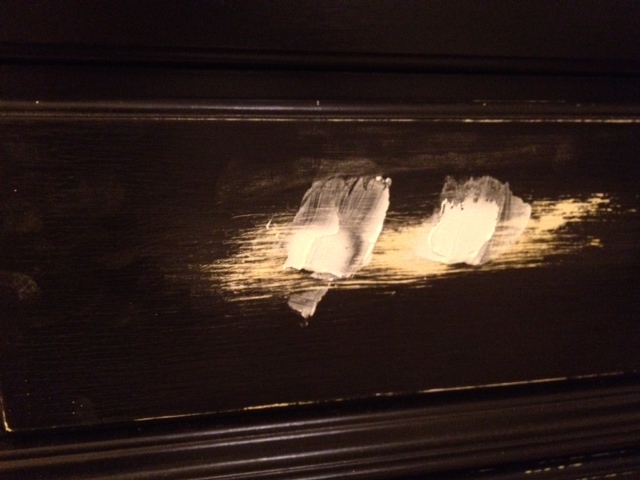
Once everything is sanded, make sure you clean up well before moving on to paint.  Any dust when painting could ruin the coat, so shake out and wash your drop cloths, sweep, mop, and dust EVERYTHING.  Once everything is cleaned up, prep to paint.

Invest in some tack cloth (a super sticky cheese cloth – find it at Home Depot) to wipe down each piece before painting.  It will essentially grab every last particle of dust for a clean start.

For furniture that gets heavier usage – nightstands, dressers, kitchen tables, etc – use oil based paint.  It’s more durable than water based paint, and though its a pain to clean up, you will save yourself from having to re-sand and re-paint chipped surfaces in a few months.

With the oil based paint, invest in a natural bristle brush – I used a 1.5″ with angled tip on the drawers and 2.5″ flat tip for the dresser and nightstands.  I chose an angled tip because of all the beveled surfaces – the angle makes it easier to cut in.  For large pieces with flat edges, a flat brush would be just fine.  Do not get a brush with synthetic bristles – these brushes will lose their shape in oil based paints and primers.  Also, do not try to save money here – splurge on a good brush that won’t shed bristles into your pieces while painting.
Ok… moving on.  Tape off the edges to ensure a clean line – messy edges take away from having the piece look professional.  Look at the bottom of these drawers – you can see the over-spray from their original paint job… a lovely shade of guacamole.  Ooh la la.  🙂
In the below close up photo, also note that the full drawer front has been sanded – to the touch it needs to be smooth otherwise you’ll be going back to redo everything.
*A quick note on sanding the paint – unless there is severe damage and it all needs to come off, you will see how much to sand based on how much paint flakes off, and how rough it feels between the paint and what lies underneath…
Put on your paint clothes and PIN LONG HAIR BACK.  Another tough lesson for this blonde – while leaned over, I dipped my ponytail into the paint… thus painting got put on hold while I made an emergency trip to the salon (another story for another day).
Because these drawers had already been painted black, I skipped the priming step.  Some might feel this is wrong, but my dad assured me they would be fine, and right he was.  If you are painting over a very light color with dark paint, or a bright color, prime with oil based primer.  If not, this step may not be necessary.
I started on the flat surfaces with the larger brush and finished up on the beveled edges with the smaller angled brush.

Do not skimp on the paint.  I did two coats on most drawers – a few needed three coats for extra coverage; especially on the drawers that got sanded down to the original green paint.  
In addition to painting the drawers, I was working on the nightstands and armoire – you can see in a few of these pics how many layers of paint I made it through (black, and creme, and green… oh my!)

On to the home stretch.  Unfortunately I do not have any pictures of the final steps, but it’s pretty simple.
Step I: Let paint dry 🙂
While the paint dries, prep for the finishing touches.  I bought pulls (one per small drawer, and two per large drawer).  You can splurge here, but I actually found a steal at Target – 14 pulls for ~$30.  That would be ~$2 per pull – a vast difference from Restoration Hardware’s $7/pull, and I swear to you, they are identical!! 
I also do not want to put myself through this process again while we live in a 1BR apartment in San Francisco, so I ordered custom cut glass to protect the tops of the nightstands and dresser.  Go as thin as you can with the glass, but be sure its not going to be brittle.  We got 3/16″ thick sheets of glass, and be sure you have the glass manufacturer round the edges – the last thing you want is to cut yourself on the edges!
Once we picked up the glass and had the pulls in hand, we got out the measuring tape, and grabbed some paper, because it was time to drill some holes.  Double and triple check your math and measurements, because once the hole is drilled, there is no going back – with stacked drawers, one slight error will mean the pulls won’t line up!  I really wish I had snapped a few shots of this, but we used painters tape around where we thought the holes might be.  With a measuring tape, we were able to mark on the painters tape where the holes would be, and drilled right through the tape.  Having tape there also helped prevent the wood from splintering or splitting so it was perfect!  With the holes drilled, we screwed in the pulls, polished the glass and carefully put it in place!
So that’s it!  Four months of sacrificed weekends, furniture in the living room, and ravaged manicures… and it was SO WORTH IT!

Happy Monday!

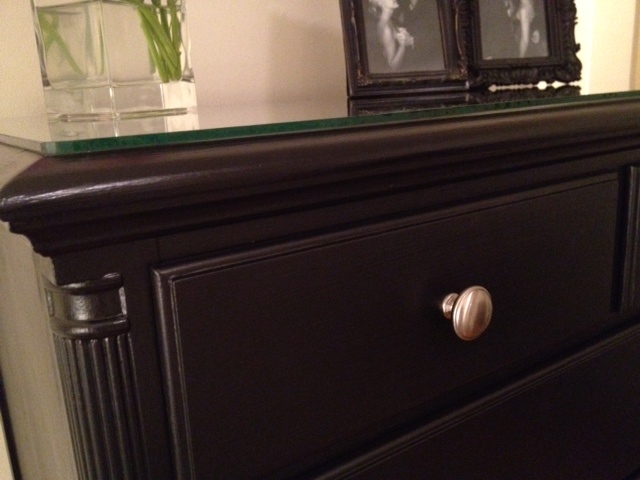
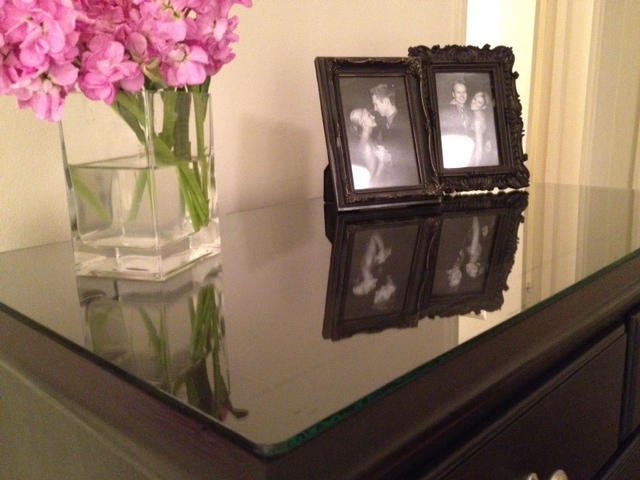
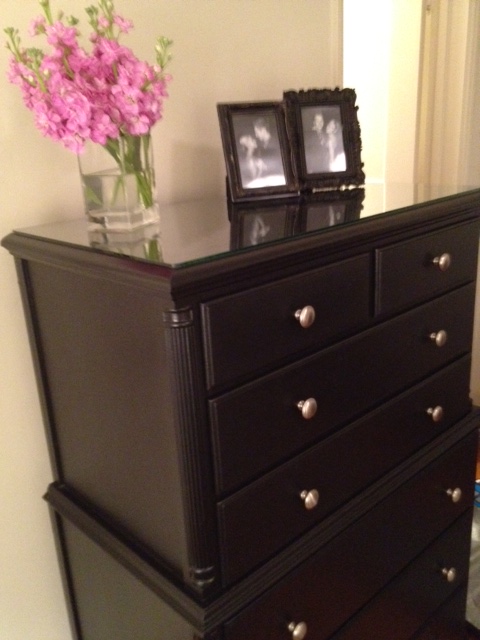
What a glorious long weekend!  The weather was warm and sunny in the mid-70’s.  I flounced about in a sundress, saw lovely friends, ate delicious food, hung out with my parents, went to the beach, and FINALLY finished a project that was a long time in the making!  I cannot even explain the satisfaction… more on that later!

Happy Monday!

Heaven is… a serene poolside (with a margarita)

pool, lounge chairs & cocktails

We got some serious rain today and last night, and I am in need of some warm weather!  Kris and I are throwing around the idea of a vacation this fall, but I don’t know if I can wait that long!!  I need a stack of magazines, some hot sunny days, and a teeny bikini stat!
I’ve been looking on one of my newest obsessions, Houzz.com, (I call it dream home porn), and am so entranced by these lovely backyard pools.  Summer isn’t too far off, and as SF isn’t known for it’s fabulous summer weather, I am getting rather jealous looking at these heavenly poolside escapes.
I’m beginning to think that these might really be what heaven looks like…

Ladera traditional pool

A COuntry Place traditional pool

Rough Hollow Pool Exterior mediterranean pool

Crisp Architects traditional pool

5,000+ s.f. Residence in Coral Gables, FL mediterranean pool

shwa traditional pool

Pool House mediterranean pool

Pool traditional pool

Little Birds

I have been seeing little birds on everything, and I am loving it!

From little lovebird necklaces, to birds on pillows, wallpaper, art, and clothing – I can’t escape these little guys, and I don’t want to!  I want to find some little birds to bring into my life now too!


This print from booooooom.com made me laugh out loud

.
This mini bird from shoptalkbuzz is made of repurposed old maps!

Owl photograph - Intelligent Design - Fine art bird photograph - Nature photography - Bird in pale winter ivory white
Still so in love with this crazy owl off Etsy

Cool graphic throw pillow from Etsy
vintage bird pillow
Etsy scores again – this would look fabulous on our bed!

birds on a wire ... just bought these!
Etsy Newspaper Prints – hang these in a series for a dramatic effect

Bird necklace, $24
Etsy wins again with this adorable (and affordable) charm necklace

bird necklace
Etsy birthstone charm necklace

love bird
I love this design for notecards and invitations via ohthelovelythings
Bird love!
Cool brushed bronze mirror
http://www.shopterrain.com/wall-decor/antiqued-bird-mirror
bird lamp

Be Brave with Prints

Wild but Classy
Photo courtesy of thelennoxx.com
In the past, I have definitely taken some decorating risks.

Proof? Growing up I was very into purple… my room reflected that.  Purple curtains, bedding, sheets.  My mom and I went to town at Laura Ashley, and not only did I go purple, I mixed prints.  Purple pansy comforter, with purple gingham sheets, with a light lavender crocheted throw.  I loved that bedding, and lived with it until I was in college.  Yeahhhh…

Flash forward several more years, after moving to San Francisco after graduation from UCSB, my roommate and I decided it would be a grand idea to paint our living room orange.  After choosing a color, we decided a faux-finish would be fun.  And so we faux-finished the living room “burnt pumpkin” – OH YES WE DID!  It was glorious… my friend still lives there with her boyfriend, and our “living room” is now their dining room, and it’s still orange.  Turns out, Home Depot brand paint does not fade quickly.

This brings me to present day – I’ve been making some “safer” choices (aka thinking my choices through a bit more), but my biggest fear is that our home will be boring.  I’ve seen so many overly tasteful homes where there is no flair… just beige everywhere… woof!  This is why I’ve decided to practice being brave with prints. A room does not have to be faux-finished a vibrant shade of orange to make a statement.  you can easily make a statement with a muted color palette, but you have to make a conscious effort to use patterns.

While an Ikat patterned chair does not seem especially practical… it is!  And why not?!  Take out the chevron love seat, and substitute in a gorgeous creme colored velvet sofa.  It still works!  As long as you love the pattern long enough to live with it for a few years, I say seize the day!  Go for it!

So here we go – I’ve exercised my mind, and put together an inspiration board based on patterns – lots of them.  I’ve chosen a muted palate of dove grey, taupe, yellow and gold (sounds strange, but I think it works).  Mixing in earthy touches balances the patterns, and somehow comes together for a eclectic yet classic look (I’m pretty sure that “classic eclectic” was not a category, but it is now).

Take a look:

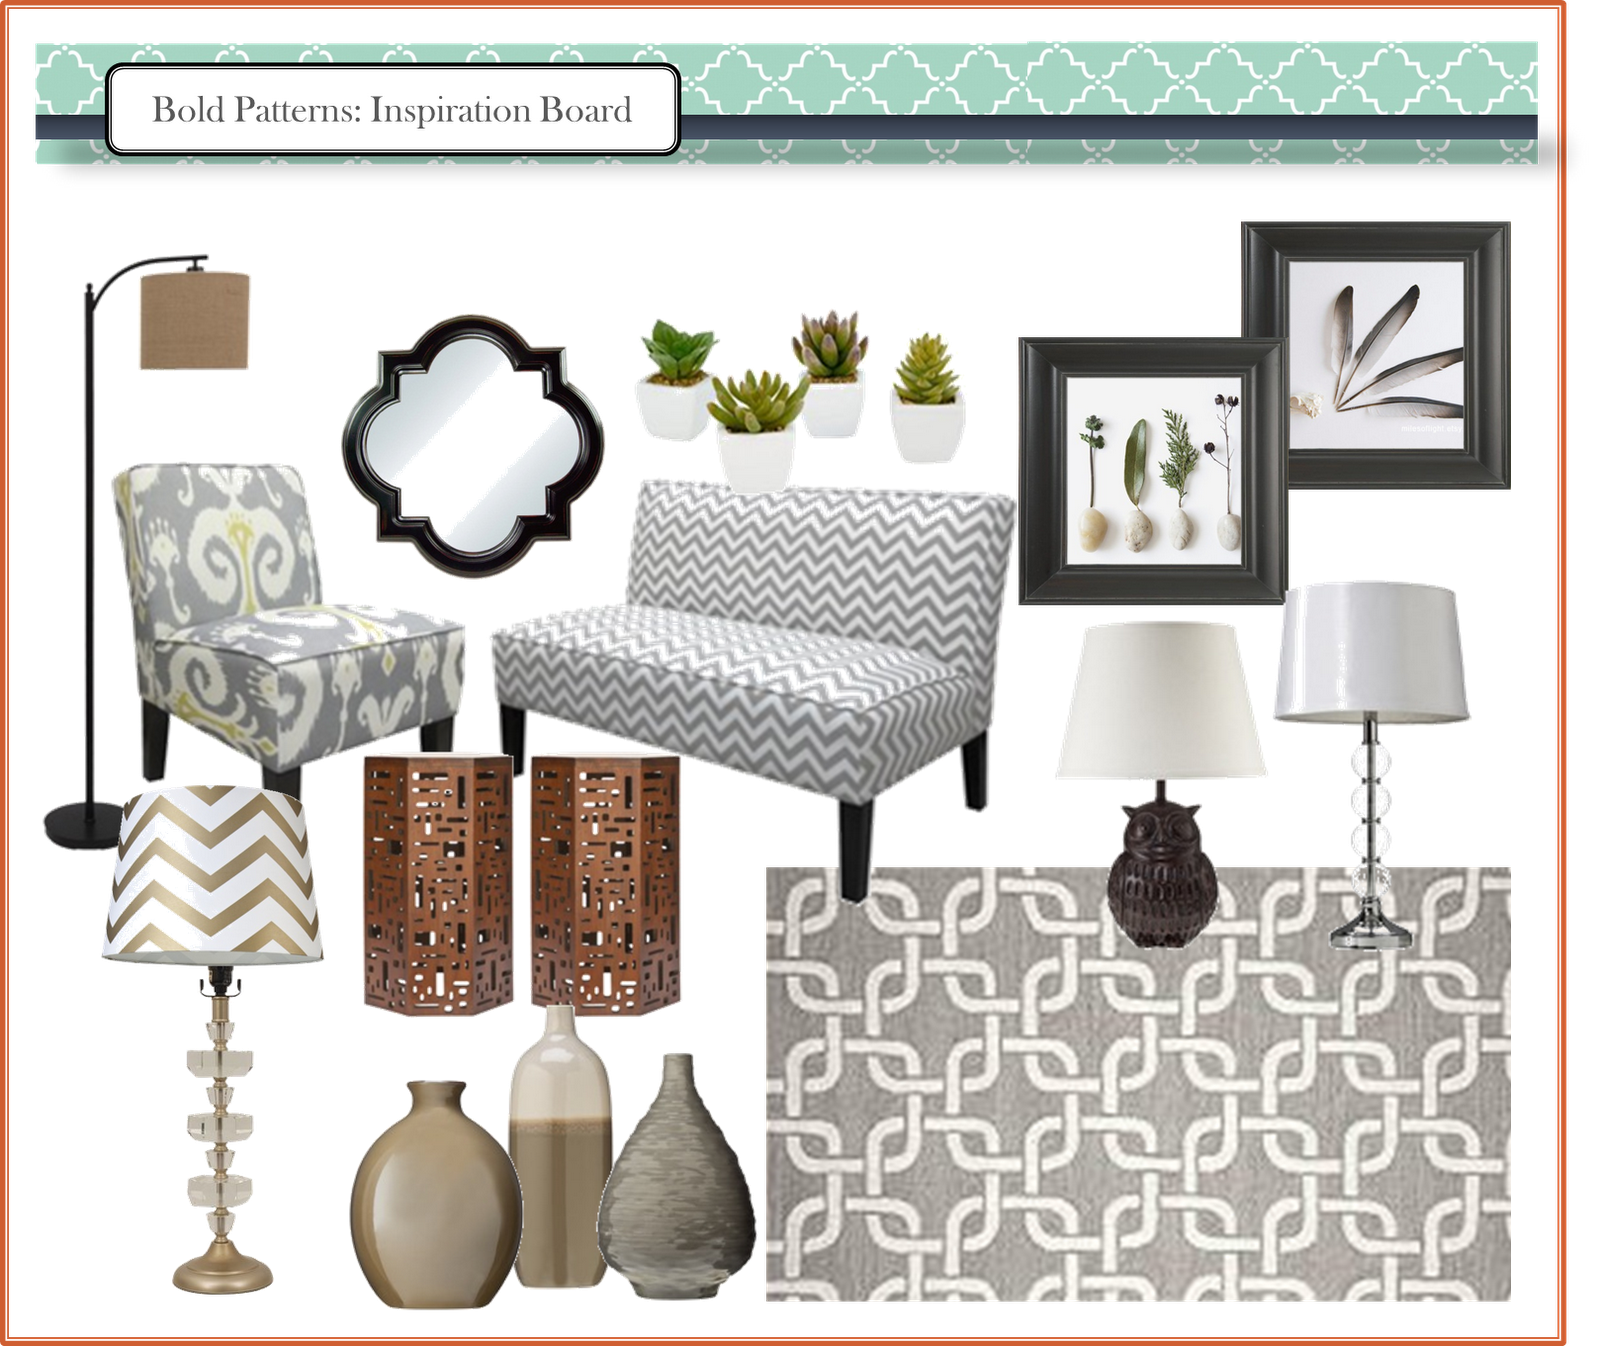
The best part?  About 90% of everything on this board was from Target… oh yeah… design on a dime!  Here’s the where to buy guide:

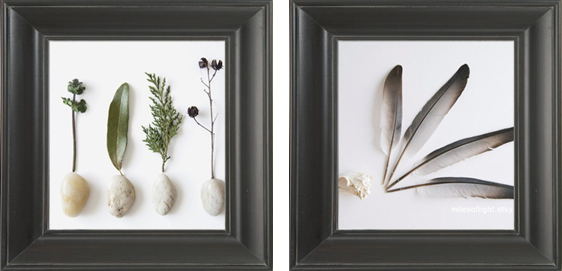
Miles of Light Photography – via Etsy 

Assorted ceramic vases – Target online

 *Each sold separately

Arched Floor Lamp 

Ikat Slipper Chair 

Unavailable Online 

Owl Lamp 

Trellis Rug