Curtained Bed

Happy Tuesday friends!  Wanted to pop in today to talk about bedrooms – most specifically about curtained beds.
Often, curtains surrounding a bed is associated with the old fashioned canopy bed of the 80’s – oh what the eight-year-old version of myself would have given for a canopy bed… unfortunately, that’s not quite what I’m referring to.  
I’m referring to the revamped version of the traditional canopy bed – the new version where the curtains meet the ceiling, and cocoon the bed while remaining fully detached from any bed frame.
Still not sure what I’m referring to??
See what I mean?  
The curtains are actually connected to a track or curtain rod that is attached to the ceiling, and these new curtained beds offer the softness and same cozy effect as the more traditional canopy bed, without the closed-in, borderline claustrophobic feeling that they sometimes give.
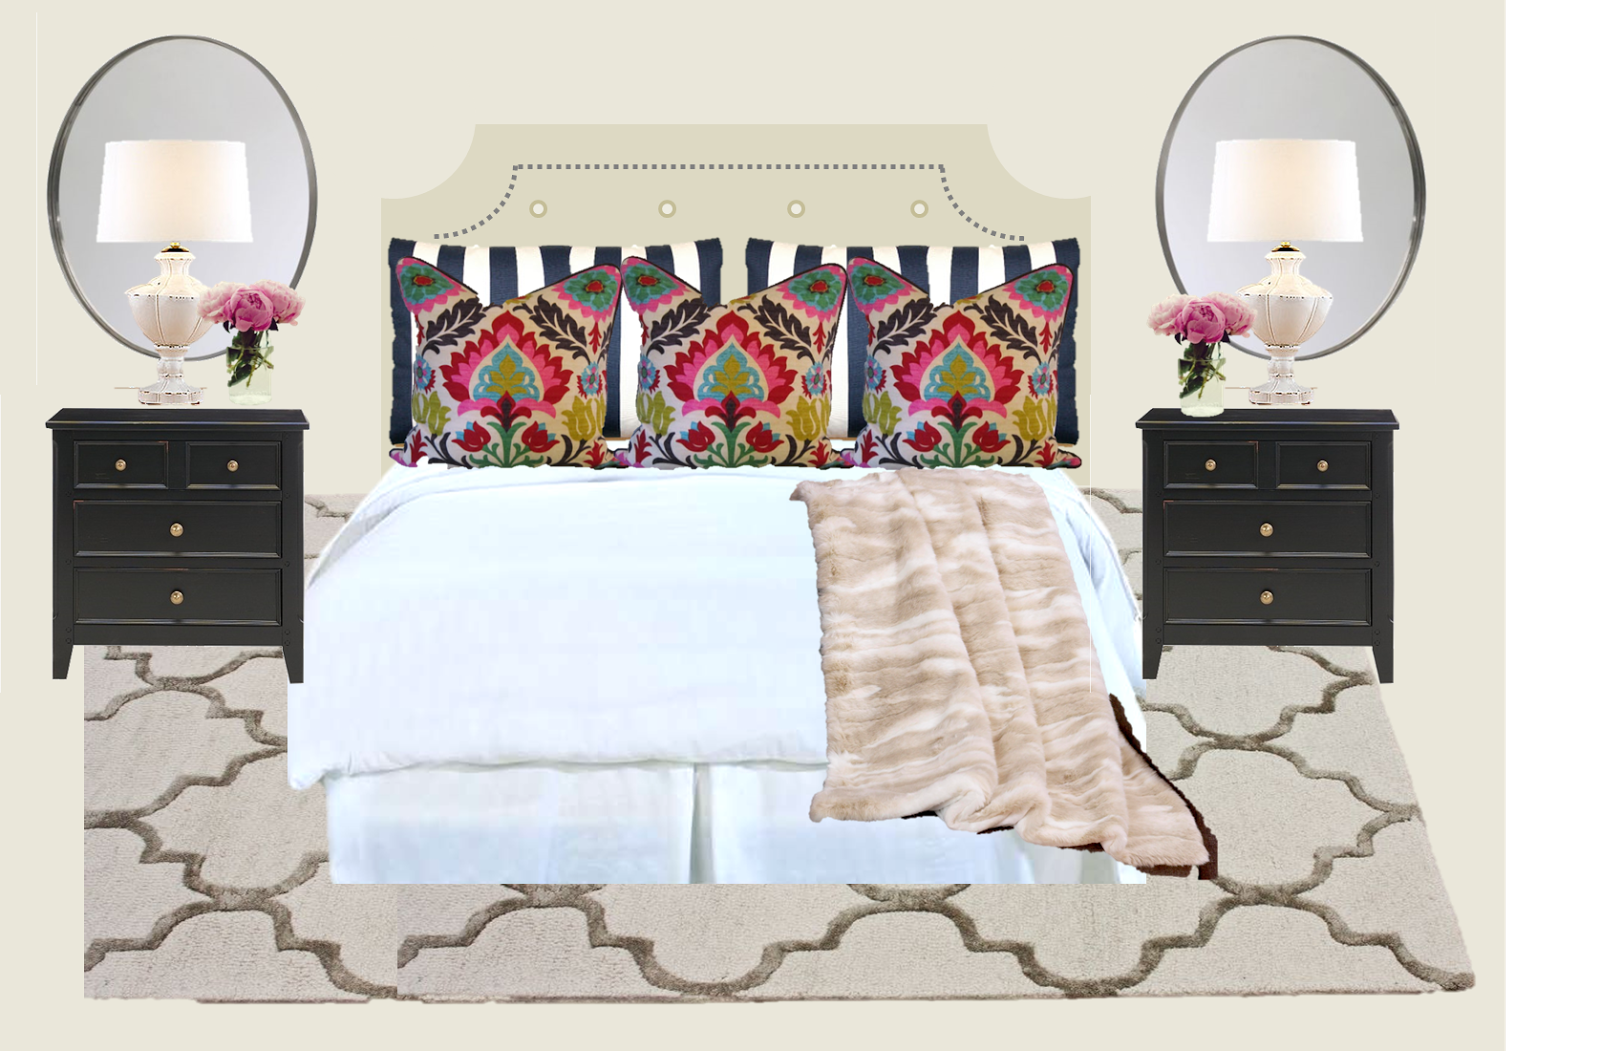
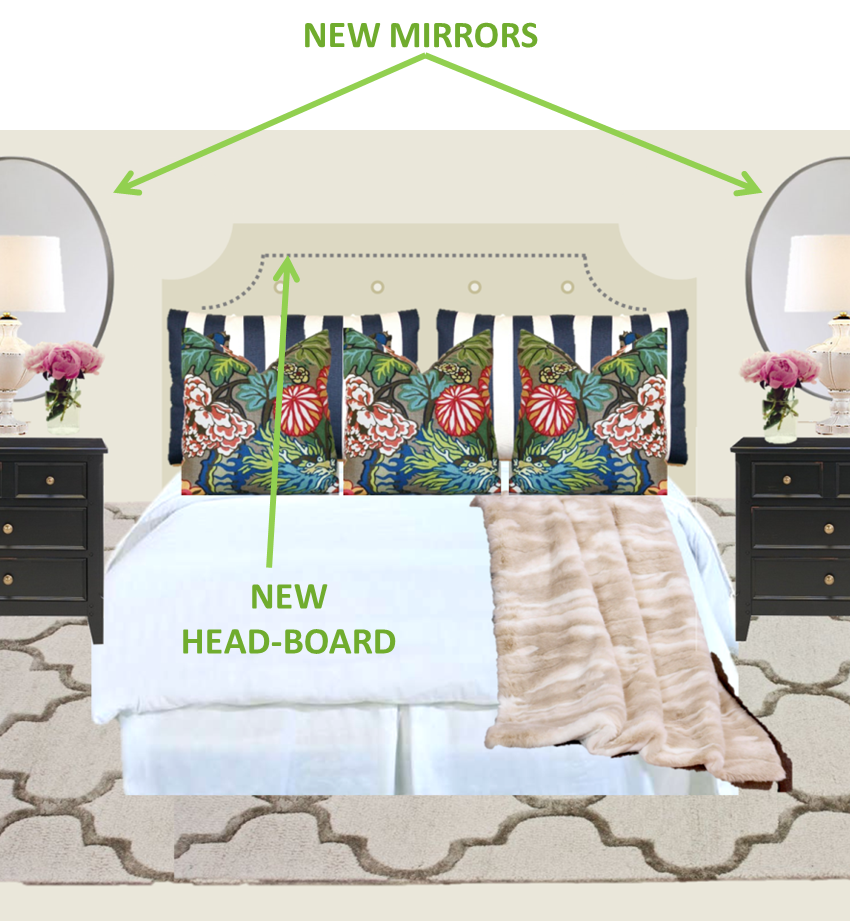
I’m 100% in love with our upholstered headboard, but I do really love the look of these – especially with the white or lighter shades in the curtains.  
So clean, and light feeling, and while a canopy bed can feel a little stuffy, and overly traditional, these actually feel quite modern.
What I love most, is that they seem relatively easy to install, and inexpensive.
They would be fabulous in a studio apartment, for separating the “bedroom” from common living spaces, or even in an open loft space, where it can be really tricky to carve out each “room” from a wide open floorplan.
The other thing about using curtains to flank a bed that I really love, is that you can save some serious money on the bed itself.  
Headboards and bed frames are really pricey, so this would be a really great option for those on a budget, who are looking to make a large impact in their bedroom without spending a fortune.
All you need are some sturdy curtain rods, curtains (or sheers even), and a standard bed-frame, box spring, and mattress.  
I’d also encourage the use of a dust ruffle to hide the less than attractive metal bed frame – something simple like the one in the photo above would be perfect.
On average, the cost of a queen size headboard or bed would range from $800 to upwards of several thousand dollars, whereas if you shop smart for the materials you’d need for a curtained off bed, you could pull off this project for less than $200 easily.  Depending on the hardware, you could even swing it for less than $150.  
What’s great is that the curtains take the place of a headboard, footboard, and bed frame, and make it feel really grand, and expensive.  If I were to do this, I’d probably stick with lighter fabric for the curtains, but there are several different styles for this that I’ve seen and like.  The trick is to find curtain panels long enough to go from floor to ceiling – if the curtains are too short, it’s a no-go.
Ikea is a fabulous source for curtains – some of my favorites are these curtains for the lighter linen look.  I actually have them hanging in our living room (white) and dining room (light grey), and I just love them.  They are thick without being too thick, they are quite long (98″ which would accommodate an 8′ ceiling – add curtain rings for extra length) and they have a really nice organic texture.  
This person actually used the Aina for this exact project (link here):
 **I think I might make the curtain rods just slightly longer so the curtains hang straight down… they look a bit short which is resulting in a bit of a “leaned” feel…
I also like these heavier velvet curtains for a deeper, cozier feel…. and hey, if they are good enough for Emily Henderson, they’re good enough for the rest of us!

These curtains would be really fun in a child’s bedroom flanking a bed… 

Aren’t they just darling?
I’m also no expert, but I feel like they’d create a really peaceful place for nap time.  Heck, maybe I’ll start adopting the daily nap if I got to sleep in a light and airy, curtained off bed.
What do you think? Would you ever try out a curtained bed?  
It seems like it would be so peaceful to be able to close the curtains, and for light sleepers who are easily bothered by light, this seems like an ideal solution to me!

Gallery Wall Surrounding the TV

Look who was unable to unearth the camera from the many boxes still piled up in our house!!
Woot woot!
It really is the small victories in life – right??  
Well, I found the camera last night, and snapped a few pictures of the gallery wall in our bedroom this morning before getting ready for work (so ignore my reflection in the TV where I’m in my robe… love that robe btw).
As you can see, I’ve made huge progress since the last updates I’d posted in my “how to hang a gallery wall” post but while the frames are in place, the gallery wall is far from finished…
Want to know why???
Look closer… 
See it now??  Some of the art is hanging the wrong way… upside down, sideways… and some of it is seasonal from Christmas!  Yep, there is one reading “Deck the Halls” hung upside down.  It drives me absolutely nuts. Sadly, Kris didn’t even notice it.  Men!
I’m in the process of pulling together new pieces to hang, that will be more cohesive together.  I want pieces that bring out the pretty blue of the dresser (which by the way photographed REALLY blue, but is more deep teal in real life).  I also want some more color, and lots of bright white.
Some of the prints and paintings will stay… specifically the black and white surf photograph, and a few of the Clare Elsaesser pieces that I still adore.

Originally, I’d been considering spraying all the frames either all gold, all black, or all white, but I’m kind of liking the mix of black and gold…

What do you think?

The two stacked frames in the middle (top) seem a little too thick to me, but perhaps with a wider white matte, and more simple art they won’t look so clunky… the pieces that are in there right now are really dark, and next to each other look like too much.
Overall, I’m really happy with how this wall (and this room) is coming together.  It’s so light and bright, and the gallery wall takes away from the big looming TV that was the lone ranger on that huge empty wall for so long.
The woven hampers flanking the TV and dresser are also new to the room, fill out the wall, and help us (aka help me) keep all the clothes off the floor.
The hampers are from Target. They are amazing.  A little pricey (roughly $50 each) but worth every penny.  They are out in the room, and the woven texture keeps them from being an eyesore.  I actually think they are really pretty! And not to go on and on about the hampers, but they have these super handy detachable liners, so when it’s time to do laundry, you just un-snap them and carry the whole sack to the washing machine.  Genius!
Anyways….

Aside from swapping out the art, and a few of the mattes, I was also thinking that I may also tweak the layout a bit more.

That’s the thing about building a gallery wall… you REALLY have to be flexible as you hang up pieces.  You’ll find that frames you thought you liked in a certain spot don’t look right once they are hung, and that certain spots need something larger, smaller, or nothing at all.  Blank space is as important in a gallery wall as coverage, and slight asymmetry feels purposeful as opposed to aiming for perfect symmetry and having a frame hanging slightly off.  Living with it for a while has really helped me see what I want to move, but it’s really minimal.  Remember the original layout plan?

I don’t want to say our gallery wall has a completely different layout, but it’s definitely different from the original.  There are a few more frames (the mock up didn’t take into account scale accurately… both the scale of the frames and the scale of that enormous wall.

To put it in perspective, some of the large frames that look relatively small here are 27″x20″… not small at all!

More pictures to come once we have hung all our new pieces, but I felt I owed you all a little taste of what’s been happening in there…

Happy Thursday!
xoxo

Full Dresser Reveal – Ikea Tarva Hack

So last week I’d jumped the gun with excitement and posted a few blurry pictures of the newly painted dresser that is in our room functioning for storage and as a TV stand…
This has been a long time in the making… remember LAST FEBRUARY when I first started talking about this???  Well, it’s only taken me eight months to finish this project 😉  With the hardware attached, I can OFFICIALLY check this project off the list!
Yep, that’s my reflection in the TV!!

I can’t even begin to explain how good that feels to be able to say it’s DONE.  Phew!

I am so pleased with how it turned out – the ultra-marine blue paint color brings such LIFE to our bedroom without being overwhelming, or too in your face.

I am in love with how it all turned out, but it was a LONG road to get here… let’s start at the beginning…

Ikea… on a Saturday… NIGHTMARE.  I got in, I got out, and a glass of wine later, I was ready to get the party started get this dresser built.

Step one: organize nuts, bolts, and assorted other random pieces Ikea packages up.

All I’ll say is… be VERY CAREFUL to be sure that you are using the right little screw thingy for each step of the process… you do not want to have to go back and take apart the dresser halfway through because you used the short screw and not the long one – TRUST ME on that one.
You may also want to enlist a buddy to help read the instructions… they use pictures, not words, and some of the little drawings I STILL can’t figure out…. bottom left picture… what do you think that says?? “Don’t break the furniture you’re building?”  Is that what it means?  Thanks Ikea… wise words…
I’ll spare you the boring details, but our living room was a disaster zone for two nights, as it went from this…
To this… an almost completed dresser! 
WITH FUNCTIONING DRAWERS.  
Holla! 
Look at those drawers… that open and close smoothly.  A work of art I tell you!  I’ve never experienced a more satisfying moment.  
Well, except for that time when I was home from college, and went to Costco with my mom, and saw that the girl that bullied me all through high-school was working the front door…  that was also an EXTREMELY satisfying moment… Deanna!  Is that you??  Going places in life I see… 
Another story for another day… 
Anyway, it felt REAL good to get the drawers working…
Moving on… the wood is pine, which means that it secretes oil from the knots in the wood for years… YEARS PEOPLE… so to be sure that the knots stayed hidden, and that my lovely paint job stayed intact without any bleeding from the wood, I used a super-duper primer.
Kilz primer got the best reviews online for sealing in wood oils on pine furniture, and so far so good.
I read that having the primer tinted made things MUCH easier to paint over when using a dark paint color.  I am SO THANKFUL I did this – I probably saved myself an extra coat of paint (or seven), and many frustrating hours in the long run.

The tinted primer won’t be as dark as your paint color, but it helps SO much.  It went on a light blue (pictured above) – I did 4 thin coats with a roller (to be sure none of that oil from the wood came through over time), let it dry, sanded it, wiped it down really well.

Then it was time to paint.

I just did regular water based paint (for easy clean up) in a semi-gloss – three coats with a roller later, and these bad boys were drying in the living room…

The most interesting thing to me about this paint color is that it photographs so differently in different lights, and that’s actually how it is in real life.  In bright direct sunlight, it’s a rich peacock blue, but in the afternoon it’s definitely a darker moodier version of itself… sometimes it almost looks like a dark green.
Like a mood ring – it’s totally fascinating to see!
Remember my inspiration for this color?? It was this Peacock Blue Dresser from Dimples and Tangles that got the creative juices flowing – I still love how her’s has the lacquered look.  
It’s AMAZING.
Anyway, you all know about my love of the brass hardware – it was quite a hunt to find!  My first order was cancelled because they ran out of lion head pulls!  WTF… I had to hunt it down elsewhere, which added a few extra weeks onto this project.

The dresser was in our room, just waiting for those pulls, and when they came, I was even more excited with how cute these guys were!  Quite sassy if you ask me.

RAWRRRRR.
And so, that’s the story my friends…  are you ready for the massive photo dump??  Here we go!
The view from my side of the bed… that’s a pretty realistic image of how the paint color reads in person – like the color of the ocean 40 feet down… gorgeous!
And a few close up images of the hardware against the paint…

Our old problem was that the TV stand that had been in here was too low to the ground so we couldn’t see the TV from the bed… especially once we bought our giant California King, with the extra high box spring.

Now, as you can clearly see, the TV is at optimal viewing height…

This room is SO TRICKY to photograph – it’s not big, and so this was the only angle where I could really get the whole dresser in.  Awesome photography skills – clearly.

And as I’m posting these, I’m realizing that there are a few unintentional selfies where I’m reflected back in the TV.  In my pajamas.  Awesome.

On another topic, how awesome do those navy and white curtains look with the dresser???  Totally baller.

Next up on the list… what do we do with this wall above the TV??

It’s a HUGE improvement to have the TV higher on the wall, but it’s still very empty feeling.  I know I have a bit of a problem and want to put something on every wall, but I swear to god, this wall NEEDS something.  I was thinking sconces, but the lazy part of me is like… ehhhhh.

If we didn’t have so many freaking mirrors in this room already, I’d consider a trio of round convex mirrors, and I haven’t completely ruled that out, but I’m trying to think of something other than another mirror…

Here’s a photo of our lovely dresser from the bathroom door looking back towards the hallway and our dining room / office area.  I love that the spaces have a really cohesive feel…

Oh, and don’t forget to notice our dust ruffle on the bottom of the bed.  It’s a subtle change, but a HUGE improvement since you could see all the crap stuff we were storing under there and it just looked so unfinished, and ugly, and messy, and terrible.  UGH.

Now it’s hidden and I’m SO much happier.

This next photograph was taken from an angle I don’t often capture since the salmon tile in our “art deco” (aka old as hell) bathroom is all up in your face.

What you can’t see (thank god) is that the shower was re-done at some point since the 1930’s, and in an attempt to match the coral tile, they went with pink.  Pepto bismol pink.  That doesn’t match.  Not even close. Oh well…

And just for good measure (and since i was already in there with the camera) I got a few photographs of the headboard and new bedding together.

I’m liking this combination for fall, and I love that the Duralee fabric on the bolster ties in with the other colors in the room, and brings a punch of color to wake things up a bit – as you can see, I’m still on the hunt for euro shams.

Standing a bit further back, you can see yet another empty wall that kills me a little every time I see it. The wall above our bed and headboard just needs SOMETHING.

I think I nice oversize clock would be nice here – again, trying to stay away from more mirrors in here… plus it will help keep me on time as I get ready in the morning…

So that’s it!  The new dresser / TV Stand / Ikea hack is complete!  If you need to find me, I’ll be in bed watching TV from now until forever.

Just kidding.  Kind of.

Happy Tuesday!!

The Lion’s are Here!!!

My little lion heads brass pulls are here!!
I was SO STOKED to see these come in the mail yesterday – I rushed home from work just to put them on the dresser, and was able to snap a few photos on my phone before it was completely dark.
With the days getting shorter, there was not a lot of natural light left, so the pictures are fuzzy and dark, but you get the idea… the brass pulls are AWESOME!!  Actually, even better than I hoped they would be!
They are actually quite small – the head itself is maybe an inch, but the ring adds to the size.
In the picture below, you can actually see that I hadn’t screwed the pulls on the other side yet… I was too excited (and the light was fading fast), but there will be more pictures to come soon – promise.
What do we think of the decorative brass corner caps??  I looked into options to antique them a bit, but it involves toxic chemicals to strip off the protective film (I read that the natural stripping methods with lemon juice, etc do NOT work).  
I think I’ll pass on the toxic stuff, and either make do as is, or scratch the idea all together.  I think I like how they look, and the little extra detail (almost called it flair… Office Space anyone??) but they are just so perfectly shiny in comparison to my awesome patina’d lion heads…
I think I’ll sit on any big decisions for attaching the end caps for now, and just keep them resting there for the time being…
More pictures to come, and they will NOT be blurry ones… promise 🙂

Bedding Decisions

As you know, the bedroom has been on my list for a little revamping for a looonnnggggg time.  And I’ve been saying for months that it’s “next on the list”, but I swear to you, this time, improvements are on the way.
And I mean, SOON.
We’ve got the new bed, some new curtains, and the new rug, so I’m going to get motivated to start finishing the room out.  Here’s a shoddy picture little reminder of how the curtains are looking now with their crisp navy and white wide chevron stripes:
If you recall, we got a new rug which arrived several months ago, but I’ve never photographed or posted.  Of the three options I was going between in this post, I went with option #3:
It was the “safe” choice since the pattern wasn’t too crazy and the colors were the most neutral, but it’s been a decision that I’ve been very happy about – here are a few pictures from the day we rolled it out… just before our bed was delivered!

I am SO thrilled with the quality.  It’s really plush and soft – you can really see the quality in this up-close and personal shot below:

So now with the neutral rug, the new curtains, the new bed, and white bedding, I feel that we need to add some more color and pattern into the mix.  I definitely want to incorporate the navy from the curtains into the bedding, and here are a few options I’ve come up with:
Bring in some BRIGHT Colors:

I really love the Santa Maria Fabric from Lewis and Sheron fabrics – it’s bright and fun, without being juvenile.  The pattern has a good dose of navy, and I love that using this fabric on the Euro Shams would bring some life to the otherwise neutral space, while tying in with the striped pattern for the shams and curtains.

Santa Maria

Kris isn’t 100% sold on the bright colors – I think it’s because of the pink – but a punch of color would really wake things up – don’t you think?

Stick with Navy and White all the way:

Staying with a navy and white palate will allow me to bring a more wild (literally) print into the mix. There is something about a little kick of navy zebra that I am absolutely LOVING.  It’s just enough animal print without being “safari” and I think it could be really fun.

Mix in A LITTLE color and fun patterns:

I love Ikat, but I’m afraid that the Kalah Blue pattern I’m so in love with is too creamy colored to work with the pure white bedding (swatch below).

The “polka dot” ikat fabric with the pale grey background makes the fabric choice more deliberate, and while the Kalah Blue fabric won’t work on the bed, I have other plans to make it work in our house elsewhere.

So those are the three options I came up with first… but then I started second guessing (shocking, right?) and started thinking that maybe a combination of these three might be what I need…

I could take the preppy striped fabric from the first mock, and the “polka dot ikat” from the third mock and pair those together…

Could this be the winning combo??

Or do you feel like I haven’t hit the jackpot yet with ANY these combinations? Should I look for other options???

What about Lime Green?

Or what if I used some of the Chaing Mai Dragon fabric from Shumacher??

DAH!  I swear I will make some decisions!

Apart from my indecisiveness, you may have noticed a few other changes to the bedroom set up in these mocked up photos.  I want to get some large mirrors – either oval or rectangular, to mount behind each nightstand, and take the place of windows.  I also want to add a headboard, to anchor the bed, and create a visual point of focus for the room.

As of the day our new bed arrived, this is how the bed pretty much still stands today:

Excuse the washed out photo – this was taken at night with all the lights on.  Since this photo was taken, the poly fill Euro shams have been replaced with down Euro Shams – a HUGE improvement (and you know how I love to chop my pillows).  We’ve also gotten a white duvet for the down comforter, and it looks just like a hotel bed – no more freshly-taken-out-of-the-bag-super-wrinkly-down-comforter.

Here’s the official list of to-do’s for the bedroom:
  – New King Shams
  – New Euro Shams
  – New Bedskirt (this is SO necessary to hide all the crap under the bed)
  – Mirrors behind nightstands
  – Headboard
  – New TV Stand
  – Get rid of gold shelving unit
  – Art behind the TV
  – Find a new home for the quatrefoil mirrors
  – Additional Lighting

That list looks longer than it sounds in my head…

I’ll keep you posted on progress (and decisions!)

A New Bed means a New Headboard!!

After months of talk, we FINALLY got a new bed!  It took two separate trips and close to 5 hours, but after laying on every mattress about a hundred times each, we made a decision!!  Hurrah!! I bet you didn’t think this day would come!

Now that we’ve picked the mattress, and it’s en route for delivery, the fun can begin!  I have grand plans to make – YES MAKE – an upholstered headboard over the holiday.  My biggest fear is that this sucker will come out looking “homemade” – there could be nothing worse – but with all the tutorials online, I’m feeling confident.

I am totally inspired by this headboard by Kate of Centsational Girl – she has more craftiness in her pinky finger than I do in my whole being, but she took on this fabulous, complex curved headboard, and look how amazing it all turned out!!

Source

This bed wasn’t a DIY – it’s actually from Overstock, but I love it all the same!

Source

This headboard was from a bedroom that Emily (of A Well Dressed Home) worked on – so pretty.

Since I am making my headboard instead of buying it, I did a little research online, and found this super helpful headboard design template online – I LOVE the Cavendish, and Grosvenor, but while they are both so pretty, I have a feeling that all those curved lines will be a lot easier to screw up!

Repeating the mantra straight lines are my friends, I think I’m most realistically looking at the Alexander or the Belgrave.  The Alexander would definitely be the easiest, but I’m just not in love with it – it’s all too linear.  Blah.  I was already leaning towards the Belgrave, but after looking up some inspirations online, I am totally sold…

I love, lovvveee, LOVE this version with the tufting, and nailhead – it’s just perfection!

Source

That deep diamond tufting is calling my name… no nailhead here, but the rich silk is so luxe.

Source

This was a DIY done oh so right – I’m going for a solid fabric, but I am really liking the nailhead close to the edge!

Source

And finally – navy and white – this close up showcases the detail of the INDIVIDUAL nailheads!  Amazing DIY!

Ok… so I mocked up four options for the Belgrave headboard since I need some sort of game plan!

I LOVE the look of tufting… it just brings everything to another level, but I am a bit concerned that this is going to over-complicate the process.  It all sounds simple enough on paper, but when it comes time for the project, I don’t want to chicken out!

The bottom two options are tuft-less, and will definitely be more simple to execute, but I’m worried that they could look lumpy over time from leaning against the foam and batting.

Also, how tall should this be?  Should I add legs to the bottom or mount it on the wall?  How heavy will it end up being?  Questions, questions, questions!!!  Dah!

Luckily I have a few weeks to figure it all out, and while a little overwhelming, I am SO excited to start pulling this bedroom together!

Upholstered Headboards

I originally fell in love with upholstered headboards in Sex and the City – do you remember the episode where Charlotte finally ditches the decoy ducks and plaid wallpaper in her and Trey’s Upper East Side apartment (much to Bunny’s disdain)??  Charlotte replaced the dark hunting lodge vibe with light colors, and a beautiful upholstered bed.  It was love.  When that episode first premiered, I remember thinking, I’m going to have a bed like that in my house one day….

Now, upholstered headboards and bed-frames are very “on trend” but it doesn’t deter me from wanting one.  Actually, I feel like there are so many options now since they’ve become popular, that it’s to my benefit!  My favorites have nailhead trim, and are stuffed to the point of almost being overstuffed.  I love tufting of any kind, and as we are getting a new mattress very soon (feels like I’ve been saying that for months now) it’s time to start making some decisions…  here are a few of my favorites I’m using for inspiration:

Simple lines and nail head trim… fabulous!

I love the clean white, and more dramatic curve on this one…

This headboard by Centsational Girl has always been a favorite with the cut-outs on the side…

I love the rolled footboard, and deep tufting here… unfortunately this is way too large for our room

The deep tufting and curved sides make a headboard with straight lines a little more unique

Finally, this may be a teenagers room, but this bed frame is absolutely classic.

Bedroom Furniture Transformation

It’s done!  Wooo Hoooo!!!!  After months (literally months) of living in a fine layer of dust from continual sanding, the bedroom furniture is finished, and we no longer have 10 drawers, two nightstands, and an armoire in our living room!

You have no idea what this means, and the intense feeling of satisfaction I have at having completed this never ending project!  The pictures don’t even portray the 180 degree change that has occurred, but take look at the transformation!!
BEFORE:
AFTER:
Let’s start at the beginning, and I’ll take you through the process:
November 2011: Empty out all clothing into cardboard box from which I will live out of for the next four months.  Four. Long. Months.
Ok, moving past that…
Remove the drawers and patch the holes with a wood putty.  Be sure you are working with a clean, dry, dust free surface.  Also, be sure to invest in a putty knife – it will make the putty fill the hole tightly, and prevent the need for 3 or 4 rounds of patching.  Because the holes were pretty deep, I had to get my hands dirty, and really pack the putty in the hole (roughly 1cm deep).  The patching took some serious time as each drawer had two holes per pull.  Putty should take around 2 hours to dry, but per my dad’s suggestion, 48 hours means it is fully cured (putty in the middle of the hole will be dry as well – not just the putty on the outside of the drawer).  The drawer below has been patched once.  Because the holes were deep, they needed more than one round of putty, so below, we were looking for coverage, not perfection.
Once the first round with the wood putty dries, sand down until smooth.  Sand with a fairly heavy grade sandpaper as the goal here is to strip off the old paint, and prep the holes for another layer of putty.  You can see in the below photo, that a good amount of paint was removed around the holes.  Once the drawer is smooth, and the putty has been sanded flush with the drawer, apply a second layer of putty.  Here I used a finer grade filler than wood putty to be sure there were no visible dimples in the wood from the filled holes.  Use a putty knife to apply again, but be sure to pack the putty tight, and feather out at the edge.  
Once the second layer of putty is dry, use a fine grit sand paper or a sanding block to lightly sand down.  Be patient here, and use uniform pressure while sanding the full length of the drawer face.  By doing so, you will avoid imperfections caused by uneven sanding.  This part will be messy – the dust coming off gets everywhere so be sure to prep the area with a drop cloth, and wear clothes you don’t mind getting dirty.  By the end of the day, you will look as though you got wild with baby powder.  Also, a mask isn’t a bad idea, to avoid inhaling the dust… hindsight is 20/20.
Keep a close eye on the drawers as the putty wears down.  You will see a slight circle form around the patched hole and this indicates that its flush, or pretty darn close (the first picture below gives a good example – look at the hole on the right; it’s almost like a halo around the patch).  
Run your fingers over the holes to gauge when the patch is flush with the drawer.  I found it helpful to close my eyes when running my fingers over the holes – by eliminating sight, I was better able to feel any imperfections.  There were several instances (especially in the beginning) where I over-sanded and had to go re-patch and re-sand the hole, but one do-over early is better than going back after its been painted and you see the dimple of the original hole.  Trust me.

Once everything is sanded, make sure you clean up well before moving on to paint.  Any dust when painting could ruin the coat, so shake out and wash your drop cloths, sweep, mop, and dust EVERYTHING.  Once everything is cleaned up, prep to paint.

Invest in some tack cloth (a super sticky cheese cloth – find it at Home Depot) to wipe down each piece before painting.  It will essentially grab every last particle of dust for a clean start.

For furniture that gets heavier usage – nightstands, dressers, kitchen tables, etc – use oil based paint.  It’s more durable than water based paint, and though its a pain to clean up, you will save yourself from having to re-sand and re-paint chipped surfaces in a few months.

With the oil based paint, invest in a natural bristle brush – I used a 1.5″ with angled tip on the drawers and 2.5″ flat tip for the dresser and nightstands.  I chose an angled tip because of all the beveled surfaces – the angle makes it easier to cut in.  For large pieces with flat edges, a flat brush would be just fine.  Do not get a brush with synthetic bristles – these brushes will lose their shape in oil based paints and primers.  Also, do not try to save money here – splurge on a good brush that won’t shed bristles into your pieces while painting.
Ok… moving on.  Tape off the edges to ensure a clean line – messy edges take away from having the piece look professional.  Look at the bottom of these drawers – you can see the over-spray from their original paint job… a lovely shade of guacamole.  Ooh la la.  🙂
In the below close up photo, also note that the full drawer front has been sanded – to the touch it needs to be smooth otherwise you’ll be going back to redo everything.
*A quick note on sanding the paint – unless there is severe damage and it all needs to come off, you will see how much to sand based on how much paint flakes off, and how rough it feels between the paint and what lies underneath…
Put on your paint clothes and PIN LONG HAIR BACK.  Another tough lesson for this blonde – while leaned over, I dipped my ponytail into the paint… thus painting got put on hold while I made an emergency trip to the salon (another story for another day).
Because these drawers had already been painted black, I skipped the priming step.  Some might feel this is wrong, but my dad assured me they would be fine, and right he was.  If you are painting over a very light color with dark paint, or a bright color, prime with oil based primer.  If not, this step may not be necessary.
I started on the flat surfaces with the larger brush and finished up on the beveled edges with the smaller angled brush.

Do not skimp on the paint.  I did two coats on most drawers – a few needed three coats for extra coverage; especially on the drawers that got sanded down to the original green paint.  
In addition to painting the drawers, I was working on the nightstands and armoire – you can see in a few of these pics how many layers of paint I made it through (black, and creme, and green… oh my!)

On to the home stretch.  Unfortunately I do not have any pictures of the final steps, but it’s pretty simple.
Step I: Let paint dry 🙂
While the paint dries, prep for the finishing touches.  I bought pulls (one per small drawer, and two per large drawer).  You can splurge here, but I actually found a steal at Target – 14 pulls for ~$30.  That would be ~$2 per pull – a vast difference from Restoration Hardware’s $7/pull, and I swear to you, they are identical!! 
I also do not want to put myself through this process again while we live in a 1BR apartment in San Francisco, so I ordered custom cut glass to protect the tops of the nightstands and dresser.  Go as thin as you can with the glass, but be sure its not going to be brittle.  We got 3/16″ thick sheets of glass, and be sure you have the glass manufacturer round the edges – the last thing you want is to cut yourself on the edges!
Once we picked up the glass and had the pulls in hand, we got out the measuring tape, and grabbed some paper, because it was time to drill some holes.  Double and triple check your math and measurements, because once the hole is drilled, there is no going back – with stacked drawers, one slight error will mean the pulls won’t line up!  I really wish I had snapped a few shots of this, but we used painters tape around where we thought the holes might be.  With a measuring tape, we were able to mark on the painters tape where the holes would be, and drilled right through the tape.  Having tape there also helped prevent the wood from splintering or splitting so it was perfect!  With the holes drilled, we screwed in the pulls, polished the glass and carefully put it in place!
So that’s it!  Four months of sacrificed weekends, furniture in the living room, and ravaged manicures… and it was SO WORTH IT!

Dreamy Photography: Paris

Paris Photograph, Laduree Shop Sign, Macarons, Mint, Pistachio, Green, Pastel, Romantic, Feminine - Sugar, Sugar
Photos courtesy of Eye Poetry Photography
While I am still 100% in love with the Paris prints I ordered from Etsy, I am re-thinking these prints for the bedroom.  I truely believe that the bedroom should be a sanctuary that prepares you for sleep – keep TV to a minimal, maintain soft colors etc. While these prints are not “loud” and I am not shrouding the room in red, I worry that these pops of bright color will derail the soothing vibe I want to keep.

I mentioned before that the rest of the house stays within taupes, tans, greys, and blues… and one of my favorite photographers (in fact the very one who snapped the “red” portraits of Paris) has added to her gallery, and there are some dreamy photos with blue’s and soft colors, soft focus lenses, and its all dreamy loveliness.  So pretty.  I think they are keepers, and I think my bedroom vision is about to change!
Folie - Paris Photograph, Versailles Detail, Romantic, Feminine, Robins Egg Blue, Gold, Home Decor

Le Petit Zinc - Paris Photograph, St Germain Des Pres, Cafe, Bistro, Chairs, Home Decor, Fine Art Print

Rococo - Versailles Door, Paris Photograph, Pastel, Shabby Chic, Romantic, Feminine, Baroque, Renaissance, Baby Blue, Spring Home Decor

Chandelier photograph, Paris - The Secret History -  Versailles, Hall of Mirrors, France, French Style, Glamour

Speaking of Paris… city of lights… Kris and I watched Midnight in Paris this weekend.  While I enjoyed it, I wasn’t in love with the plot, however, it made me want to go to Paris so bad, it hurts!  Kris and I have been talking about planning our vacation this year, and I think Paris just flew to the top of the list.

I’ve only been there once, and it was in the dead of winter.  I brought my warmest coat, but being from California, I clearly had no idea what to expect.  It was bone chillingly cold – the coldest wind you can imagine!  Dark gray skies… very moody.  At the time, I was backpacking through Europe with my best friend Kira, and despite our strict budget, we ended up ducking into lot’s of overpriced cafe’s to warm up.

Our trip through Paris is actually pretty laughable, but it’s another story for another time.

Now, to start work on a new vision for our bedroom!