Rustic Wood Shelf DIY

Our dining room has new shelves!!  They are a little rustic… a little glam… and totally perfect!  I’m SO THRILLED with how they came out!

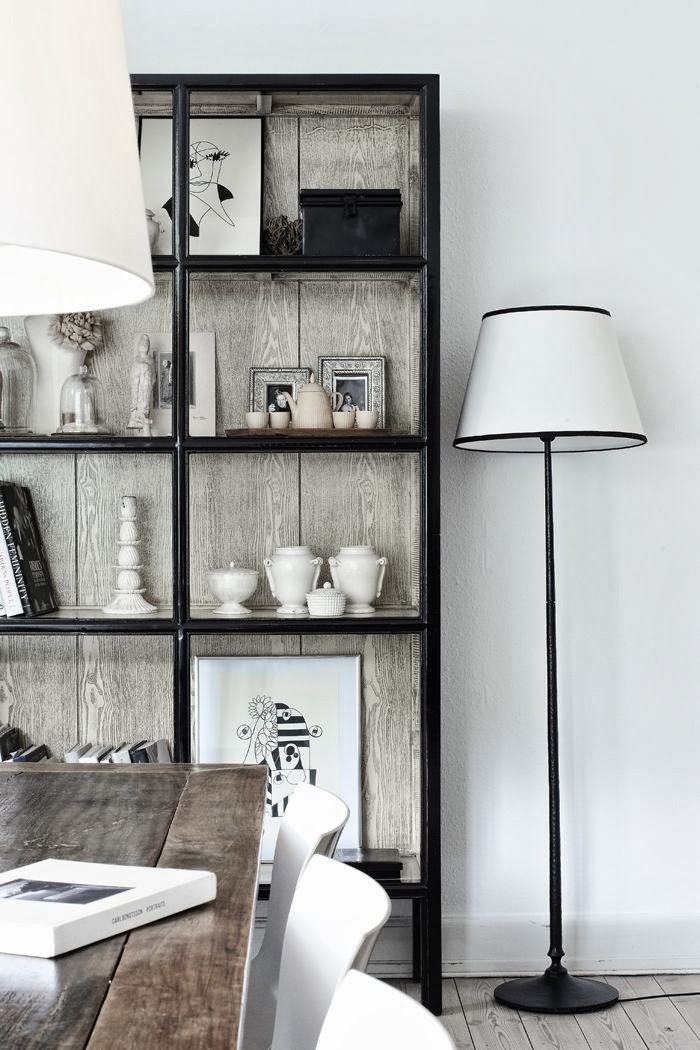
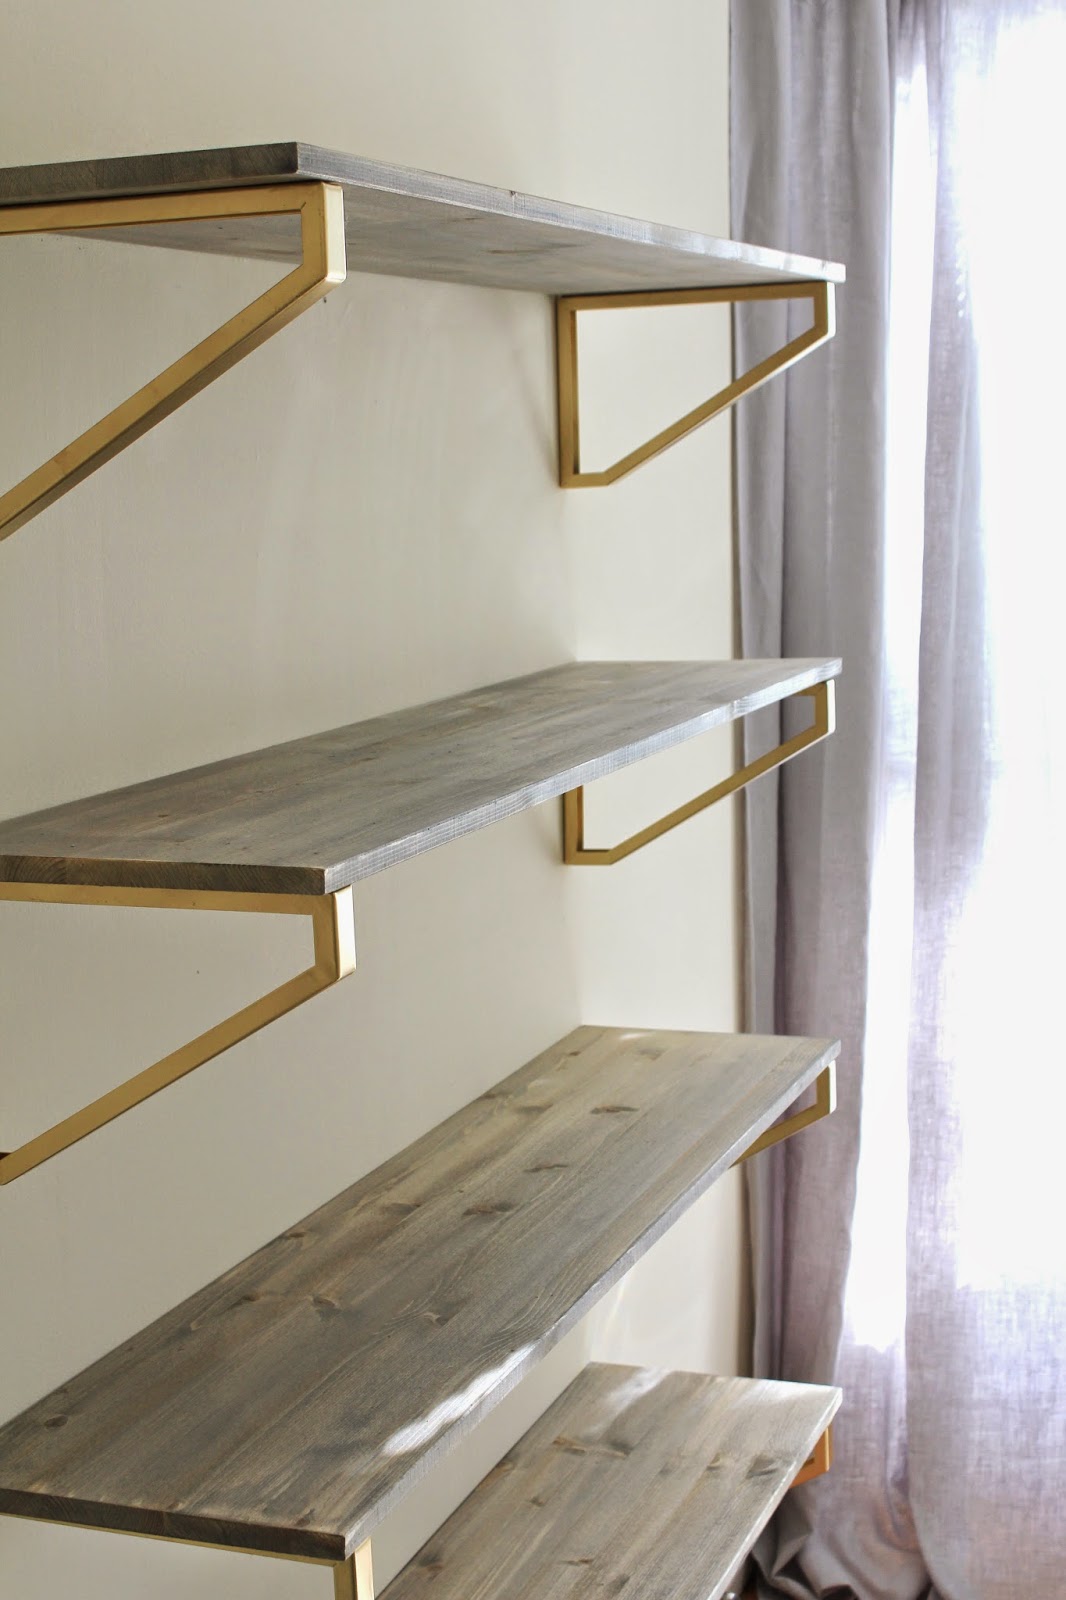
Just look at them!!  So pretty right??

I spent the better part of Saturday afternoon, with my drill, level, and measuring tape, hanging these bad boys up.

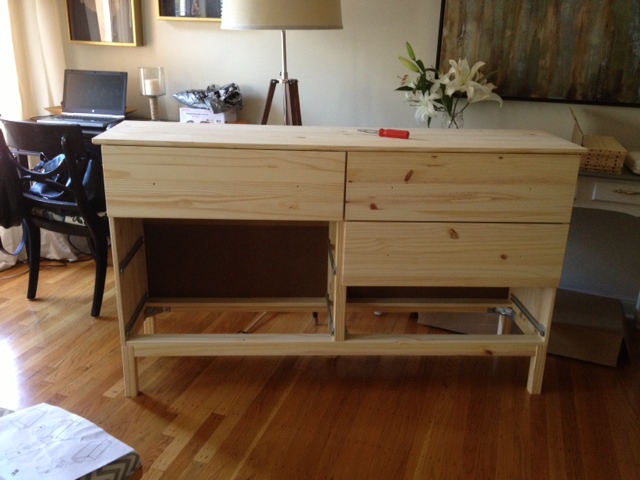
These shelves are a DIY I’d started a few months back, and then they got totally neglected out of sheer laziness.  They’d been sitting in our garage for about a month after I stained the wood, and then sitting against the wall in our dining room for another few weeks before I finally decided to do something about them.

I don’t know what came over me this weekend, but I was on a mission to finish unpacking, and with several boxes of books staring me in the face, I knew it was time to get these shelves installed.

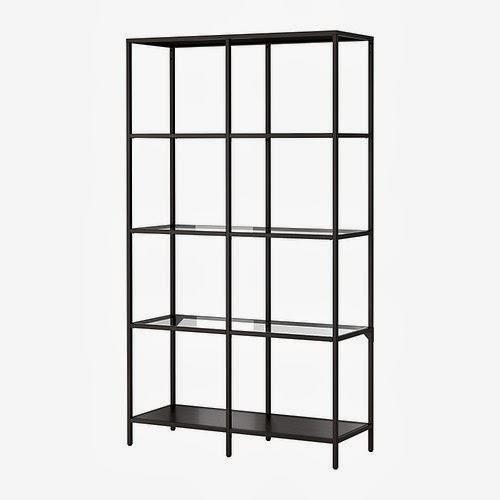
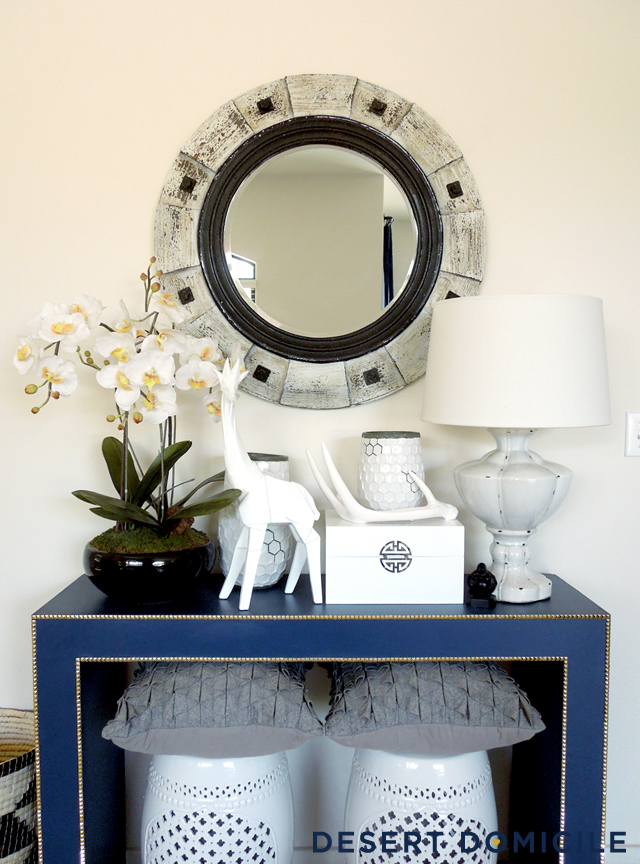
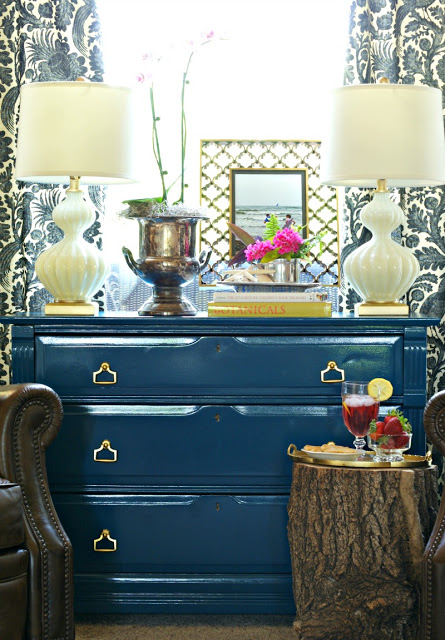
Originally, I’d been envisioning a lovely rustic bookcase like this or this, but in the end I didn’t feel like I could commit spending that much on a bookshelf I wasn’t 100% sure I wanted, so shelves were the best option for me.  One thing I knew I wanted was for them to be made of wood – we have too much painted furniture in the house right now, and bringing in an organic material like wood or natural fibers (our Jute Rugs… the linen curtains… etc) makes such a difference!

Do you want to know how much I ended up spending on these shelves??

Next to nothing!!

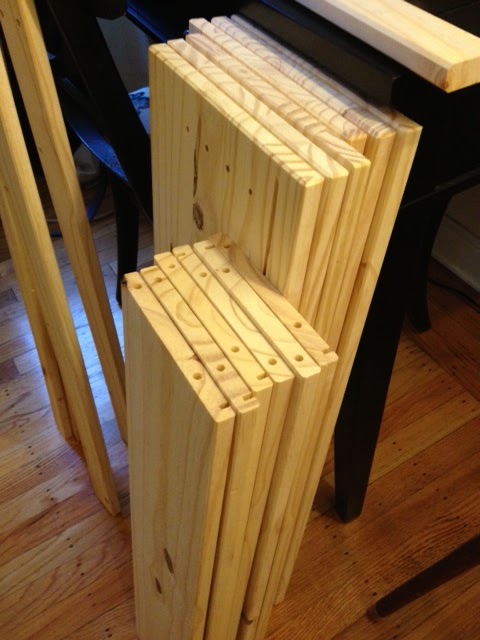
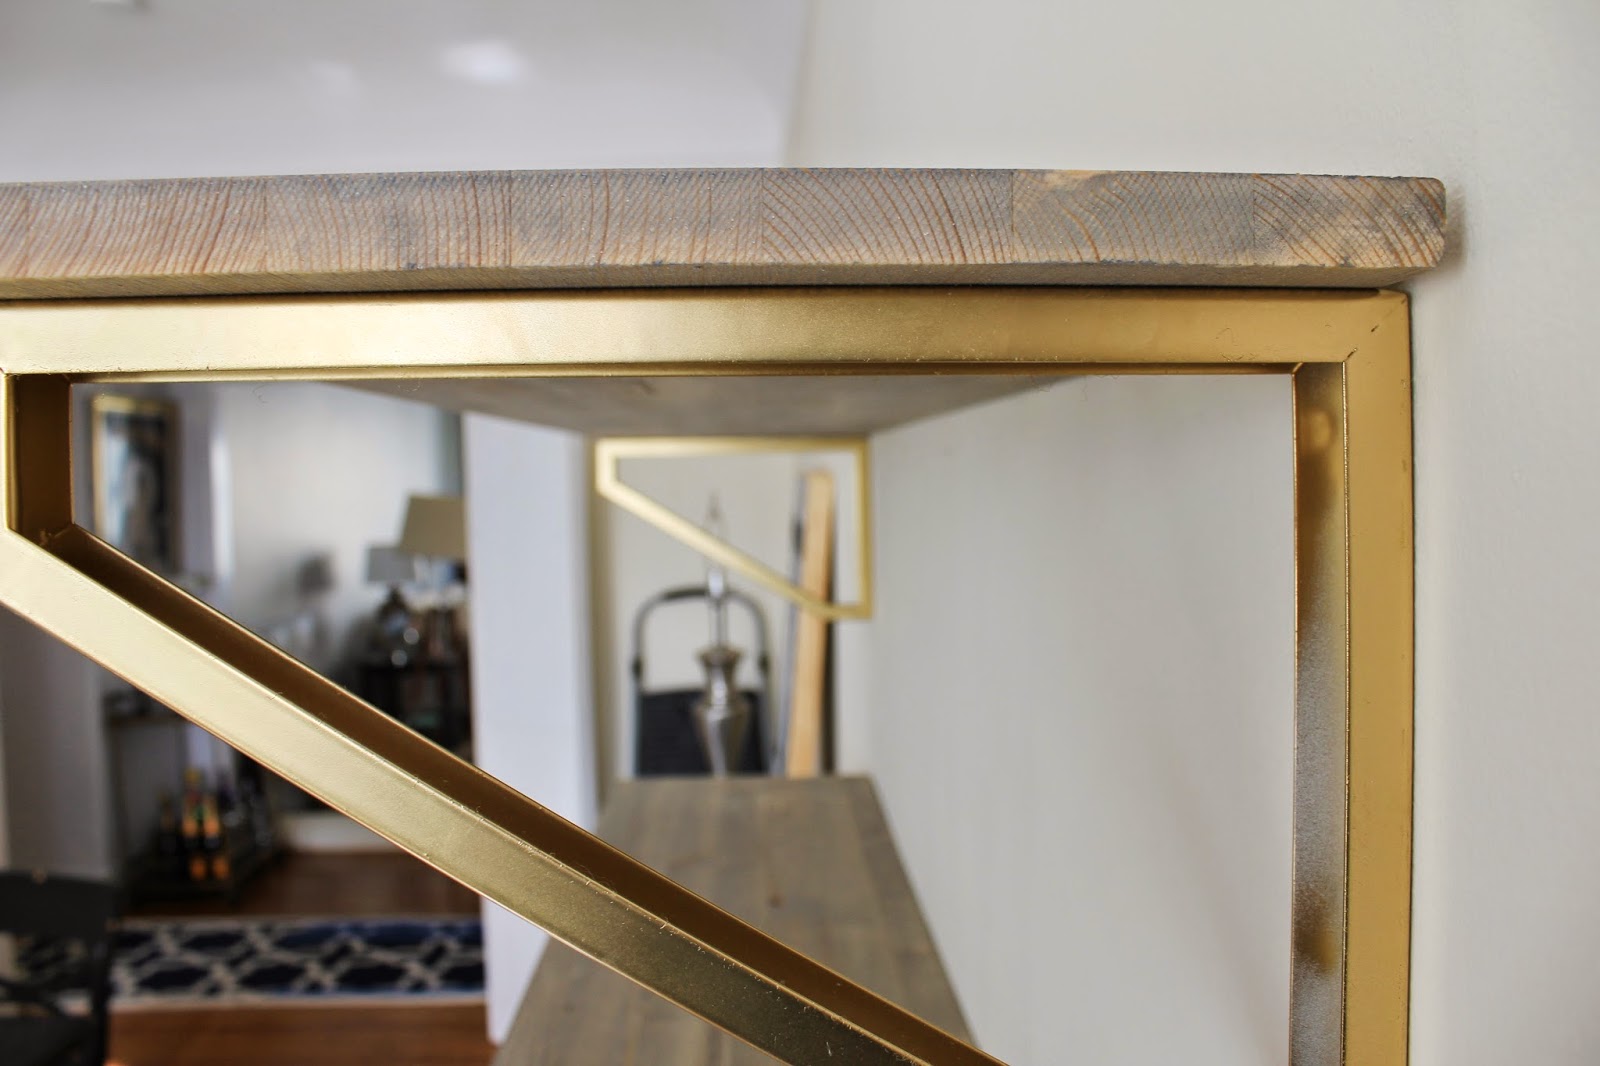
Each bracket was $2 and each shelf was $15.  I bought eight white brackets, and four untreated raw pine shelves from Ikea, for a whopping $76.  Pretty sweet, right??

In all honesty, I can’t take credit for coming up with this Ikea hack on my own – I totally copied the shelves that Sarah over at Smitten Studio had DIY’d and installed.  I found her blog through an image of these shelves on Pinterest, and I was smitten.  Pun intended.

Imitation is the sincerest form of flattery… right??

While I loved the reddish color of the wood she used, I wanted something a little more weathered in our dining room – a little “Restoration Hardware” inspired since greyed out weathered wood is their thang, and I think it pairs really well with the grey linen curtains in there.  A little beachy… a little less formal.  It’s a match made in heaven.

Anyway, the DIY was super SUPER simple…

Materials you’ll need before starting:
  – Unstained wood shelves (mine were pine – same ones listed here)
  – Wood Conditioner (I used Minwax, pre-stain wood conditioner)
  – Stain (I used Minwax Classic Grey)
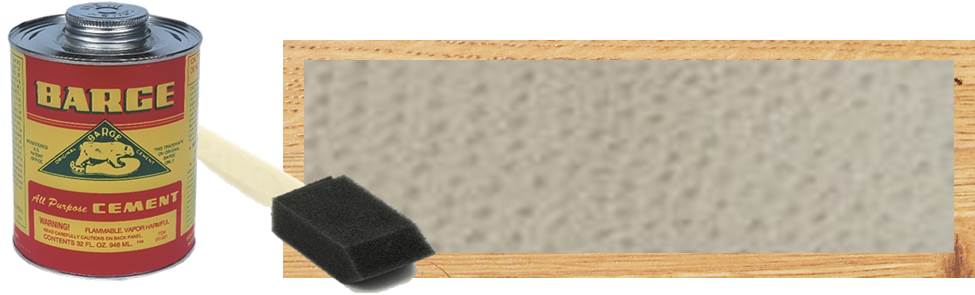
  – Foam Brush
  – Rag
  – Brackets (I used these)
  – Rusoleum Metallic Gold Spray Paint – it’s my favorite gold
  – Brass Screws

I had never stained wood before but it could not be simpler – when you’ve got all your supplies gathered, coat each board with the pre-stain wood conditioner.  I’d read about using wood conditioner on One House Love, and was sold.  More even application, and more uniform color?  For $7?  What do I have to lose?

I can’t speak to how much better it was than untreated wood, but it worked great for me, so I think it’s worth the extra 5 minutes it takes.

Anyway, just apply the conditioner with your foam brush, and wait for it to soak in for a minute.  By the time you finish the last board, the first is ready for stain, so there isn’t any down time.

On to the stain – feel free to use the same brush that you used to apply the wood conditioner to apply the stain, and brush it on in long, even strokes in the same direction as the wood grain.  Do NOT brush against the grain.  As long as you go with the wood grain, this process is foolproof.

Once you get one coat of stain on the wood, immediately wipe it down.  You can re-stain as many times as you like to build up color over time, but this way you’ll have more control over how much of the stain takes to the wood, so each board is uniform.

I found that even with the conditioner, the wood soaked up a lot of the stain quickly, so be ready with the rag to wipe it down.  Fearing that I’d stain them too dark, I did one coat and waited to see if it would need another the next day… thankfully they didn’t, so I stopped after one coat.

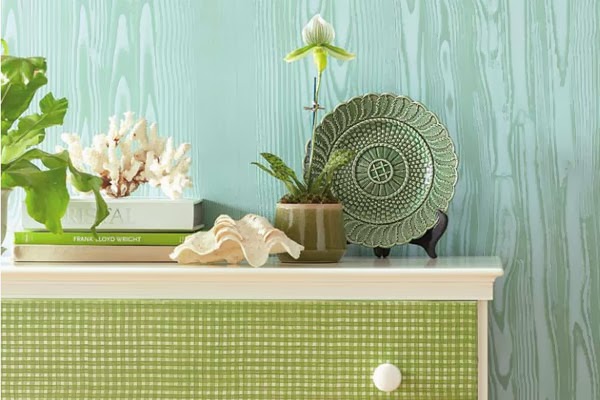
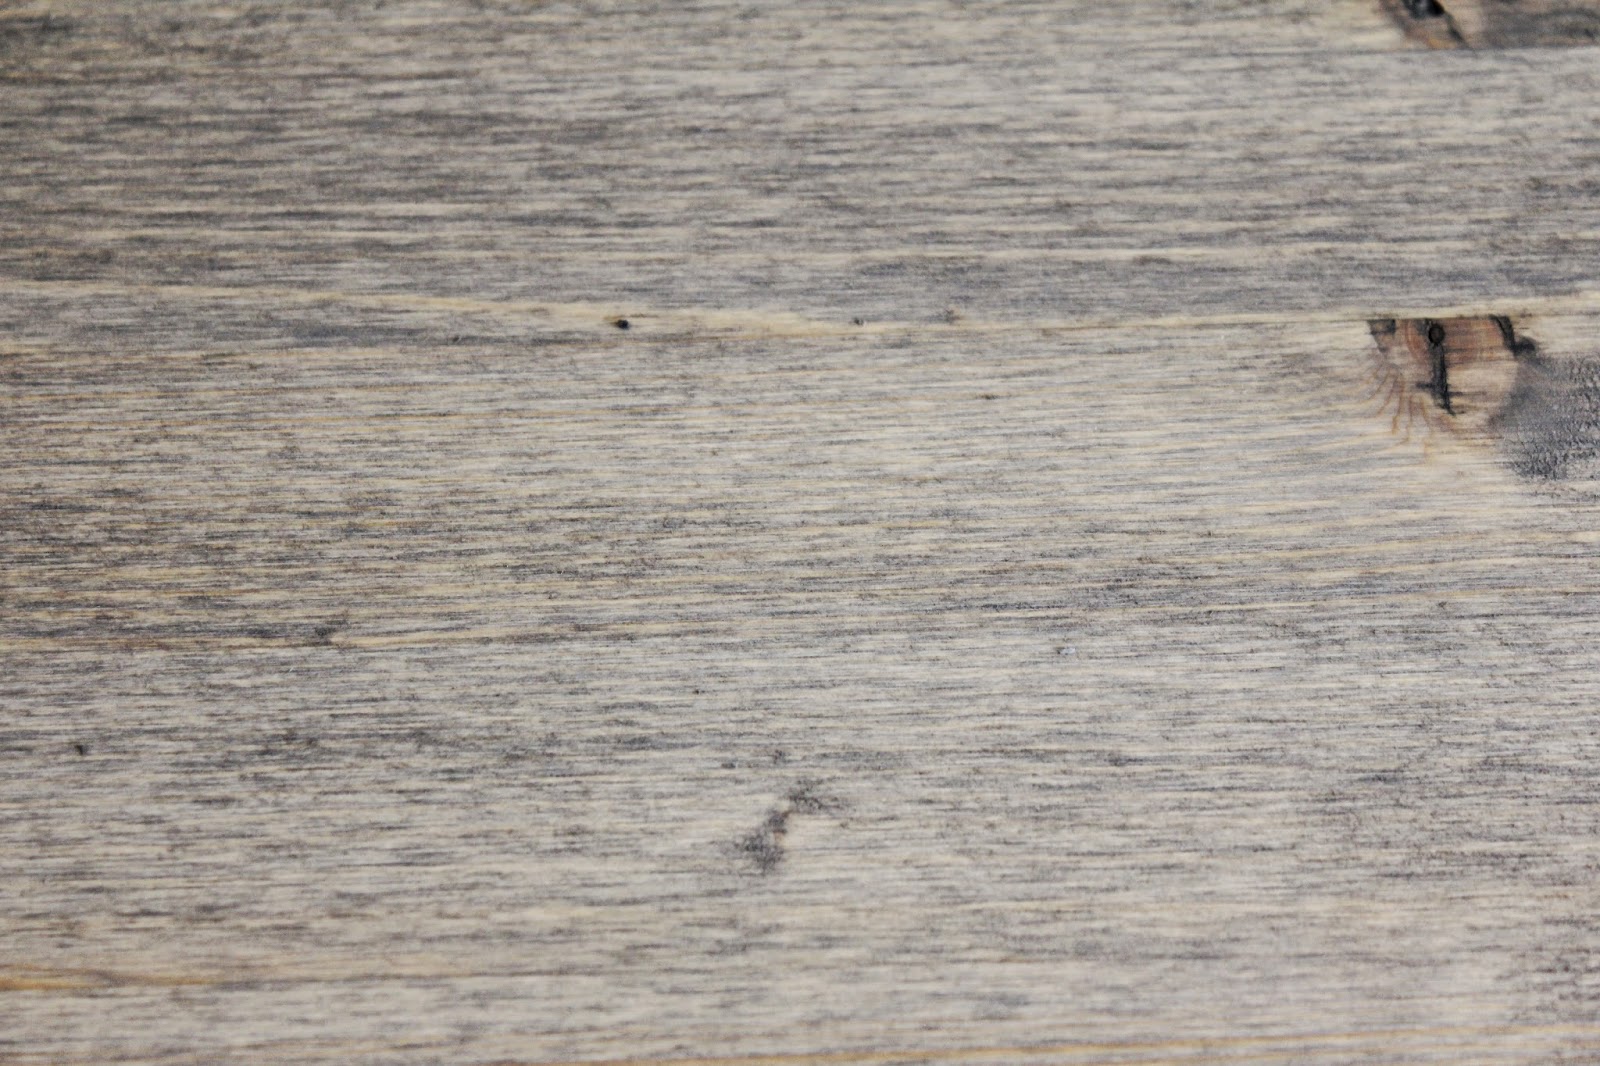
As I got started applying the stain, I was a little nervous about whether or not it would turn out – when I was first applying it, it was looking awfully purple.  The raw untreated pine has a bit of a “pink” quality to it, and the stain initially looks very purple – parts were blue, and the undertone of the wood was showing through, but fear not – as it dries, the colors meld together, and it will turn out nice and greyed out like below.

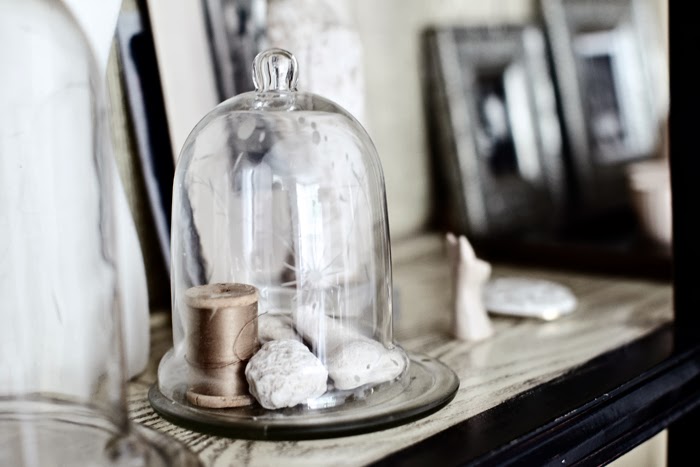
You’d never know this wasn’t an old reclaimed piece of wood now that’s dry and cured.

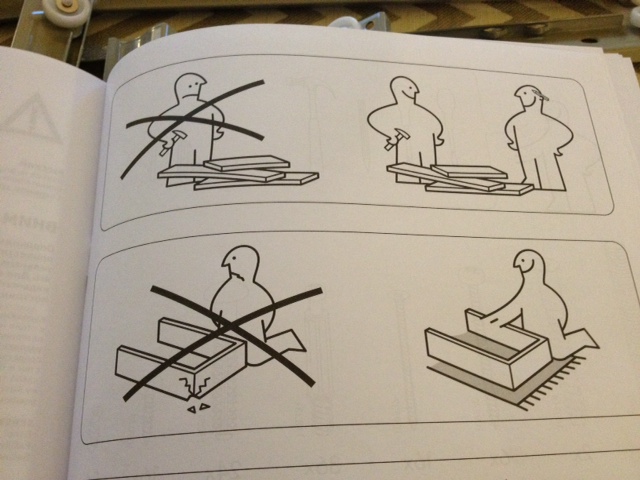
My father will kill me if I don’t add this bit in – once you’re finished staining the wood, DO NOT throw your rags and brushes in the trash.  The chemicals generate heat which could catch fire if not allowed to dry out – lay them flat in open air to dry completely before throwing everything away.  No one wants to start an unintentional fire.

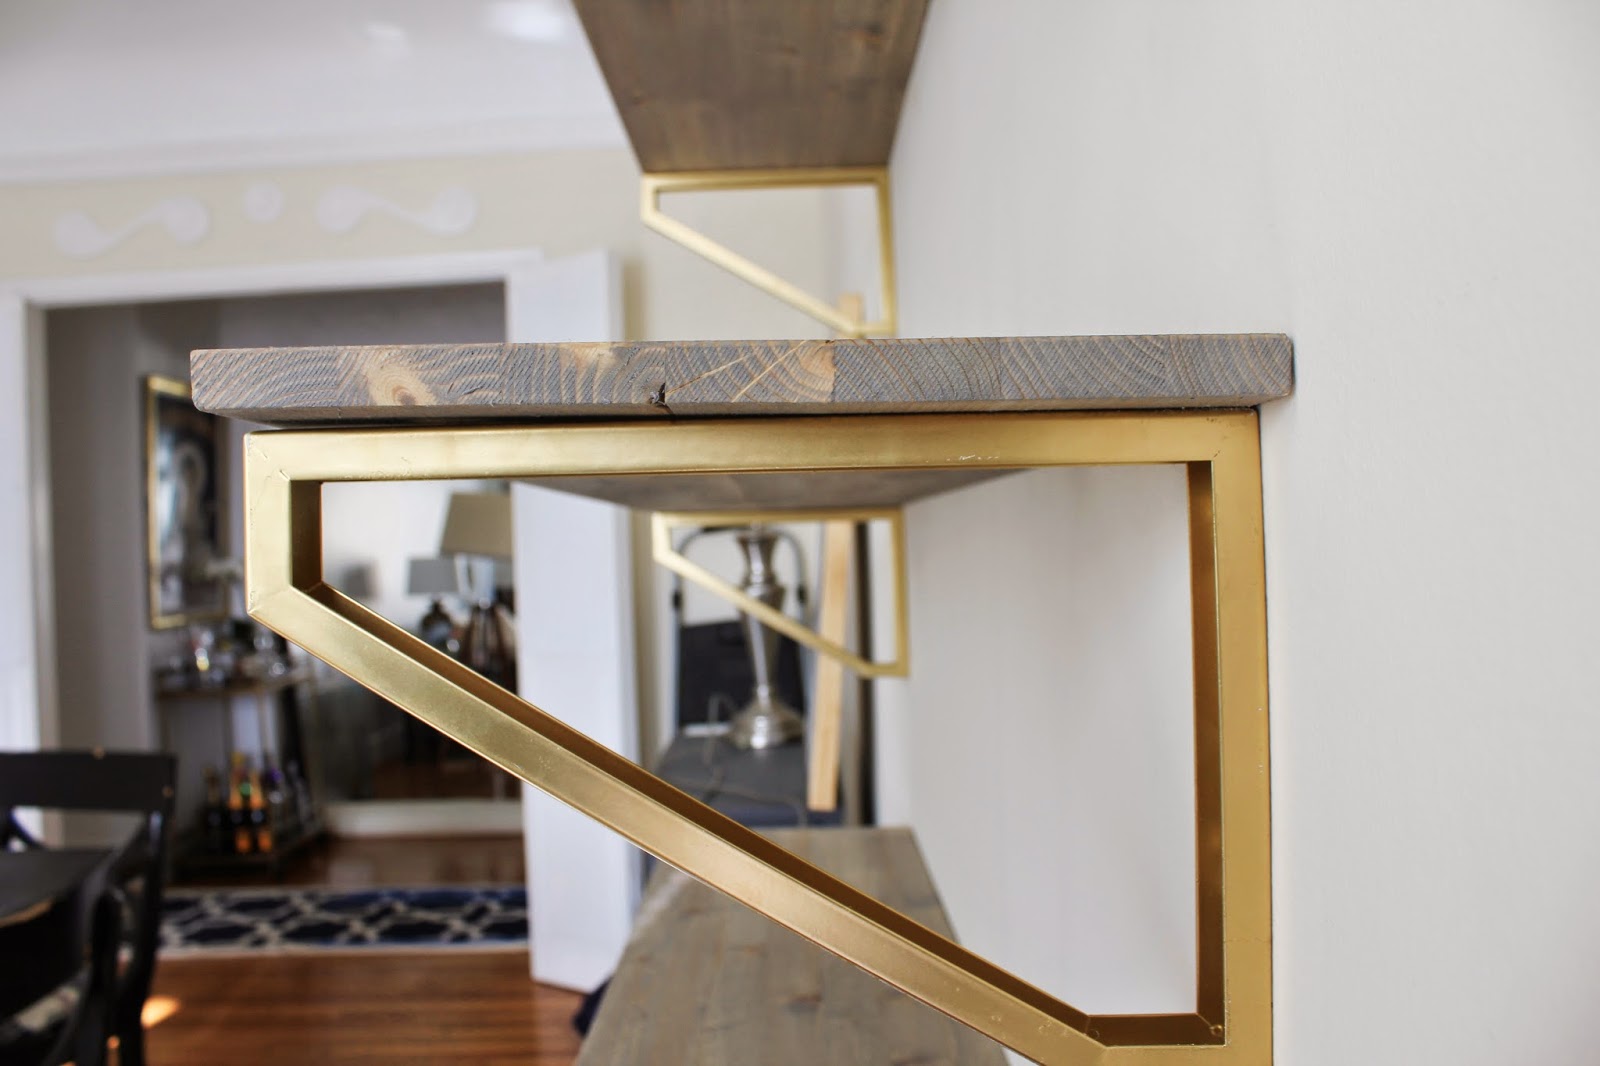
Anyway, as the stained wood was dying, I laid out all the brackets and sprayed them gold.

Simple.

Once everything is fully dry (I’d give it a full 24 hours for the spray paint to cure) everything should be ready to be hung.

Since the wall brackets screw into the wall, I wanted the screws to be as incognito as possible.  You could spray regular screws gold, but I went the easy route and bought brass screws from the hardware store.  They are more expensive than normal screws (about $0.55 per screw) but worth the time I saved and the finished look.

The DIY was the easy part, getting them hung was the most time consuming!

When hanging shelves (or art, or anything really) measure very carefully, and mark out your holes before drilling or hammering anything.  That way you’ll end up with fewer holes in the wall.  Also, a straight edge and a level are your best friends.  There is nothing worse than crooked shelving.

Anyway, I’m thrilled with how this all came together.  Even though this project cost me next to nothing, they look really expensive, and even though all the pieces came from Ikea, they feel really unique because I was able to put my own spin on them.

I have another post coming your way later this week with these gorgeous shelves all styled up, but that’s a whole separate post.

It was a lot harder than I thought it would be!  It was also a little painful to cover up my beautiful shelves with books and pictures, because I was loving the simplicity of how they looked on their own. After a few failed attempts to style the shelves, I did a little researching around “how to properly style shelves” and while they aren’t perfect, I have a few pointers I picked up that really helped me out in the “styling” department.

Happy Monday!

Black and White and Grey All Over

I just cannot get enough of this image…

I am absolutely loving the greyed out wood floors, and the perfectly imperfect dining room table, and all the lovely muted colors…. but what I really love the most is the awesome bookshelf in the background.  Totally unassuming, but so cool – a little industrial, a little classic, a little natural. It’s amazing.

I’ve seen lots of bookshelves with patterned backs – using wallpaper, fabric, wrapping paper… but I really love how the back of this bookcase has simple planks of wood.  The greyed out, light wood allows all the accessories on the shelves to take center stage, but while they are a “quiet” muted slate for displaying the contents of the shelves, I think that they bring something really special to this bookshelf…

I also love that the shelves of this bookshelf are made out of the same cool muted wood (or is it “wood”… so hard to tell!).

After admiring this bookshelf for a while, I started brainstorming how to recreate this awesome bookshelf, and came up with a game plan.

The bookshelf in this picture looks A LOT like the Vittsjo Shelving unit from Ikea

The problem, is that since the Vittsjo is made of a lightweight metal, it’s would require some serious skillz to securely hang rustic wooden planks from the back.  I’m actually not convinced that it would really work out… it seems like a terrible idea to mount heavy wood planks on one side of a light weight frame.  I can just picture that thing toppling over.

So, to avoid DIY catastrophe, I say that using actual wood is out… going to plan b, I’m thinking something sturdy but lightweight like particle board would be a MUCH better bet. It’s cheap, so all you would need are a few long sheets at Home Depot (they can measure and cut to size for you)!

Once you have a long piece of particle board cut to size, it’s time to get creative.

Queue up the Faux Bois Rocker

This one is Martha Stewart, but I’m sure there are others out there…  doesn’t look like much, but it creates the COOLEST EFFECTS.  It’s to be used much like a paint roller to create the cool look of wood, on flat surfaces… walls, dressers, foors, shelves… you get the idea.
Here are a few good examples of a faux bois finish…

Pretty awesome, right??

The last photo comes from Little Green Notebook, and she has a FABULOUS tutorial on how to create this effect.

OKKK – now that we’ve gone down the faux bois rabbit hole… I’ll continue.

Create this finish (perhaps more subtly) on the MDF / particle board, screw holes in the bookshelf and attache the boards to the back.

So easy, and likely $100 for the entire project (or less if you are able to find a Vittsjo on Craigslist).

I REALLLLYYYYYY want to try this now!

Full Dresser Reveal – Ikea Tarva Hack

So last week I’d jumped the gun with excitement and posted a few blurry pictures of the newly painted dresser that is in our room functioning for storage and as a TV stand…
This has been a long time in the making… remember LAST FEBRUARY when I first started talking about this???  Well, it’s only taken me eight months to finish this project 😉  With the hardware attached, I can OFFICIALLY check this project off the list!
Yep, that’s my reflection in the TV!!

I can’t even begin to explain how good that feels to be able to say it’s DONE.  Phew!

I am so pleased with how it turned out – the ultra-marine blue paint color brings such LIFE to our bedroom without being overwhelming, or too in your face.

I am in love with how it all turned out, but it was a LONG road to get here… let’s start at the beginning…

Ikea… on a Saturday… NIGHTMARE.  I got in, I got out, and a glass of wine later, I was ready to get the party started get this dresser built.

Step one: organize nuts, bolts, and assorted other random pieces Ikea packages up.

All I’ll say is… be VERY CAREFUL to be sure that you are using the right little screw thingy for each step of the process… you do not want to have to go back and take apart the dresser halfway through because you used the short screw and not the long one – TRUST ME on that one.
You may also want to enlist a buddy to help read the instructions… they use pictures, not words, and some of the little drawings I STILL can’t figure out…. bottom left picture… what do you think that says?? “Don’t break the furniture you’re building?”  Is that what it means?  Thanks Ikea… wise words…
I’ll spare you the boring details, but our living room was a disaster zone for two nights, as it went from this…
To this… an almost completed dresser! 
WITH FUNCTIONING DRAWERS.  
Holla! 
Look at those drawers… that open and close smoothly.  A work of art I tell you!  I’ve never experienced a more satisfying moment.  
Well, except for that time when I was home from college, and went to Costco with my mom, and saw that the girl that bullied me all through high-school was working the front door…  that was also an EXTREMELY satisfying moment… Deanna!  Is that you??  Going places in life I see… 
Another story for another day… 
Anyway, it felt REAL good to get the drawers working…
Moving on… the wood is pine, which means that it secretes oil from the knots in the wood for years… YEARS PEOPLE… so to be sure that the knots stayed hidden, and that my lovely paint job stayed intact without any bleeding from the wood, I used a super-duper primer.
Kilz primer got the best reviews online for sealing in wood oils on pine furniture, and so far so good.
I read that having the primer tinted made things MUCH easier to paint over when using a dark paint color.  I am SO THANKFUL I did this – I probably saved myself an extra coat of paint (or seven), and many frustrating hours in the long run.

The tinted primer won’t be as dark as your paint color, but it helps SO much.  It went on a light blue (pictured above) – I did 4 thin coats with a roller (to be sure none of that oil from the wood came through over time), let it dry, sanded it, wiped it down really well.

Then it was time to paint.

I just did regular water based paint (for easy clean up) in a semi-gloss – three coats with a roller later, and these bad boys were drying in the living room…

The most interesting thing to me about this paint color is that it photographs so differently in different lights, and that’s actually how it is in real life.  In bright direct sunlight, it’s a rich peacock blue, but in the afternoon it’s definitely a darker moodier version of itself… sometimes it almost looks like a dark green.
Like a mood ring – it’s totally fascinating to see!
Remember my inspiration for this color?? It was this Peacock Blue Dresser from Dimples and Tangles that got the creative juices flowing – I still love how her’s has the lacquered look.  
It’s AMAZING.
Anyway, you all know about my love of the brass hardware – it was quite a hunt to find!  My first order was cancelled because they ran out of lion head pulls!  WTF… I had to hunt it down elsewhere, which added a few extra weeks onto this project.

The dresser was in our room, just waiting for those pulls, and when they came, I was even more excited with how cute these guys were!  Quite sassy if you ask me.

RAWRRRRR.
And so, that’s the story my friends…  are you ready for the massive photo dump??  Here we go!
The view from my side of the bed… that’s a pretty realistic image of how the paint color reads in person – like the color of the ocean 40 feet down… gorgeous!
And a few close up images of the hardware against the paint…

Our old problem was that the TV stand that had been in here was too low to the ground so we couldn’t see the TV from the bed… especially once we bought our giant California King, with the extra high box spring.

Now, as you can clearly see, the TV is at optimal viewing height…

This room is SO TRICKY to photograph – it’s not big, and so this was the only angle where I could really get the whole dresser in.  Awesome photography skills – clearly.

And as I’m posting these, I’m realizing that there are a few unintentional selfies where I’m reflected back in the TV.  In my pajamas.  Awesome.

On another topic, how awesome do those navy and white curtains look with the dresser???  Totally baller.

Next up on the list… what do we do with this wall above the TV??

It’s a HUGE improvement to have the TV higher on the wall, but it’s still very empty feeling.  I know I have a bit of a problem and want to put something on every wall, but I swear to god, this wall NEEDS something.  I was thinking sconces, but the lazy part of me is like… ehhhhh.

If we didn’t have so many freaking mirrors in this room already, I’d consider a trio of round convex mirrors, and I haven’t completely ruled that out, but I’m trying to think of something other than another mirror…

Here’s a photo of our lovely dresser from the bathroom door looking back towards the hallway and our dining room / office area.  I love that the spaces have a really cohesive feel…

Oh, and don’t forget to notice our dust ruffle on the bottom of the bed.  It’s a subtle change, but a HUGE improvement since you could see all the crap stuff we were storing under there and it just looked so unfinished, and ugly, and messy, and terrible.  UGH.

Now it’s hidden and I’m SO much happier.

This next photograph was taken from an angle I don’t often capture since the salmon tile in our “art deco” (aka old as hell) bathroom is all up in your face.

What you can’t see (thank god) is that the shower was re-done at some point since the 1930’s, and in an attempt to match the coral tile, they went with pink.  Pepto bismol pink.  That doesn’t match.  Not even close. Oh well…

And just for good measure (and since i was already in there with the camera) I got a few photographs of the headboard and new bedding together.

I’m liking this combination for fall, and I love that the Duralee fabric on the bolster ties in with the other colors in the room, and brings a punch of color to wake things up a bit – as you can see, I’m still on the hunt for euro shams.

Standing a bit further back, you can see yet another empty wall that kills me a little every time I see it. The wall above our bed and headboard just needs SOMETHING.

I think I nice oversize clock would be nice here – again, trying to stay away from more mirrors in here… plus it will help keep me on time as I get ready in the morning…

So that’s it!  The new dresser / TV Stand / Ikea hack is complete!  If you need to find me, I’ll be in bed watching TV from now until forever.

Just kidding.  Kind of.

Happy Tuesday!!

Ikea Hack – Dresser turned TV Stand

Man oh man… is it Friday yet???

This week, I’ve been up to my eyeballs in this…

Accompanied by these – SUPER confusing building instructions…

BTW, what is that first picture trying to say? If you try to attempt this alone, you will fail??  Whatever Ikea… I’m a one woman show!

Just call me Tim the Toolman Taylor!

As of this morning, this is where my newest little project stands.  Give me some credit!  Those are 3 fully functioning drawers on this bad boy!!  They line up and everything!  Woot wooootttt!!!

While I may be celebrating my carpentry prowess a little early, I need to start making some decisions on the direction of this new dresser / TV stand.  It’s moving into our bedroom (hopefully sooner rather than later), and I’m starting to think that my original plan for this dresser makeover needs a major overhaul few updates.

This photo was my original inspiration for the dresser makeover.  Pretty right?  Simple and clean with pretty gold hardware…

What’s the problem you ask??

It’s going in a beige room, with all white bedding, and a creme colored rug.  After giving it some thought, I think it’s going to be too blah in there if I paint this thing white.  We need some wow factor!

I turned to Pinterest for a little inspiration (duh, where else) and saw a few pieces of furniture that I’d pinned long ago.  The little wheels in my head started to turn…

Peacock blue!  Why didn’t I think of this before??

Can’t you just imagine how fabulous this is going to look, in a nice glossy finish with some brass hardware??

Speaking of hardware… check this out:

You like??  I like!!  They are from some random site called eFaucets.com, but at $1.50 each, they could be coming from Timbuktu and I wouldn’t care.

Thinking it’s a bit much?  It’s not.  I don’t think…

Look at these totally tasteful examples of how to incorporate a brass lion’s head drawer pull into any room!

Source Unknown 

See, a traditional take above….

And a little more sassy below…

Source Unknown 

Either way, its $20 total for 12 pulls, so if I hate them, it’s not a HUGE loss, and if I love them… then it’s potentially the best $20 I’ve spent yet!  I mean how cool are those lion heads?!

Wish me luck, I hear that priming and painting pine can be a huge pain in the you know what (apparently pine seeps sap, making the paint harder to adhere??)

Restoration Hardware Iron and Rope Mirror… the DIY version…

Meet my new little friend…

The large round Iron and Rope from Restoration Hardware

He’s rustic and cool and old timey, but welcoming him into your home won’t make you seem like a suspender wearing, fake-old-timey poser… but just a cool collector of rad things…

The problem??

$650 for a mirror???

I think not!

But how easy could this possibly be to replicate??  Sure, those knots are the complicated knots of a skilled sailor, but heck, I’m sure it’s nothing a quick Google search (or help from my father… who is a skilled sailor) can’t fix!

Let’s find some eligible mirrors, eh?

Here are a few contenders… I’m liking both the size and thin rim around the Ikea version – and that could EASILY be painted black.

This is how I see it all coming together…

I’d mount the mirror on the wall (as opposed to appending the rope and using that to hold the mirror’s weight.

Then I’d find some good rustic rope (I’m sure any hardware store supplies it), and tie some ornate knots at each end.

Glue to the sides of the mirror.

Get a largish door knob, and spray paint it black.

Mount the doorknob on the wall where the rope can loop over it… to give the illusion that it’s hanging

And voila!  For a lot less than $650 (and dare I say it… probably quite a bit less than $100) you have a very close substitute for the Restoration Hardware Iron and Rope mirror…

I Have a Dream… of a Fiddle Leaf Fig

Here’s a riddle for you… what is alive (but doesn’t move on it’s own), has gorgeous green waxy leaves, is ridiculously expensive and favored by every contemporary interior designer who ever lived???

If you guessed the fiddle leaf fig, then you’d be correct!

I mean look how pretty they are!!

Enough with the inspiration photos you say??  You totally get how amazingly gorgeous these plants are???  And you understand why I am completely obsessed with them????  And you are wondering where I am going with this?????

Well, ok.  Let me tell you my little fiddle leaf fig story…

I’ve wanted one of these graphic, big-leafed beauties for going on three years now, but I have discovered that they are pricey.  REALLY pricey in fact.  A 5′ fiddle leaf fig can easily run four-hundred plus dollars… I know… I KNOW… that is ridiculously expensive!!  I have a notoriously brown thumb, so I was not about to shell out several hundred bucks for a plant that I would be likely to kill in record time.

I had heard rumors that Ikea was known to sell these plants, but I’d stalked the Ikea plant section for years without seeing so much as a bit of evidence to show that the fiddle leaf fig was ever actually sold there… I was convinced that this was a total urban myth… or was it???

Fast forward to this past weekend while I wandered the aisles of Ikea, dodging every idiot and their huge cart picking up shelves, brackets, and some of their lovely Ribba square frames… when lo and behold, what did I see??

You got it – a lovely, lonely, (smallish) fiddle leaf fig, nestled among the cheap-y palm fronds and money trees (not to hate on the money tree… I actually kind of like them).  As the Ikea patrons were examining the medium sized palm plants, I deserted my cart, and dashed over to the lone fiddle leaf fig, possibly trampling a few small children on my way.  Um, it was the holy grail – and for $12.99

HOLLAAAAAAAA!!!

Here she is –

Go on… just look at those lush pretty leaves…
And let’s not forget about the basket I found to house it!!  It does NOT look like it came from Ikea.  It’s big and sturdy, but it was still under $30!!  And that’s not it (I feel like an infomercial)… it also has a plastic insert to catch any water that leaks out from watering – keeping your floors dry, and preventing any rot in the pretty basket. It doesn’t get better than that folks.
Plus, look at the nice handles and black detail around the rim – House Beautiful has started to feature decorating advice from the experts in every issue, and last month one of them was “always be sure to include black in every room – it grounds the space”.  Thanks House Beautiful!  Don’t mind if I do!

And a final “beauty shot” of my little fiddle leaf fig… the mirror reflects the rest of the room, so you can kind of see how the rest of the space is evolving in this last photo…

Now I just need to figure out how to keep this little plant alive, and then I can call it a success!!

Rast Hack – Ostrich Leather Upholstered Side Table

It all started with this image…

Can you imagine anything more extravagant??  To have a side table that is upholstered with ostrich leather??  And that brass hardware… stunning.  You all know how I feel about gold.  To die for…

A piece like this would cost the big bucks (can you hear the ca-ching sound in your head???)

But oh how amazing it would be to own a fabulous side table JUST. LIKE. THIS. Since I’ve been put on a budget, and I could never fathom spending thousands on a side table anyway, I had to get a bit creative in brainstorming up a little DIY for this end table…

Here’s what I came up with…

So that means that with a little patience, and a bit of work that you could recreate one of these side tables for less than $115 –  and for just over $200 you could have a pair of them!  That’s my kind of budget!
To recreate this side table, I imagine the steps going something like this…
STEP I: Piece together the Rast side table, prime and paint the top and sides of it gold (leave the drawers bare)
STEP II: Use Barge’s multi-surface glue to secure the fabric to the drawer fronts.  Leave a half inch of space around the edges of each drawer for the trim (side note, if you ever have a question on what adhesive to use, use this site… it’s AMAZING!!)
STEP III: Measure and cut the pieces for each drawer front (you’ll need 8 pieces of trim total – two long for the top and bottom drawer, and six short for each drawer)
**Note: you could probably have the Home Depot cut the trim for you before you take it home to avoid the hassle of measuring the corners and sawing them yourself…
STEP IV: Prime and paint the trim gold
STEP V: Use finishing nails (or even liquid nails) to secure the trim to the drawers
5. Screw in the pulls to the drawer fronts
Ta-da! You’re done!
The hardware is certainly the most pricey part of this endeavor, and I’m sure that with a bit of scouting around, you could find three plate brass pulls for less than $15 each.  
While I’m on a bit of a DIY hold until we find out if we are moving for sure (and when we are moving for sure) this is definitely a little project I’m itching to test out! 

Card Catalog – Ikea Hack

Just last week I was talking about incorporating vintage card catalogs into your home, and just this morning I stumbled across this awesome Ikea Hack to make your own card file drawers!

This Post at The Painted Hive gives you the details on making the very inexpensive (and cheap looking) Moppe Drawers from Ikea into this lovely, antique-y looking card catalog for your desk.

Use a little stain, get some cute brass label holders, flip the drawers backwards, and voila!  I may have missed a step in there, but it’s all very easy – pretty much a 20 minute project.

I also think these would be awesome outside of an office environment. Wouldn’t these be great to hold recipes in a kitchen, or hold makeup, or q-tips, or other bathroom supplies?

Seemed like the other trick to making them appear authentic was to sand the corners down a bit so they looked worn, and using Danish oil for a slight sheen… who knew?!

After a quick search online, I’m seeing these drawers available only on the UK Ikea site, however they may have a different name here.

I’ll report back on what I find!

Gold Leaf Chair – DIY Inspiration

This post all started with this chair that I found on Pinterest…

The text accompanying this pin read: “gold leaf an IKEA chair, genius“… and I myself thought… yeah that IS totally genius!  I want to do this even though we have nowhere to put said gold leafed chair when it’s finished!

So I clicked on the image, and it took me to… an error page.  Is there anything more annoying than a pin from Pinterest with no source?!  Dear pinners of the world, give credit where credit is due!

Moving on… this hack is easy enough… spray the legs red (or aqua, or emerald green, or slate grey, or whatever cool color you think would be awesome) and either gold leaf the seat or spray that gold too.

Zero talent required… my favorite kind of DIY.

I decided to track down this Ikea chair on their site, but alas… it’s either discontinued, or it was never a chair from Ikea to begin with.

I don’t want to let this slow me down, so I pulled together a list of other inexpensive Ikea chairs that this hack could totally work with…

Sources: #1#2#3#4#5#6
I think option #3 is the most similar to the inspiration, but #5 would make some pretty sweet bar stools in a cool kitchen space…
I also thought this chair (at $40 each) could be an interesting spin on this hack…
And not that this chair has anything to do with this post (aside from the fact that it’s from Ikea), but if you’re in the market for some mod lucite chairs… these bad boys retail for just $80 each, and are SUPER on trend right now…
Just throwing it out there…
Anyway, I am still toying with this idea… mainly because I just think it looks cool… not because we need a gold chair of this nature.  Hope this helps inspire!
xoxo

TV Stand with Storage… and Height… and Style…

I have been looking to replace the TV stand in our bedroom for a while now, but it seems like my list of requirements is a mile long… thus making it impossible to find anything that will work!  The current TV Stand was a Craigslist find from a few years back – it’s dark wood, low to the ground, and really nothing too special.  I think it may have come originally from Target. It does the job, but we need something taller, and it NEEDS to have storage.

To add onto this equation – it also has to be narrow, since our monster King size bed moved in with us, and the way our room is laid out, you walk between the TV stand and the bed to get to the SINGLE bathroom in our apartment.  Awesome.

Anyway, I had been thinking “console table” but it’s rare to find a console with storage, and most dressers are too “fat” for this space – we need at least several feet for the walkway, otherwise it is just going to feel WAY too claustrophobic.  I hadn’t been having much luck so far, so my hunt had nearly come to a halt… until I discovered this little gem at Ikea!  The Tarva 6 Drawer Chest.  Hello lover!

I know, I know… it doesn’t look like much, but when I’m done with it, this simple little guy is going to look phenomenal!

Don’t believe me??  Look at a few of these Tarva hacks I dug up online…
Little Green Notebook: Greek Key Dressers.  This is what I want to do to the Ikea Tarva.  I like that this version uses knobs; it makes more sense for a piece that you are going to be opening and closing a lot.
Pinterest… no source
Look at this lovely white number… that high gloss paint, really transforms it into something fabulous, and the greek key appliques covered up the holes where the original pulls went, so each drawer could have a single middle pull.


Source
This is another super cool take on the original – painted drawers – ombre no less – unique pulls, and a stained top and legs??  Talk about a transformation!


Source
No clue how they pulled this off, but they make this brand spanking new chest of drawers look old, and cool, like wooden shipping crates…


Source
And… it’s official… this may just be the most versatile piece of furniture, since it serves as a kitchen counter here!

ikea tarva hack inspired by james mont and hollywood regency aesthetic - who doesn't love an ikea dresser makeover?  photo: ryan brook
Source
Finally, my favorite hack (I think) – this one draws inspiration from Hollywood Regency, and I love loovvveee LOOVVVEEE it.  The gold border and the large gold pulls??

Fabulous!

Can’t wait to get started on my own version!!