Custom Stationary

Who else here reads Cupcakes and Cashmere??  Emily was the second blog that I got into after discovering Centsational Girl.  It was like my eyes had been opened to this awesome little world that I had no idea existed!!

Well Emily has made quite a career for herself, having already published a lifestyle book that spun off from her blog, and she is so talented and relatable – I think that’s why I (and so many others) just love her.  I look to her for inspiration for fashion, crafting, and recipes all the time, but this week she posted about creating your own stationary, and a light bulb went off in my head.

photo via cupcakes and cashmere

I’ve already ordered my own embosser, a few stamps, clear ink, and some heavy cardstock and I’m like a little kid waiting for Christmas morning right now…  I cannot WAIT to test it out!  For more details on how to do this on your own, by all means check out her tutorial and examples

In the meantime, I’ve been looking for inspiration for stationary that I want to try and re-create on my own…

How fun would it be to make some stationary that gives a nod to our little city by the bay??  This would be so cute!

And simple personalized stationary is so lovely with just their initials embossed on it.  This one would make a really great, personal gift for a friend.

And one with chevron… I need to find a larger chevron stamp, but I’m sure I can make that happen… imagine this in gold.  AMAZING…

Anything with dogs would be perfect too… I mean how cute are these??

Ok, the embosser needs to get here already!  I’m raring to go!

I Cheated…

I cheated… but just a little!!

I’m linking up today with Michaela at Michaela Noelle Designs for a fun craft link up party!

There have been some AMAZING ideas posted already, and while I had grand plans to post up a fun paper Christmas Tree project, there have not been enough hours in my day.  Eh, you can’t win them all… so I’ve contributed to the link up with my ornament garland from last year that has held up SO WELL.

Last year it stood alone in the hallway, but this year, it’s a part of the winter wonderland I posted about last week!

Go take a look at some of the amazing ideas and projects!!  Some of them totally doable, and some I know are outside of my talent level…

A few favorites already??

This super charming Swedish Felt Christmas Tree from Southern Distinctions….

I’m obsessed with Sarah’s blog, so it’s no surprise that I loved her feather garland… I just love how it catches the light and sort of glows…

And this felt wreath from Life on Virginia Street is so festive, and relatively simple to make!

If I had a mantle, you can bet your buttons that I’d be whipping up a few of these trees from Little Bits of Home!  I love the tinsel one along with the one with the pompoms.  So clever!!

Have you gone and checked out all the brilliant projects??  Prepare yourself… you’ll get totally sucked in!

DIY Art: Ombre Effect

I’ve found that art can get really expensive.  I’m a huge fan of framing prints (you can order large prints or posters pretty cheap from sites like Art.com or Posters.com) but I love a good piece of abstract art on a canvas.
We have a few hanging in our home that I’m obsessed with – we have one very large piece from Ballard that I’m still obsessed with two years later… it hangs in our living room.  And another piece of black and white abstract from West Elm that is in our dining room.
I believe everyone has a creative streak in themselves, so I wanted to start posting ideas about creating art for your own home. First up… an ombre art project…
For this project you’ll need:
  – A large stretched canvas (or small… if you want to test it out before going big)
  – A 2″ foam brush (they are cheap, and you can toss it when you’re finished)
  – A super saturated paint (any kind of paint would do… wall paint, craft paint, oil…)
  – White paint
  – Plastic tray or plate for mixing (something you can throw away – Tupperware works too)

Once you have all your materials, it’s time to make some art!

Start with the darkest color first – squeeze out a bunch onto your plastic tray / plate / tupperware, and load up your foam brush.  Make a single long streak starting at the far left.  You’ll probably need to load up your brush several times if you’re working on a larger canvas.  I like that the edges here are more streaky, and the middle is solid – I’d start in the middle and work out to the top and bottom to be sure it’s nice and textured on each end.

Add a bit of white paint to the mix, stir it around, and paint your next stripe.

As you go, continue adding white to lighten the color, up until you’re finished. The final stripe should really be a wash of the color – nearly colorless.

I am loving the green they used above, but you could do blues, blacks and greys… really any color combo that suits you!

Fun, right??  I really want to try this out!

DIY Paper Mache Pumpkins

Happy Friday you guys!  Are you as excited for the weekend as I am??
So I saw this fabulous little Esty shop that sells these charming pumpkins, and not to derail her business (at ALL), but I was just thinking of what a fun DIY project these Paper Mache pumpkins would make.

I’m thinking that it could be as easy as this…

Supplies:
  – Small Pumpkins
  – Glue
  – Craft Brush / Foam Brush
  – Small Container
  – Old Books
  – Moss

1. Buy some small irregularly shaped pumpkins from the grocery store (look for ones with long stems)
2. Mix one parts glue (Elmer’s white glue) and one parts water in a small container
3. Rip book pages out of an old book you’ll never read again (hey, I just gave you a use for the copy of Twilight hiding in the bookcase!)
4. Tear pages into small pieces
5. Adhere pieces of the book pages to the sides of the pumpkin
6. Glue a bit of moss around the stem of the pumpkin
7.  You’re done!

You could mix it up like the pumpkin on the far right, and use plain creme colored paper and finish it off with a cool stamp…

You could take things a step further and use a little gold leaf on a few of these…

Like the above pumpkins, you could hang small jewels, brooches, or name tags off of these – how cute would these be as a name card for a place setting at a spooky Halloween dinner??

I might have to give this DIY a go!

Happy weekend 🙂

Re-upholstered Seat Cushions

Amen to Friday!

I’ve actually been down in LA for the week – my first week on the new job – so I’ve felt really disconnected from everything “normal”.  The weather was so fabulous, and LA is one of those places you always feel like you are on vacation, but it was a busy week for sure.  After a wonderful start to the new job, I am so happy to be back home, with Kris.

I’m ALSO excited to share a mini DIY project I worked on last weekend!

Our dining room chairs were looking very sad.  I bought them from Craigslist with an antique (aka old) table for $50 total, and since buying them over three years ago, I have done nothing to fix them up.  I like to refer to the chipped paint as “shabby chic” but the cushions were just plain sad.  The old linen fabric was yellowed from probably decades of wear, and they were badly stained (from god knows what).

Actually confessing that on paper is so embarressing since we lived with them like that for YEARS, but last weekend, I finally did something about it.

While at World Market (picking up our FABULOUS new tripod lamp… yes, I pulled the trigger on that), I saw some curtian panels on sale for 50% off.  For just $15, I scored some amazing fabric with enough yardage to cover four seat cushions (and then some).  Sunday afternoon, I busted out the staple gun and went to work…

Here are a few “before” shots so you can appreciate the afters:

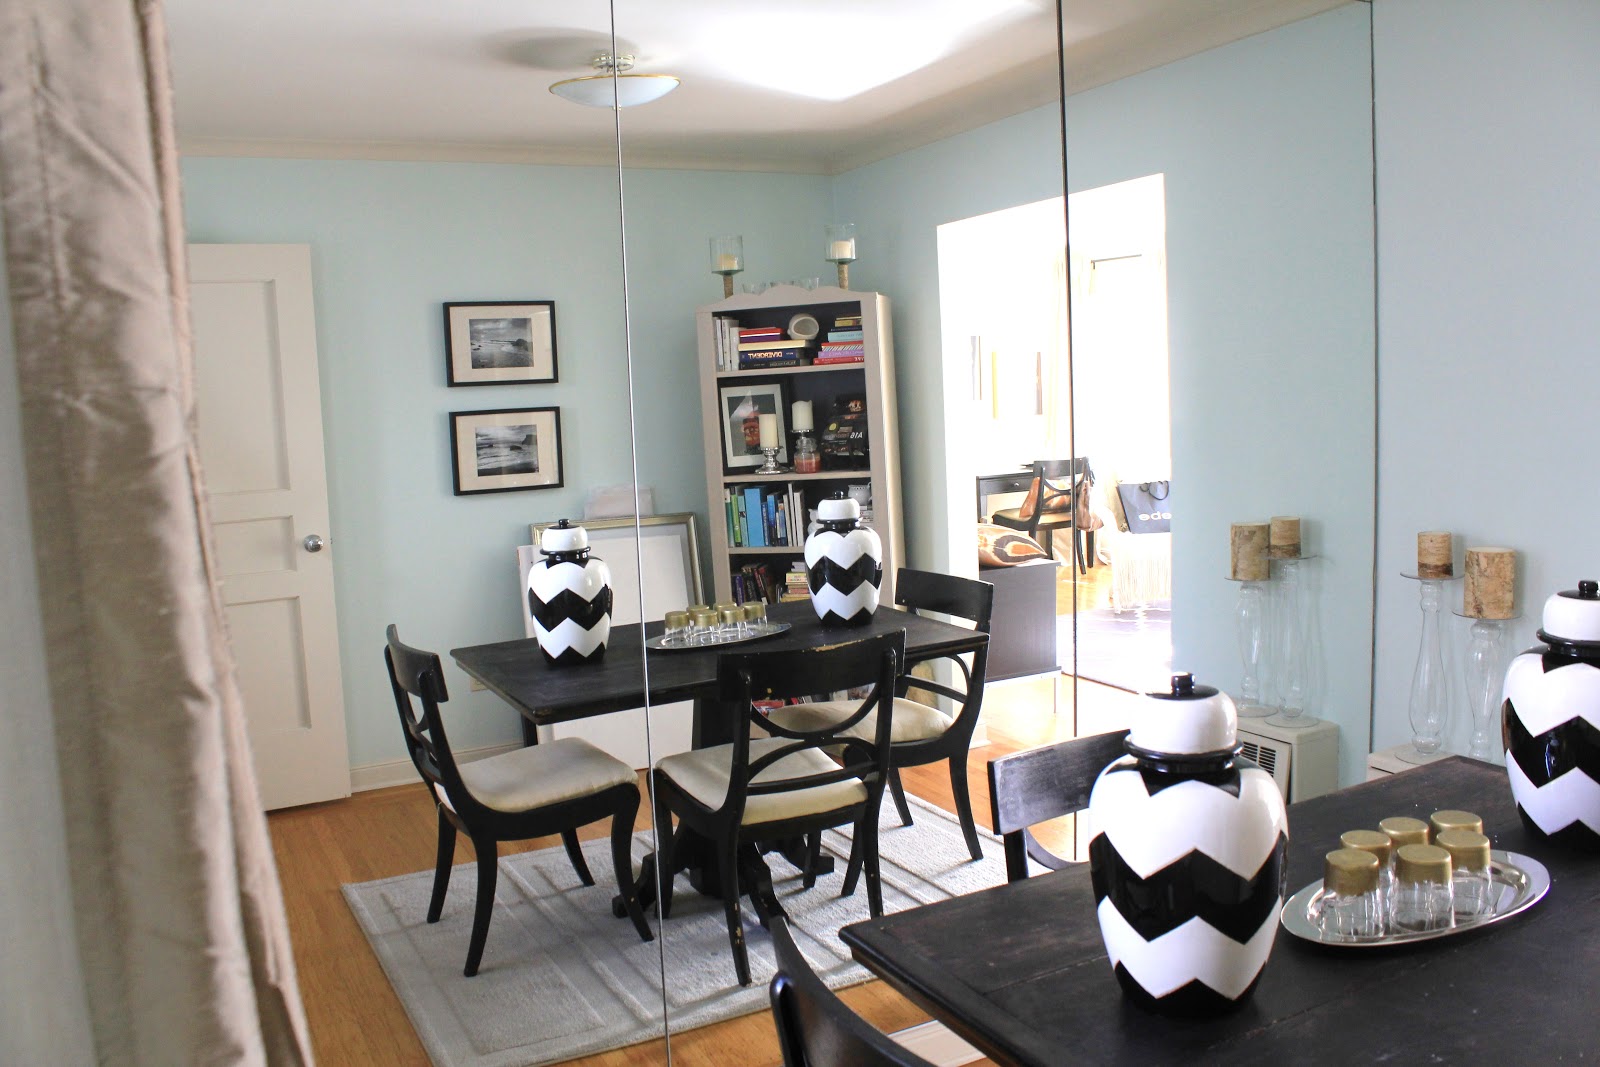
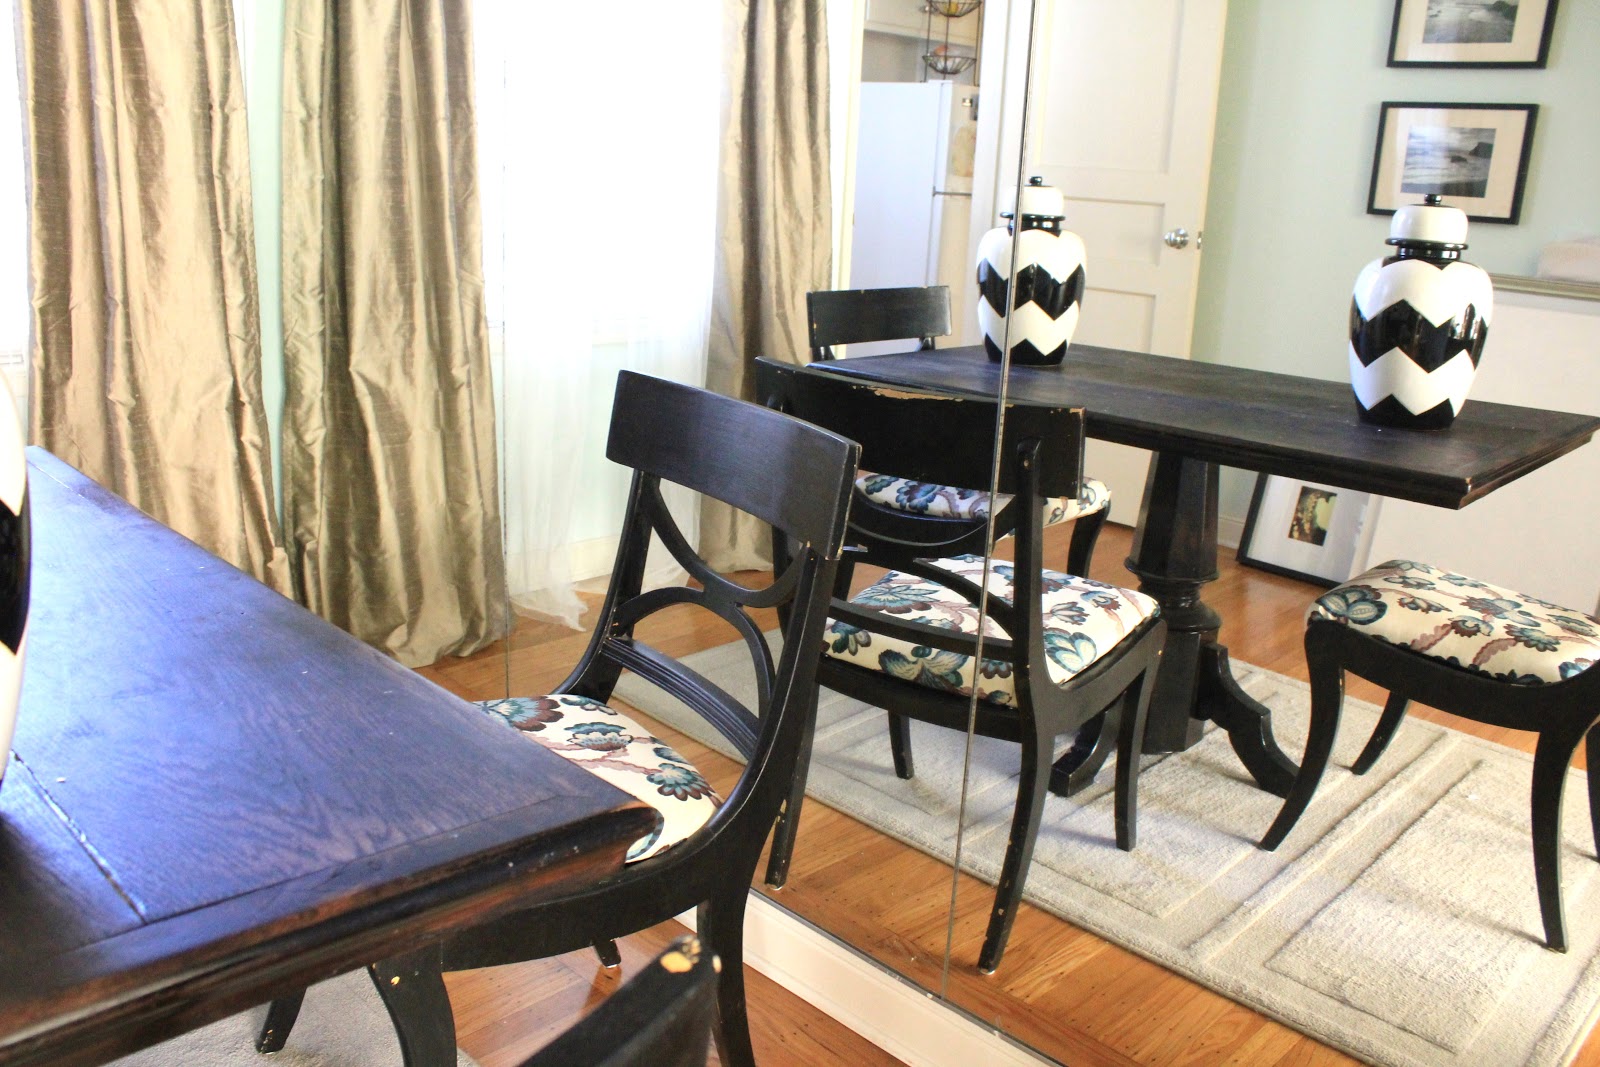
This is looking into the dining room from the living room – not awful, but the chairs were definitely on the plain side from afar…

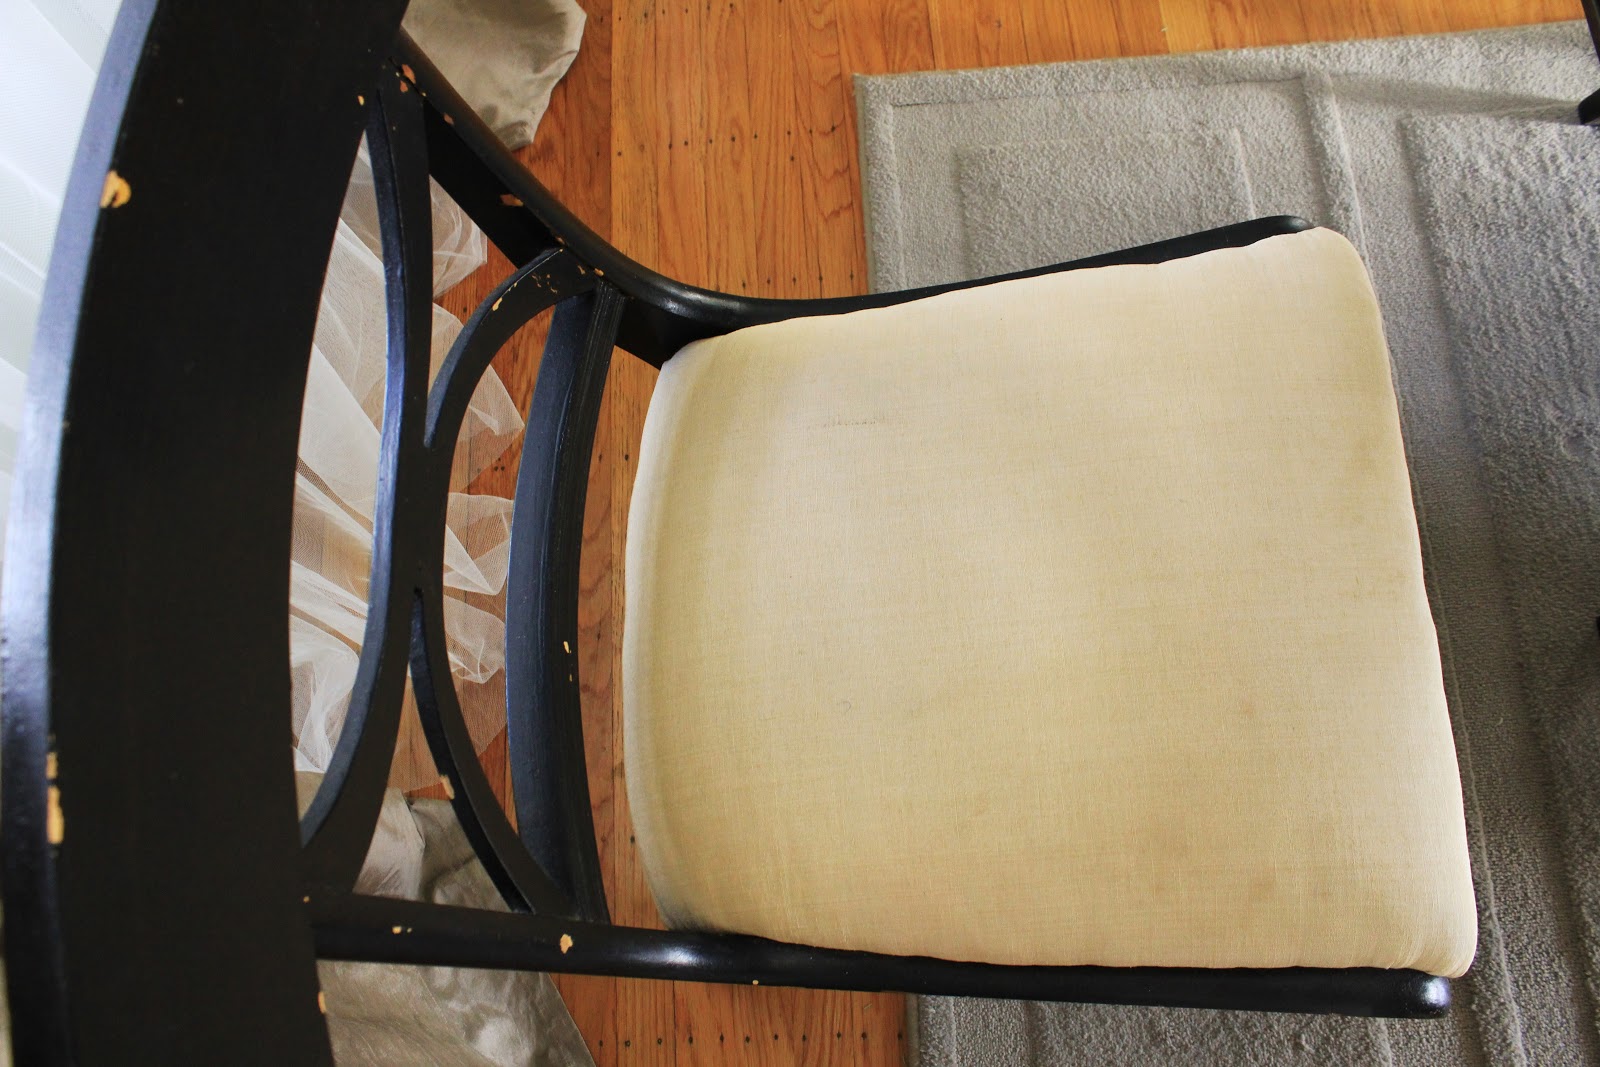
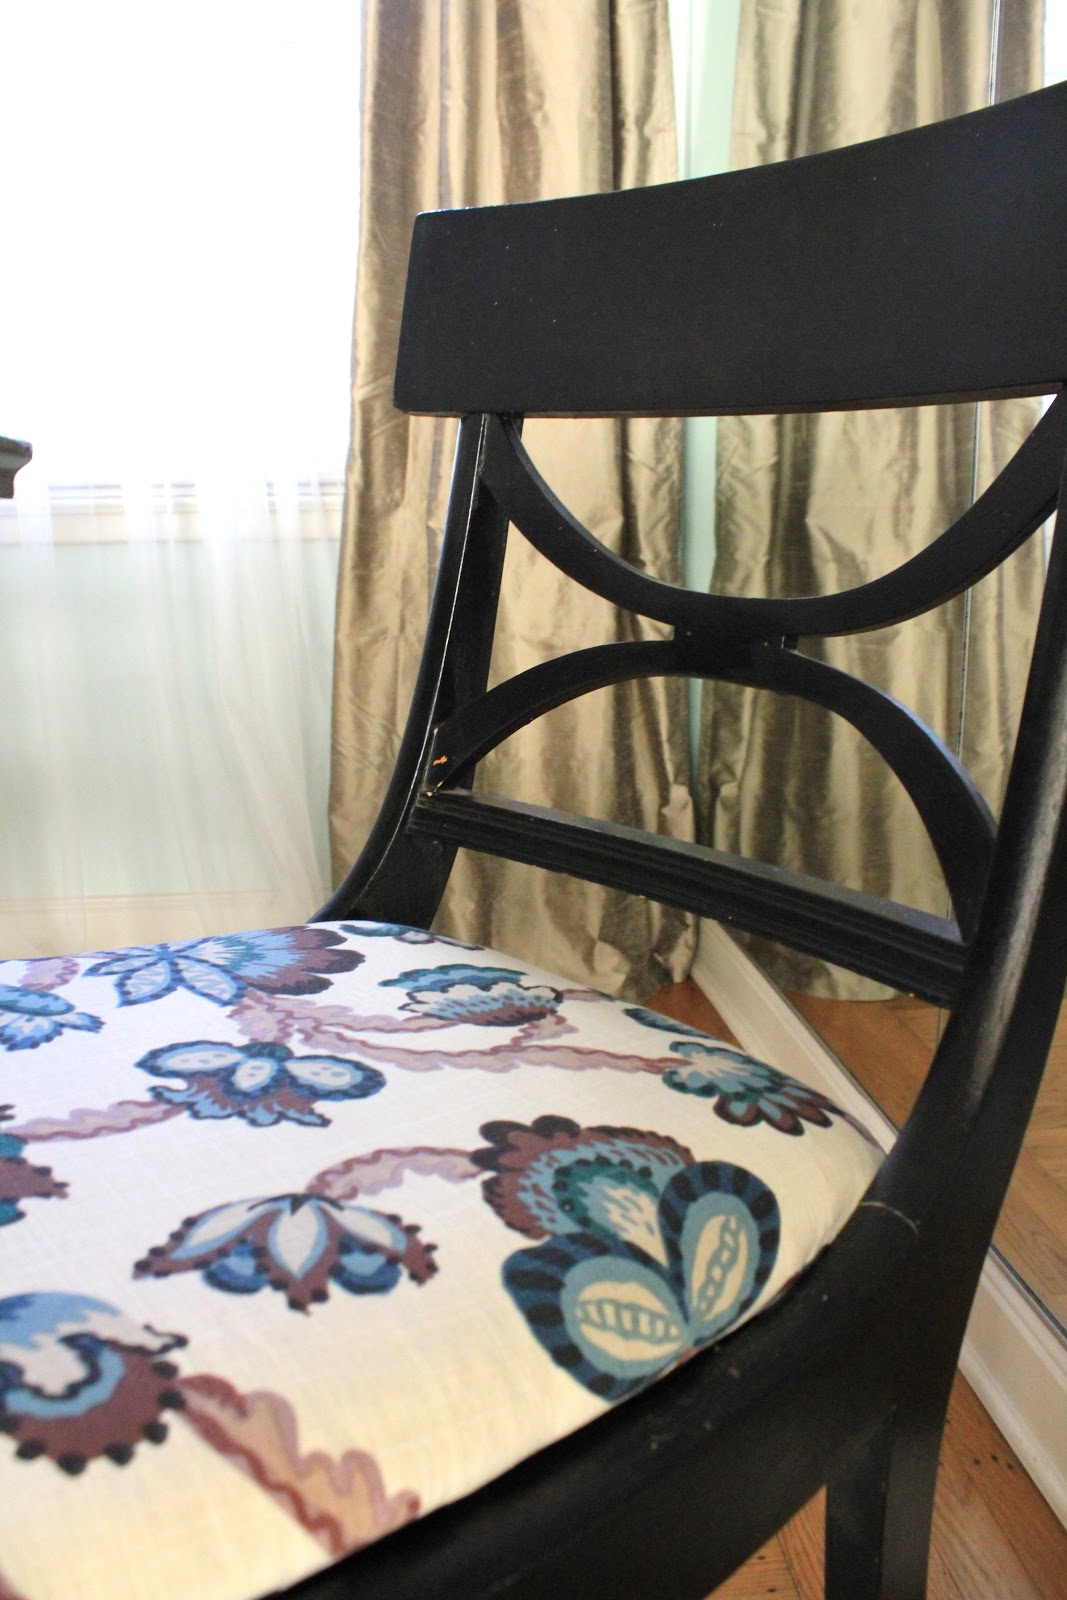
 Closer up, you can really see how badly the paint is chipping…

And another angle – this room is pretty small… maybe 11’x10′, so it’s hard to photograph from a distance, but the mirrored wall helps a little… also, ignore the mess in the corner – those frames are still waiting to be hung!

Ok this photo is the last “before” that I’ll post, but this one does a really good job illustrating how disgusting the fabric was – stained, yellowed… this is so embarrassing!  I can’t believe we lived with these for YEARS.

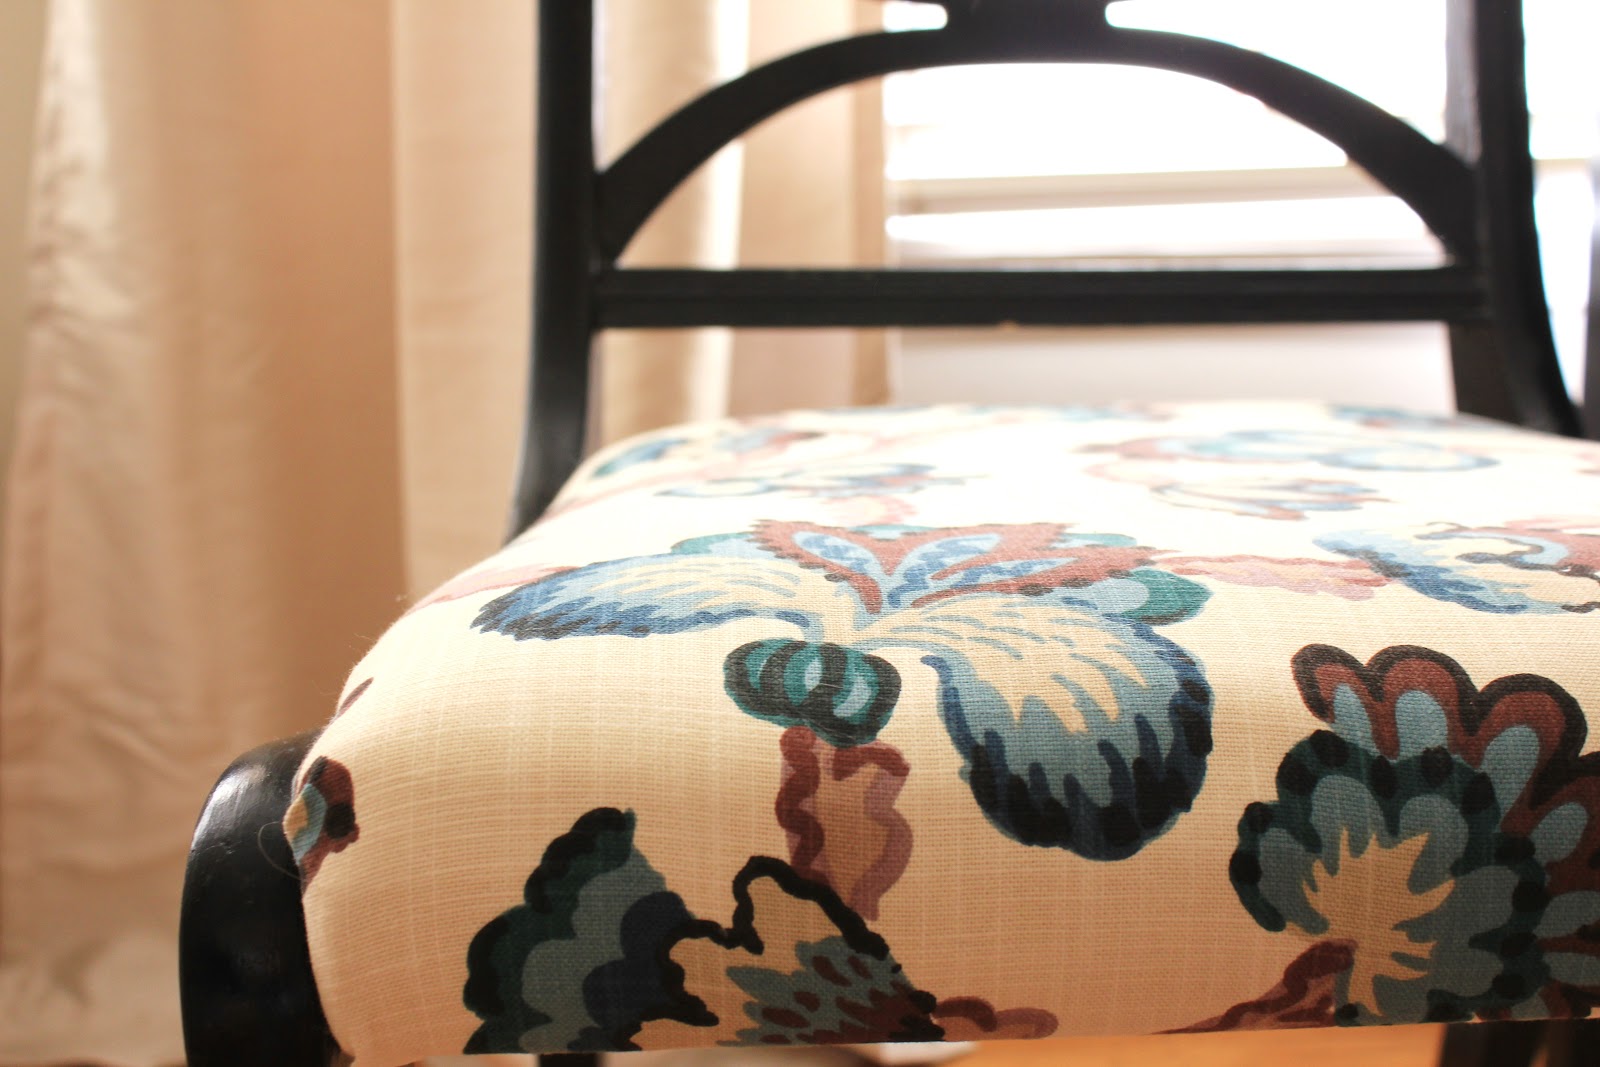
Ok time for the “after” shots!! Here they are in all their glory!

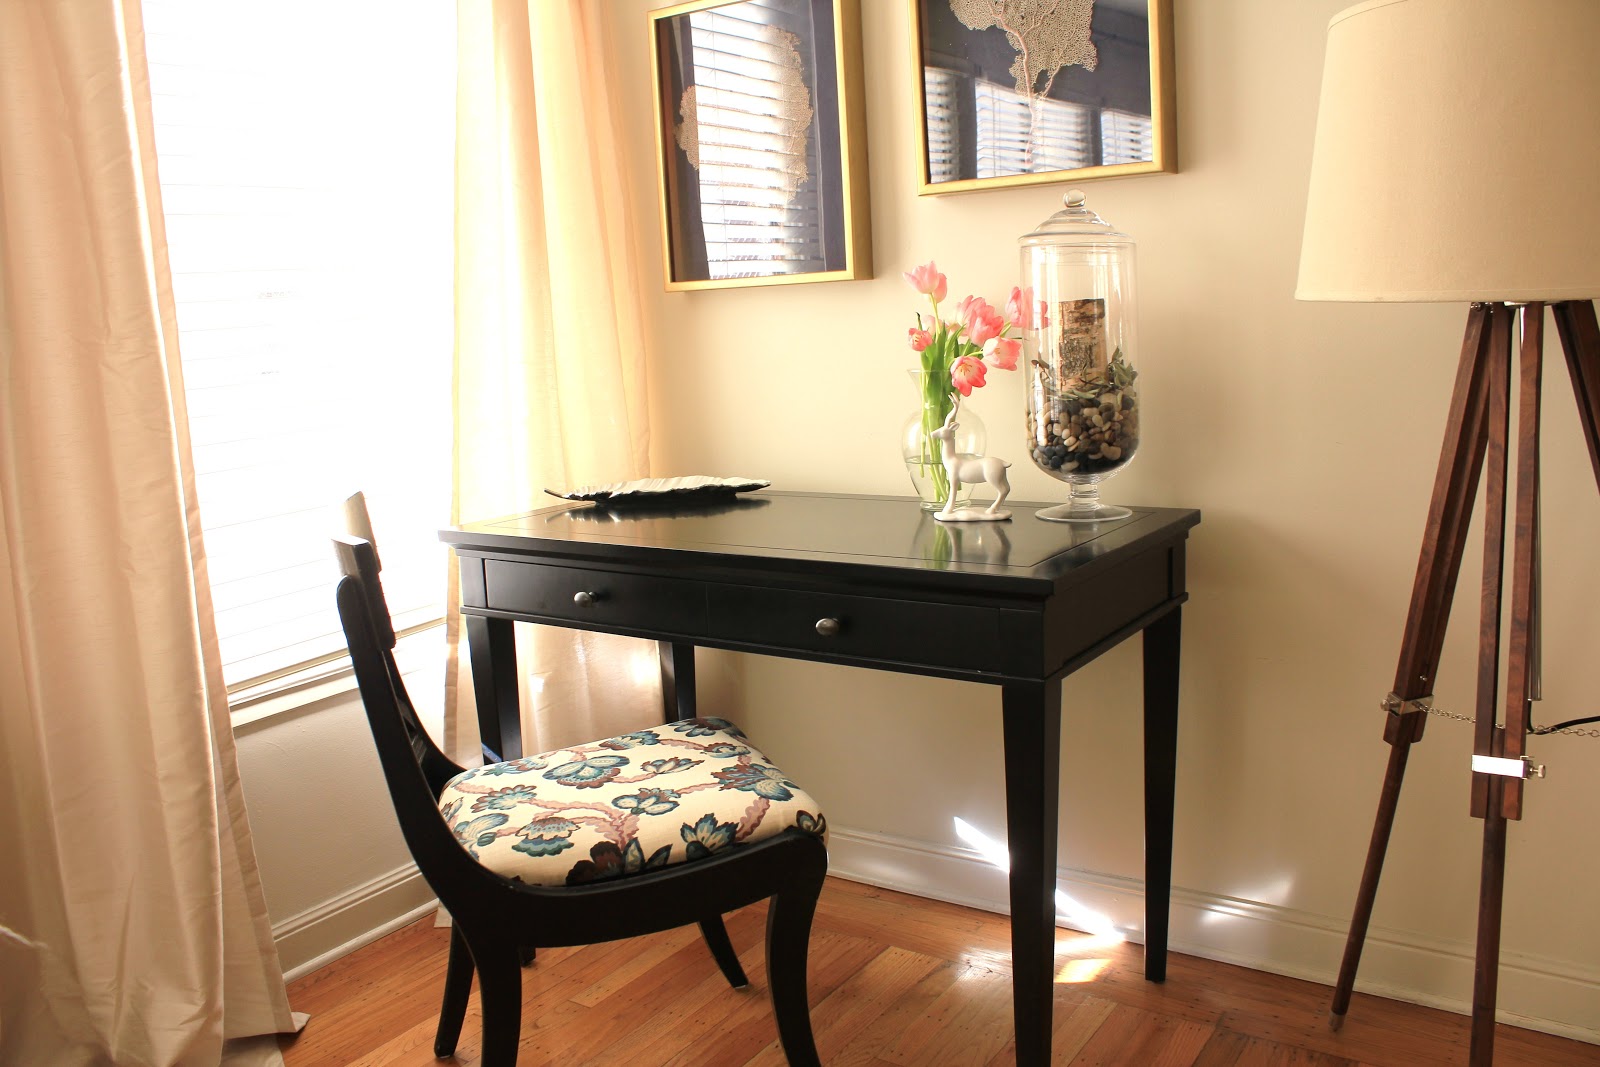
One of the chairs still acts as our desk chair, but I love it as much in the living room as in the dining room, and dare I say it… it looks amazing with the tripod lamp 🙂

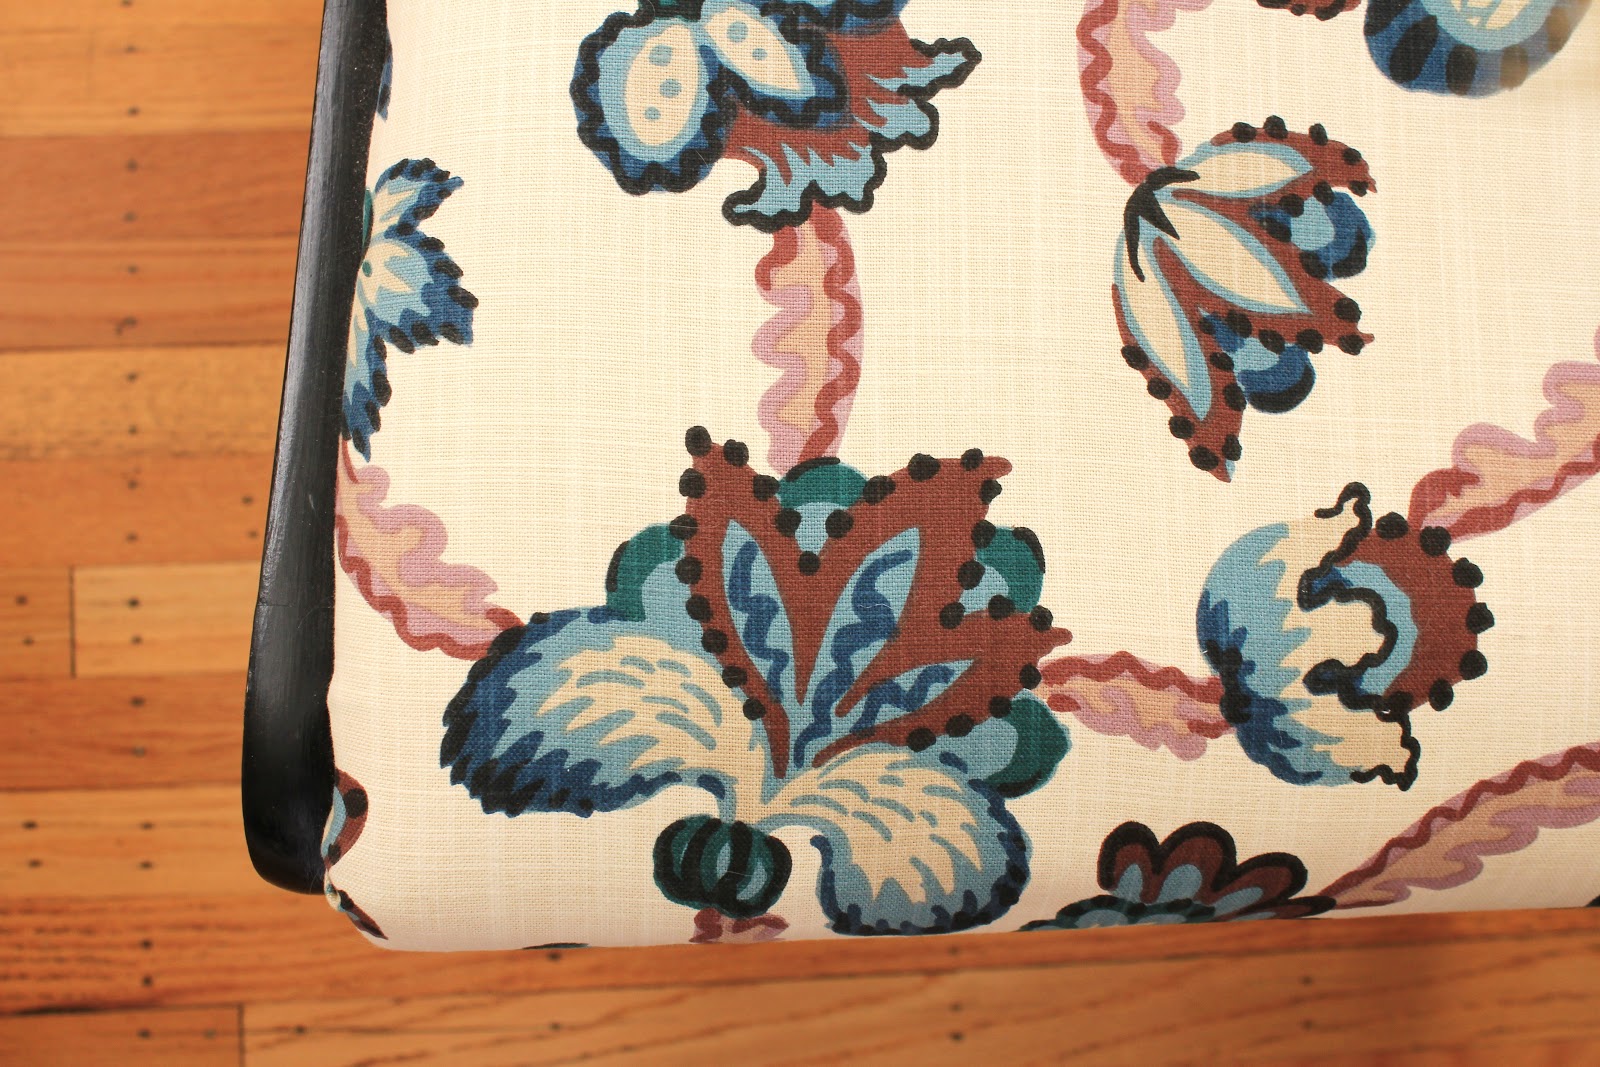
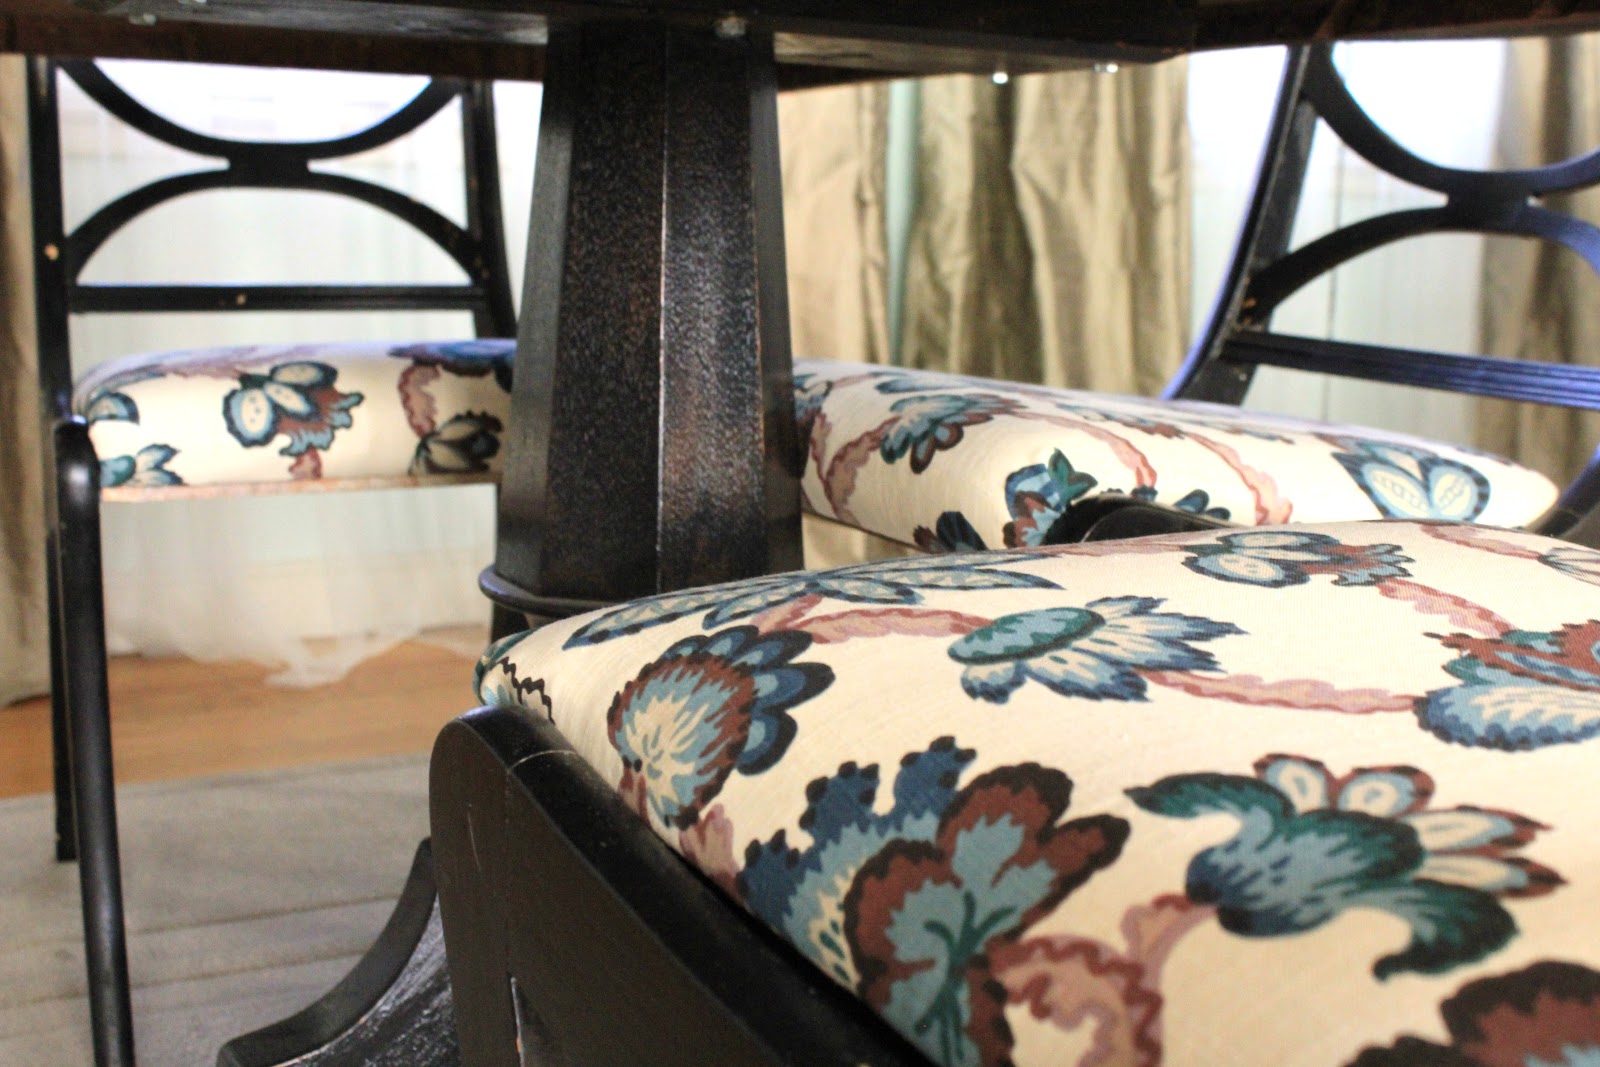
Here is a zoomed in shot – you can really see the raw texture of the fabric here – I love the “grain” in it (is that a term, or did I just make that up?)

      
And just for fun, here is a photo with the new lamp in place… that inspiration board I put together is really coming together!  I am absolutely LOVING the desk next to the window, and the light from that enormous lamp shade is just so pretty at night.
More pictures of that lamp later – I need to figure out how to camouflage the cord!!

I am loving the colors, the pattern, and the fact that in just over an hour, the chairs looked a million times better!

The paint is still chipped, but I’m going to choose to ignore that for now – we’ll get to repainting everything another weekend.  One, step at a time, am I right??

Let’s talk about the process for recovering the cushions for a minute – trust me when I say that it is SOOO easy.

Step I:
Rip off old disgusting fabric – you would not believe how dusty it was.  SO gross!

Step II:
Staple fresh layer of batting over cushions if needed – the actual cushions were in good shape, so I skipped this step.

Step III:
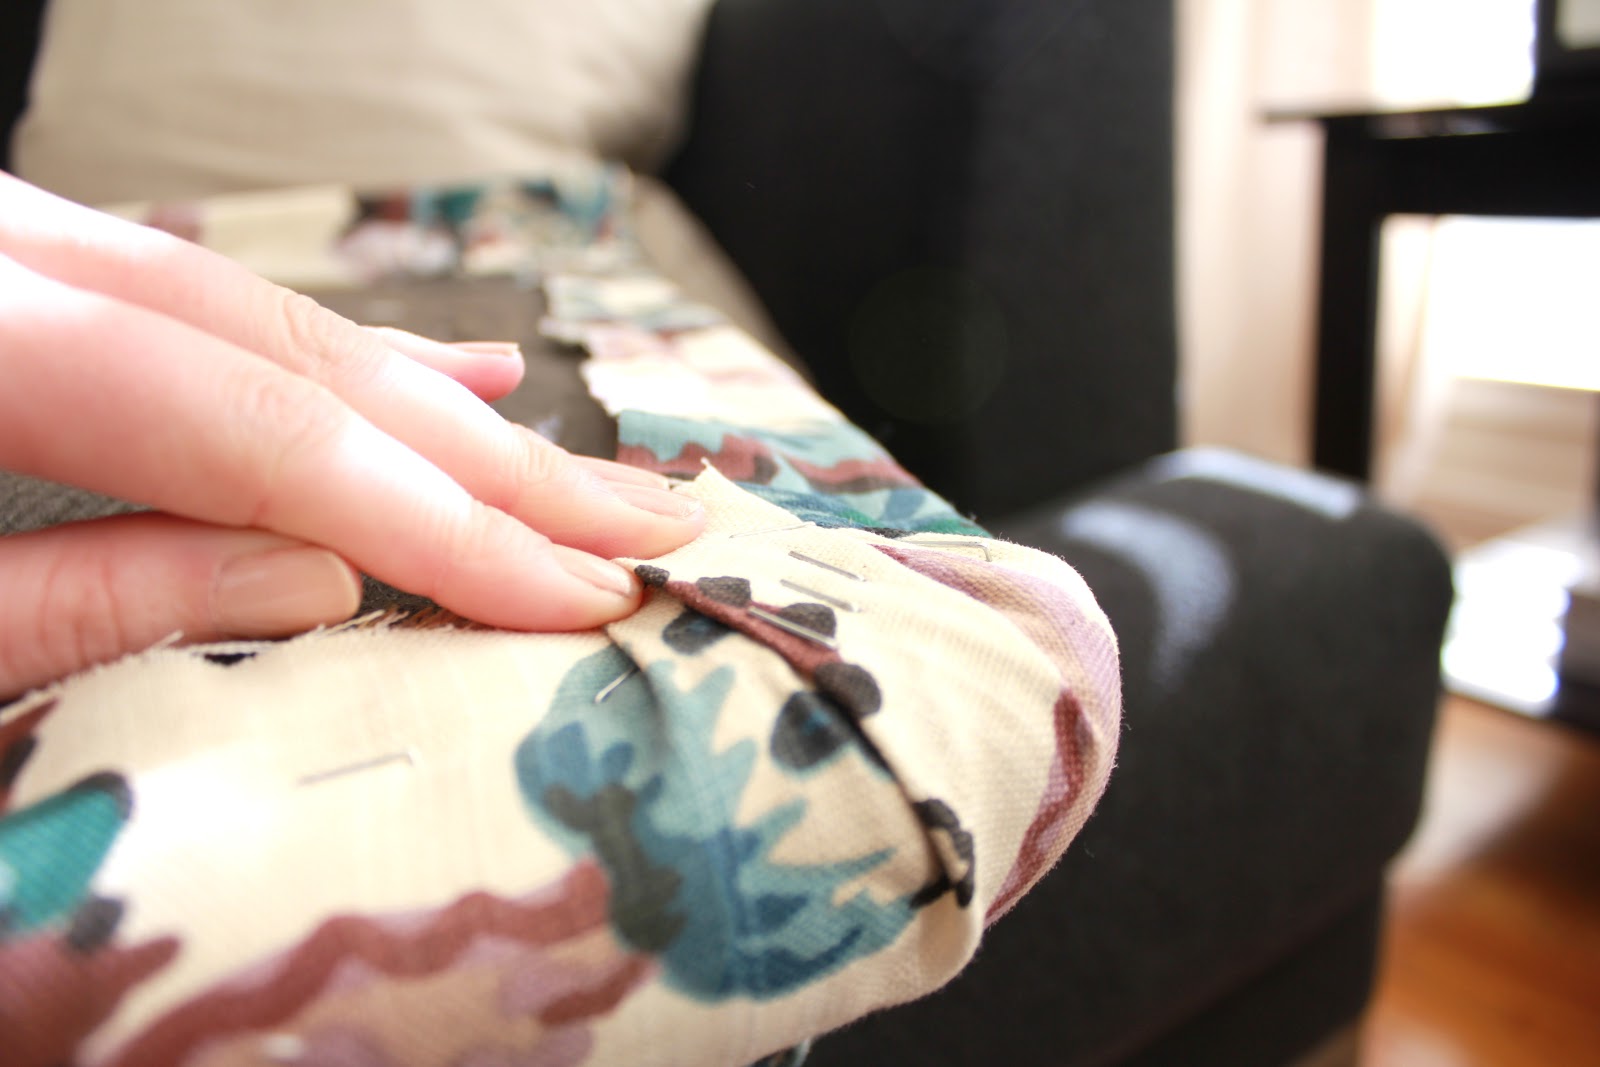
Staple new fabric onto cushions.  I found it was easiest to get the fabric smoothest and tightest by working on opposite sides.  Pull the fabric taut along one side and then staple (leave the corners for last!!)  Pull fabric taut on the opposite side from the one you just secured, and then staple.  Pull remaining sides taut and staple. The fabric on the corners should still be loose – this is where you finish the cushions.  I just pleated the fabric along the corner as neatly as possible, and stapled as I went.

There are basically two different ways to pleat the corners.  One was like a fan, the second like a box pleat (kind of).  Take a look at these pictures – you’ll see what I mean.

“Box Pleat” fold:

“Fan Pleat” fold:

Step IV:
Finish everything off by cutting excess fabric from around the staples – any bulky fabric will prevent the cushino from sitting flush with the seat – if you are able to, screw the cushions back on the seats.  Ours have a lip that goes over the front of the chair, holding them pretty secure, so I also skipped that step.

All in all, this project took me about an hour.  One of the most labor intensive parts was cutting the fabric up, and removing the old fabric from the cushions.  The actual reupholstering took almost no time at all!

Next on the list is to repaint the chairs (and table – god the table needs some love), but for now, I’m happy with the improvements to the cushions!

Gold Leaf Barware DIY

It all started with this Barclay Butera barware I discovered on A Creative Day.  The decanter and tumblers are absolutely fabulous… no?

Well I looked them up online, and each tumbler is $21, and the decanter is $57.  Holy moly – the set is absolutely beautiful, but it’s just not realistic for my “budget” right now.

                
After falling in love with this lovely barware, and knowing it wasn’t going to happen, I started scheming, and decided that my Ikea tumblers were getting a makeover… ASAP.

Here’s what we started out with – simple, solid, glass tumblers… $4.99 for a six pack!  Can’t beat that price! As a side note, do you like my mani??  It’s OPI’s Everyday is Oktoberfest if you are interested…

I still had some liquid gold leaf left over from sea fan shadowbox project, and so last night I got to work giving these tumblers a snazzy makeover.

There was nothing planned or precise about it – I didn’t want them to be all the same, and since gold leaf has some texture, it was easier to just go with the flow and freehand it… and I think it turned out pretty well!

This paint dries in seconds, so by the time I finished the last glass, the first one was completely dry, and I was able to arrange them back on the chrome platter they live on in the dining room.  Don’t you love that instant satisfaction??

And here they are – with the low light night pictures, the candles show how shiny the gold leaf is – all glowy and pretty 🙂

Not bad, right??  While my glasses don’t have the lovely honeycomb pattern of the Barclay Butera tumblers, they cost me $5, and that sure beats the $120 price tag for six of the Barclay tumblers.

Would they stand up to hard scrubbing or a dishwasher?? I wouldn’t count on it, but since they are only used occasionally for cocktails, and I am the “dishwasher” in our house, I think they’ll be just fine.  Worst case scenario??  I dab some more gold leaf paint on there when they chip.

Brilliant!

DIY Leopard Gold Leaf Tray

Aside from the old dishes I have from college, and the hand-me-down plates I’ve accumulated from friends who have gotten married (and gotten new, pretty dishes), our dish wear is a random assortment of ranging from fiestaware, to shabby chic, and everything in between.

This is not a problem for me normally, since Kris could care less about the table settings, but I’ve been planning a little something for Kris’ 30th birthday that is looming just around the corner, and wanting to make it a bit more special, so I’ve decided it’s high time to get a few decorative plates for entertaining.

Luckily for me, I found this adorable DIY tutorial at A Creative Day for a DIY Leopard Print Tray – made with a gold leaf pen! (angels singing).  Check out her cute blog, and her lovely DIY here!

Ikea has great (cheap) white dishes, and you can find a gold leaf pen at Michaels for less than five dollars!  Done and done!  I can’t wait to whip up a few sassy serving platters and plates!

I love this irregular shape of this bowl, the modern look of this platter, and the classic lines this tray (which coincidentally would also look amazing on a coffee table or entry way to corral keys, mail, and the random nickles I find scattered around our house).

It’s Beginning to Feel a lot like Christmas

Ok, yeah it’s definitely not.  It’s not even halloween yet, but I’ve seen so many FABULOUS ideas for Holiday decor on Pinterest, and this one I just HAD to share!

Isn’t that the most adorable tablescape of mini Christmas Trees.  This is actually direct from StyleMePretty – the post on a Christmas DIY Potluck.  These ladies are so crafty, making all sorts of adorable projects like wreaths made out of old book pages…

I mean how awesome is that??  Another favorite project they showcased were these adorable little Christmas trees made of different sizes of cut paper.  It’s actually pretty self explanatory to make just by looking at it, but how clever (and lovely)

To make the moss trees from the tablescape, you’ll need a few foam cones from the craft store, a hot glue gun, cute pot, some sturdy twigs, floral wire, and some flat moss… start gluing away, and you’ll end up with some sweet (and easy) moss topiaries.  I also love the idea of using round foam balls for these (less holiday, and they could even take you through January and February)!
     

OK… back to thinking about Halloween, and getting our costumes ready for the weekend!!

DIY Projects: Halloween

I love fall, but the decor for Halloween that you find in stores leaves a little to be desired.  I scoured the internet for some clever decor ideas that are simple, and relatively inexpensive.  It’s such a short lived holiday, no one wants to break the bank on fake witches and over the top lawn displays (or maybe you do… I know I don’t!)

Read on for some fun ideas to get into the Halloween spirit!!


Glittery Pumpkin Candle Holders:

This one is perfection – Twig and Thistle has a fabulous tutorial for turning foam pumpkins into sparkly accessories for fall.  Tutorial here!

Spooky Porch Decor:

Cassie from Hi Sugarplum! decked out her porch with a swarm of bats, which is spooky, not silly (my favorite type of Halloween decor).  She used thick felt, and fake crows from the dollar store, and it’s incredibly striking (and easy!)  Check out her tutorial (and more pictures) here!

Glittery Spider Webs and Spooky Shelves:

Centsational Girl is the ultimate in crafty DIY, and has been making all the stops for Halloween.  These bookshelves capture the Halloween spirit without being tacky. One of my favorite ideas!!  Go look at the whole tutorial here.

DIY Trick or Treat Pillows:

The Cutest Blog on the Block had an easy idea for some DIY Halloween Pillows – these would work indoors or outdoors but with the glitter involved, I think I’d keep these outside on a porch, or in an area you could easily sweep (unless you want to find glitter in your carpet for years to come).  Tutorial here.

Pumpkin Punch Bowl:

You’ll need an extra large pumpkin to pull this off, but Martha Stewart reigns again with her clever ideas for fall entertaining!  Check it out here

“Pick your Poison” Bar Setup:

Throwing a party?  While we are on the topic of entertaining, this is a fabulous little set-up for an adult Halloween Party!  Get more details here on BHG!

DIY Treat Bags:

Hi Sugarplum! made it on this list of fabulous DIY projects twice (she really is that clever) – this time with her cute idea for Treat Bags.  Adorable!!

What did I miss??  Any other cute Halloween DIY’s that I should test out??

Fun Craft Project: Spray Painted Lightbulb

Everyone knows the easiest way to create romantic atmosphere is to light a candle, but I came across a cool DIY that I am DYING to try!

Lightbulb Makeover: DIY
Spray paint a bulb covered with lace. Remove the lace and ... tah-dah, pretty

If you have a plain light bulb in your home that could use some sprucing, then this project is for you!  Just grab a piece of lace and some spray paint!

Tape lace over light bulb (I’d use a low watt, soft pink or soft white bulb).  Hold can 8-10 inches away, and spray evenly with paint.  Carefully remove the lace while the paint is wet, and set the bulb to dry.  What could be easier?!

This would look great in metallic (to glitz up a closet, or dining room), soft pastel colors (baby’s room), or bold hues (for the adventurous)!

I am having grand visions of painting a few, and clustering them together for a modern (and inexpensive) alternative to a chandelier.  Obviously with the paint blocking most of the light, these aren’t going to illuminate a dark room or give you ample reading light, but the soft glow through the intricate pattern will likely cast a cool design in a dark room, provide a bit of light for those with bad dreams, or just look plain awesome.