Updated Living Room Photos

I always share updates about our house little by little – like last week I posted photos of our side tables with the orchid terrarium, or a few weeks ago there were some photos of our living room when I posted the x-bench makeover – but I rarely ever post lots of photos at once… call me lazy, but I realized this when hunting down pictures of our un-styled wine hutch, and couldn’t find a single one!
I feel like this is a good time to document and share pictures of where our living room is now… before it changes again with a new, beautiful sofa…
Let’s start out with the desk area… not much has changed here since any prior updates.  The sea fan shadow boxes are still alive and well, and I still love them as much now as when I first hung them!!

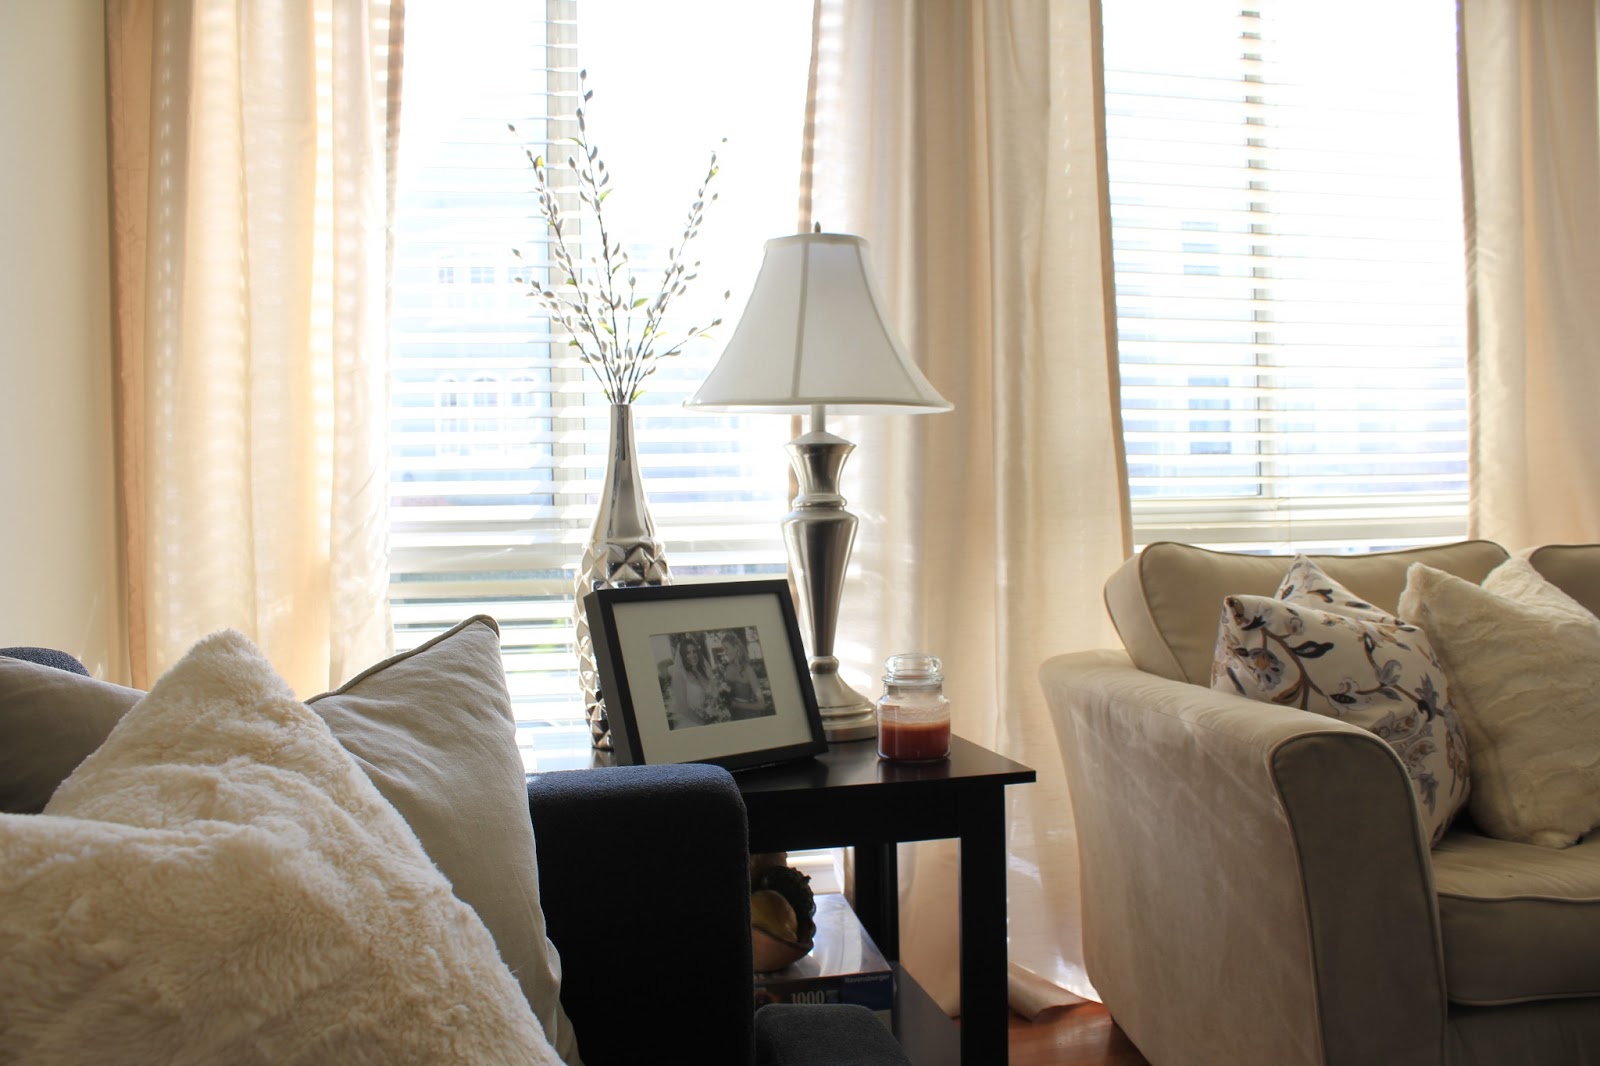
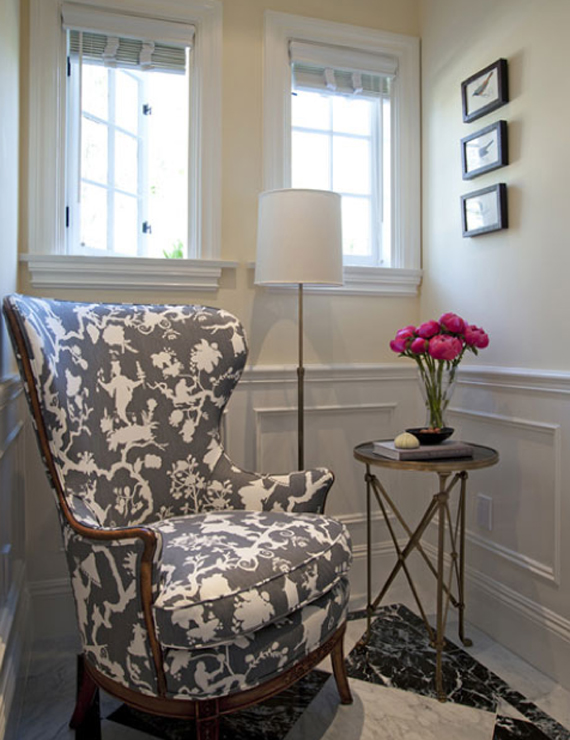
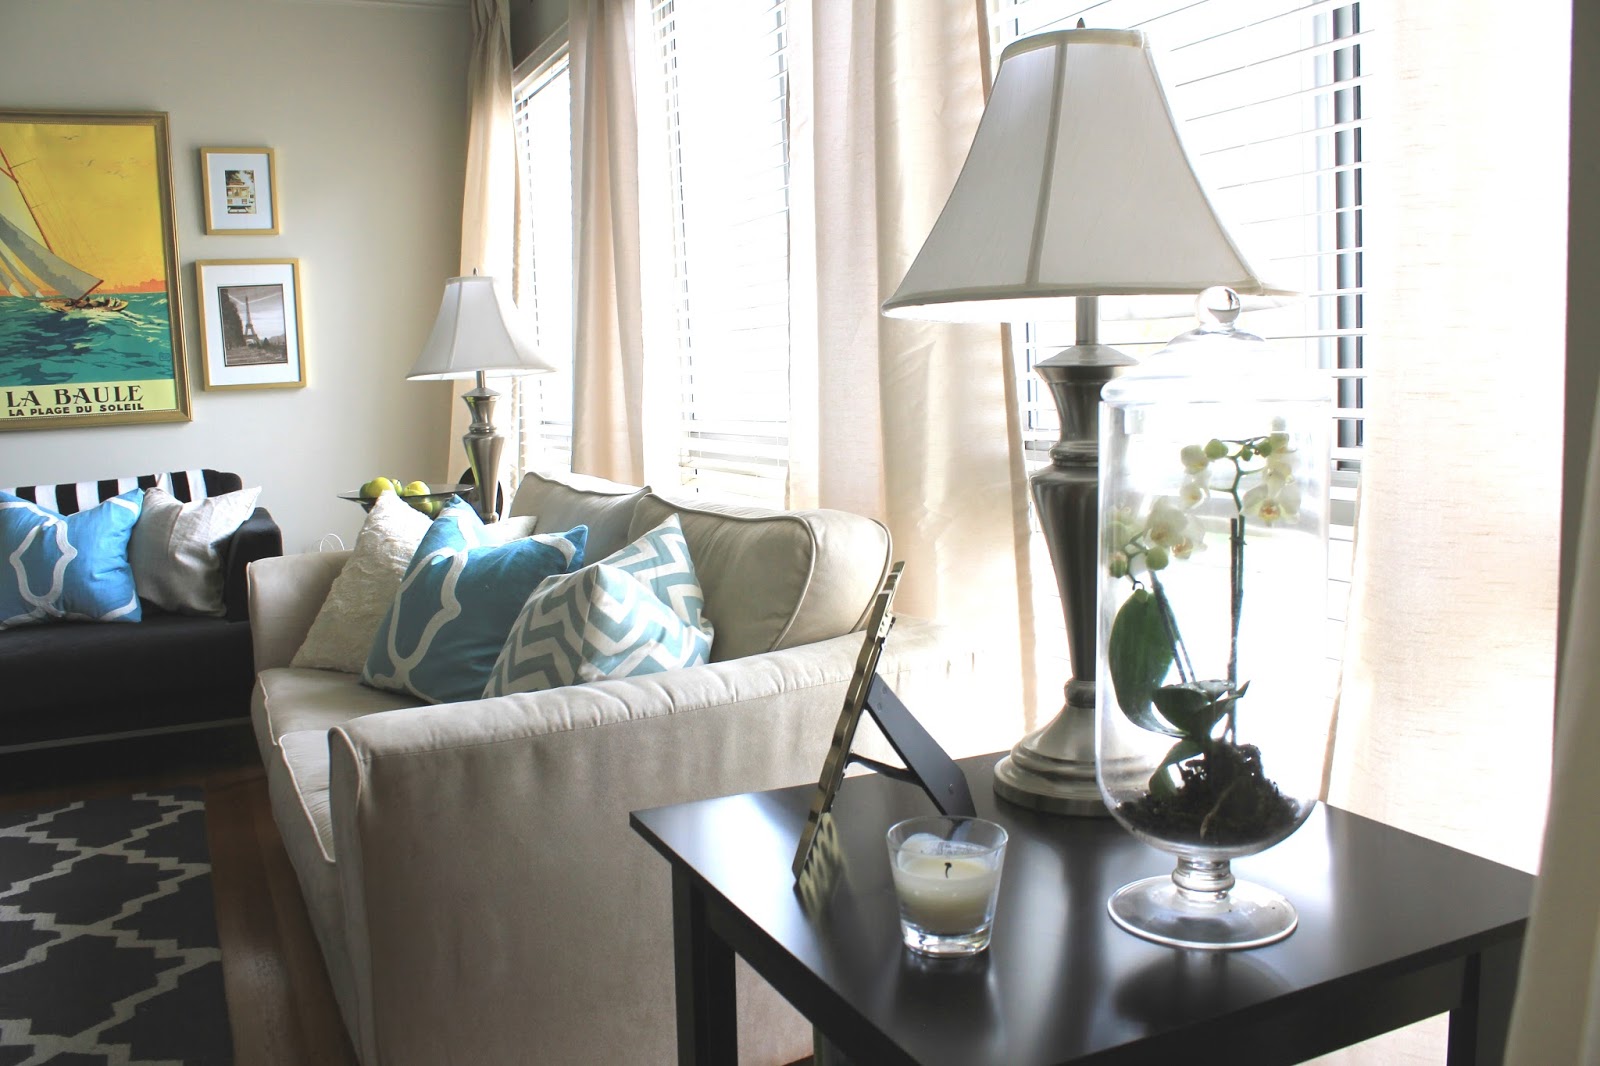
The tripod lamp is also still one of my favorite things… I got a new lampshade that has a rougher woven texture that I’m planning on swapping in, but nothing earth shattering.

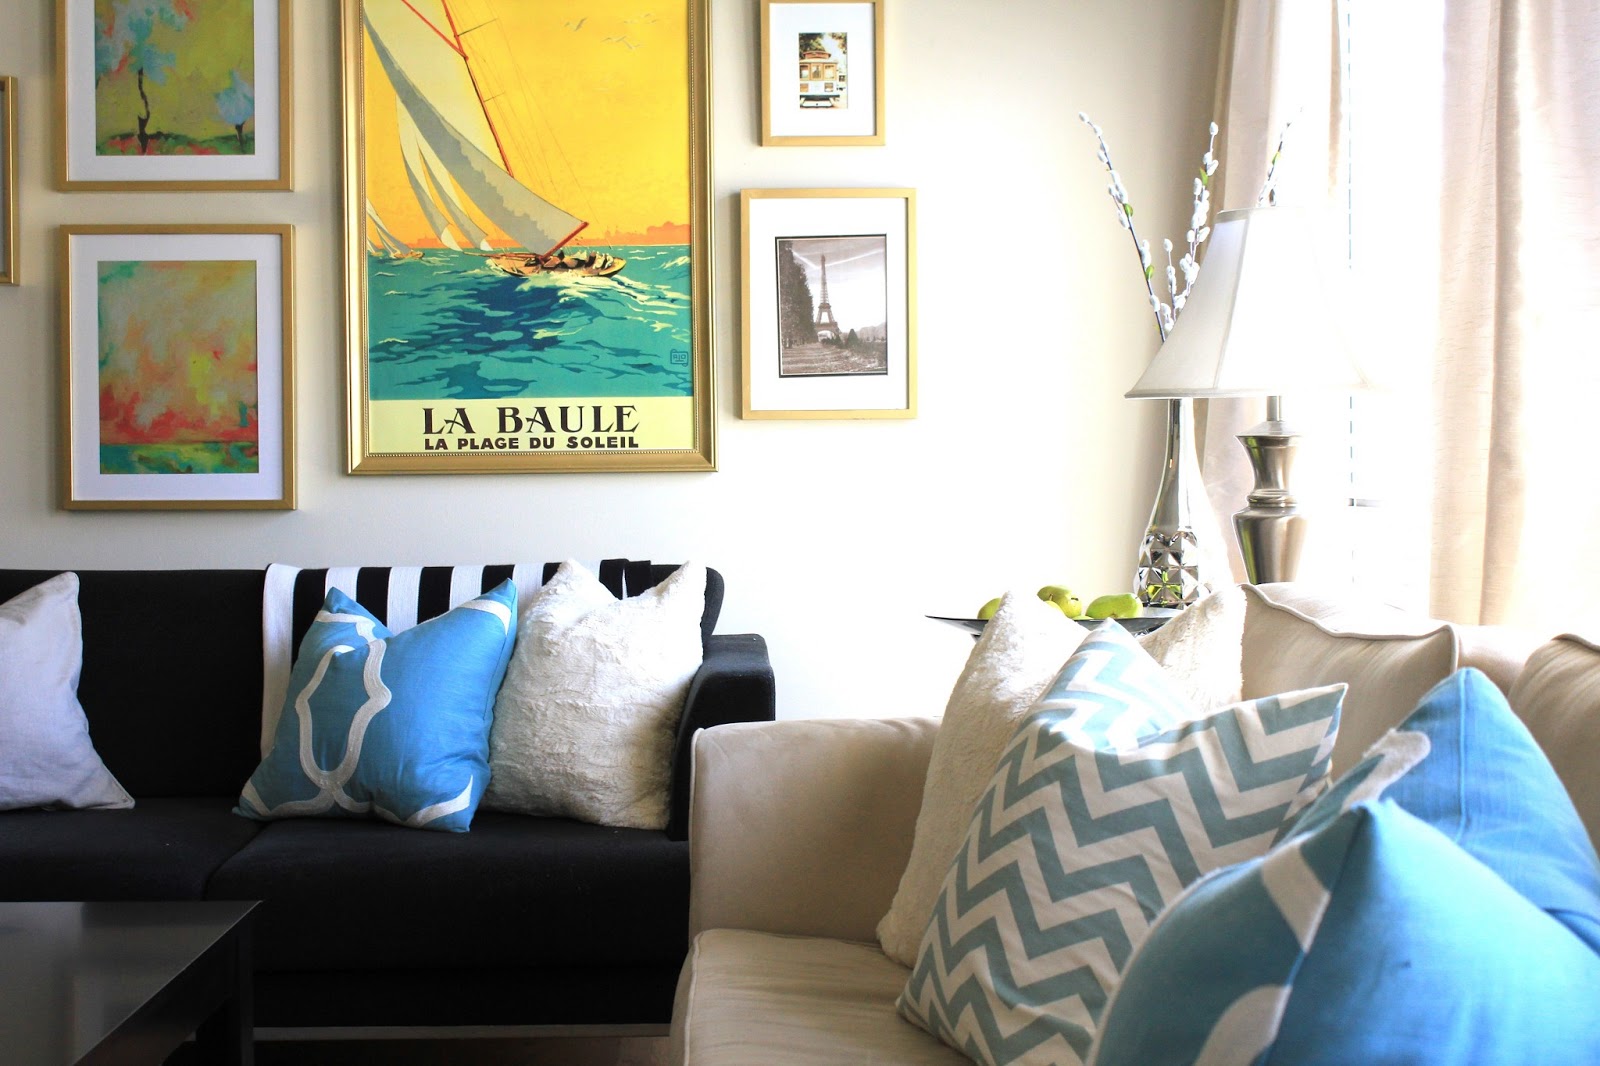
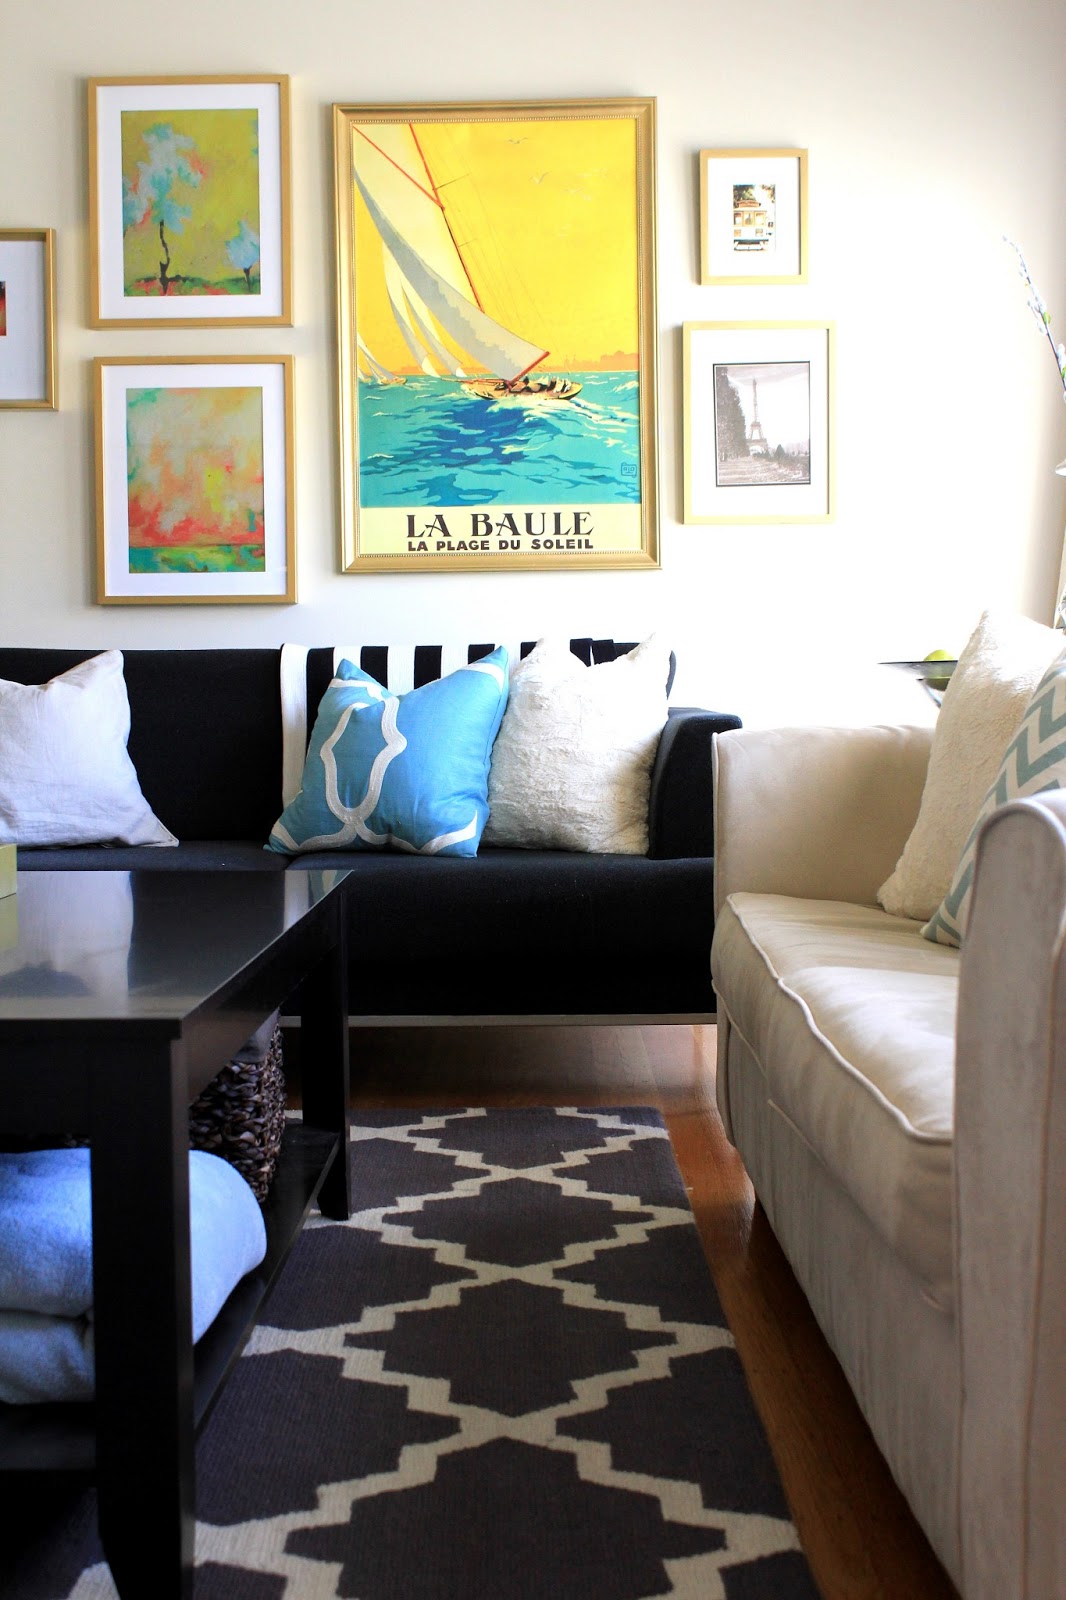
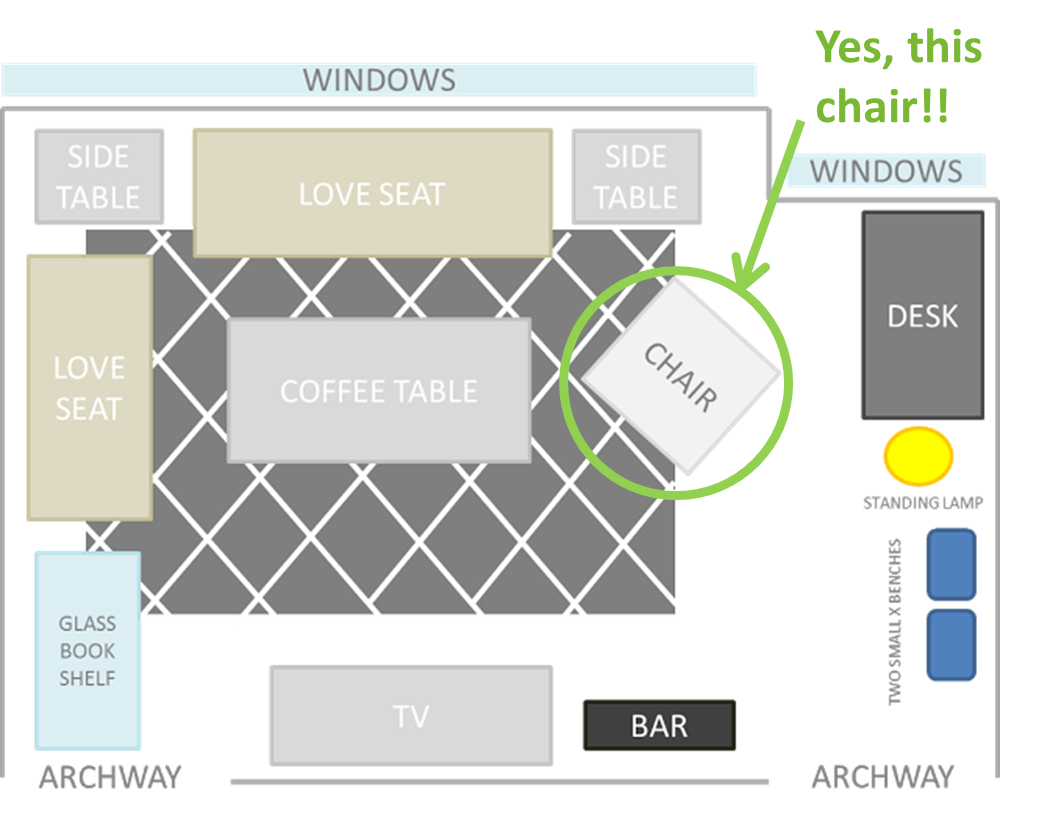
Standing at the desk and turning around to face the rest of the living room, there is lots of color going on for summer and I love it.  As the weather cools down (or should I say, as it warms up with fall since there has not been one day over 60 degrees in the last several weeks)… whatever… as the seasons change, and we move into fall, I want to swap the art out for something a little more moody, and the pillows will be a bit more subdued as well.

For now, the bright blues and yellows remind me that it’s summer (somewhere outside SF), and of course these just make me happy… even in the fog.

My little terrarium is still plugging away… nothing has died yet!

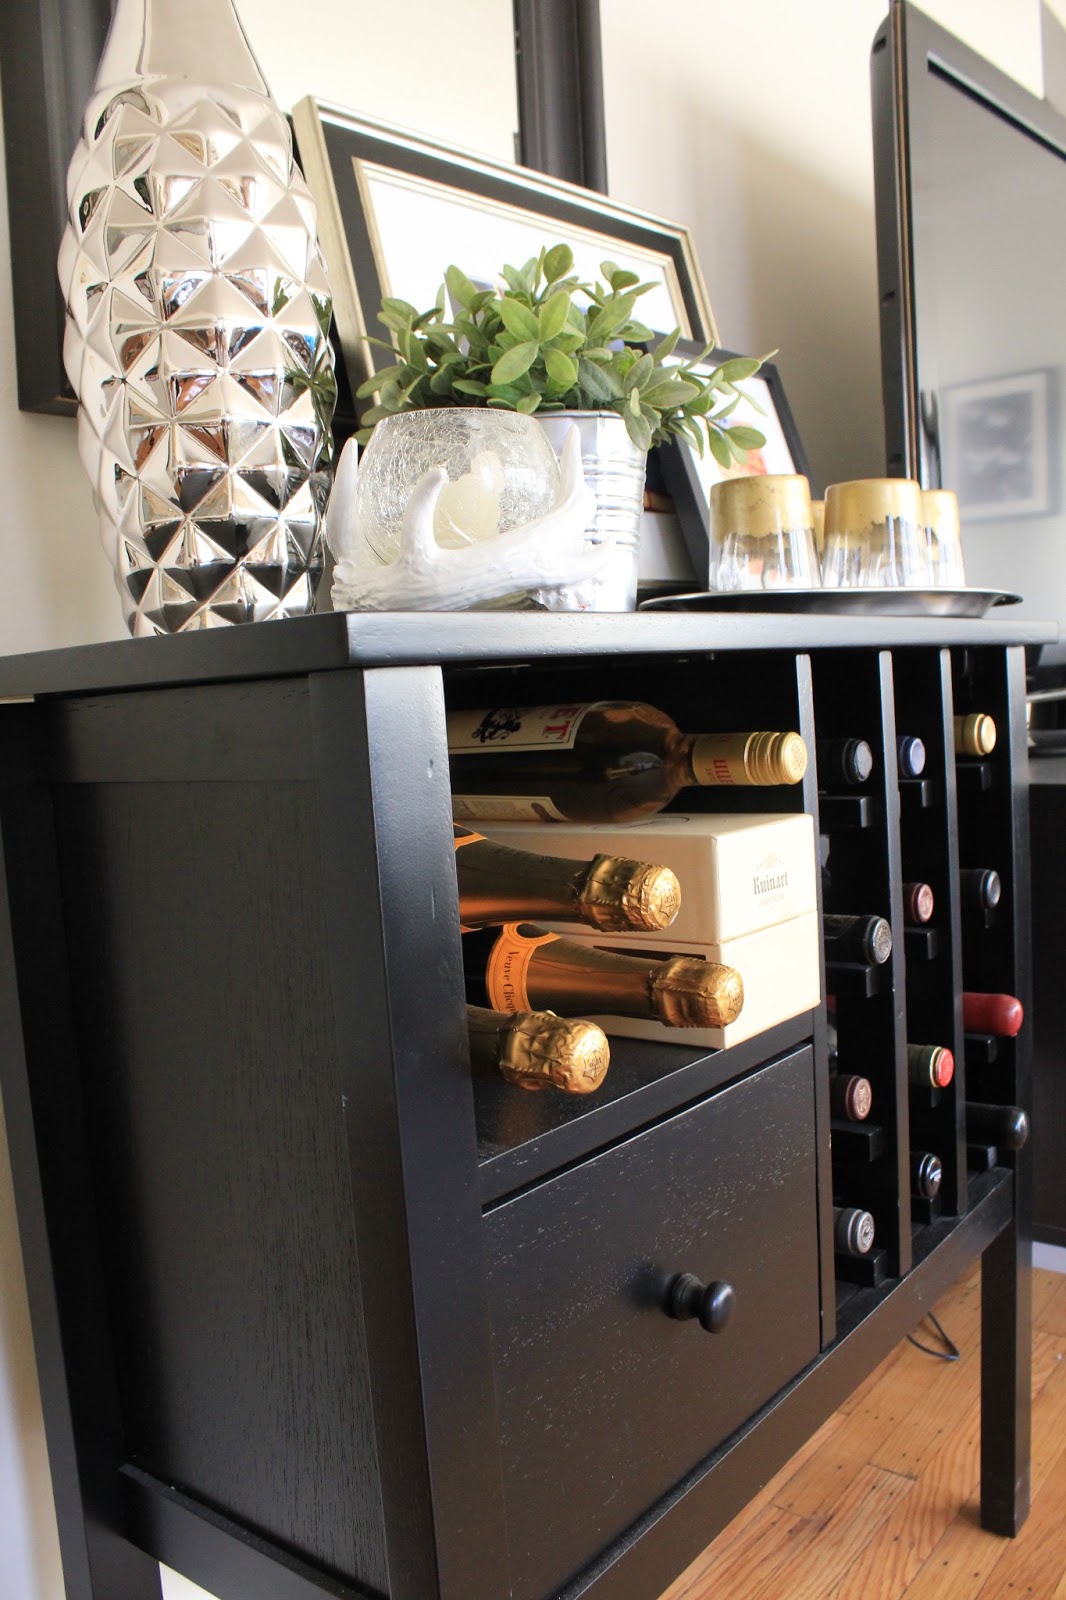
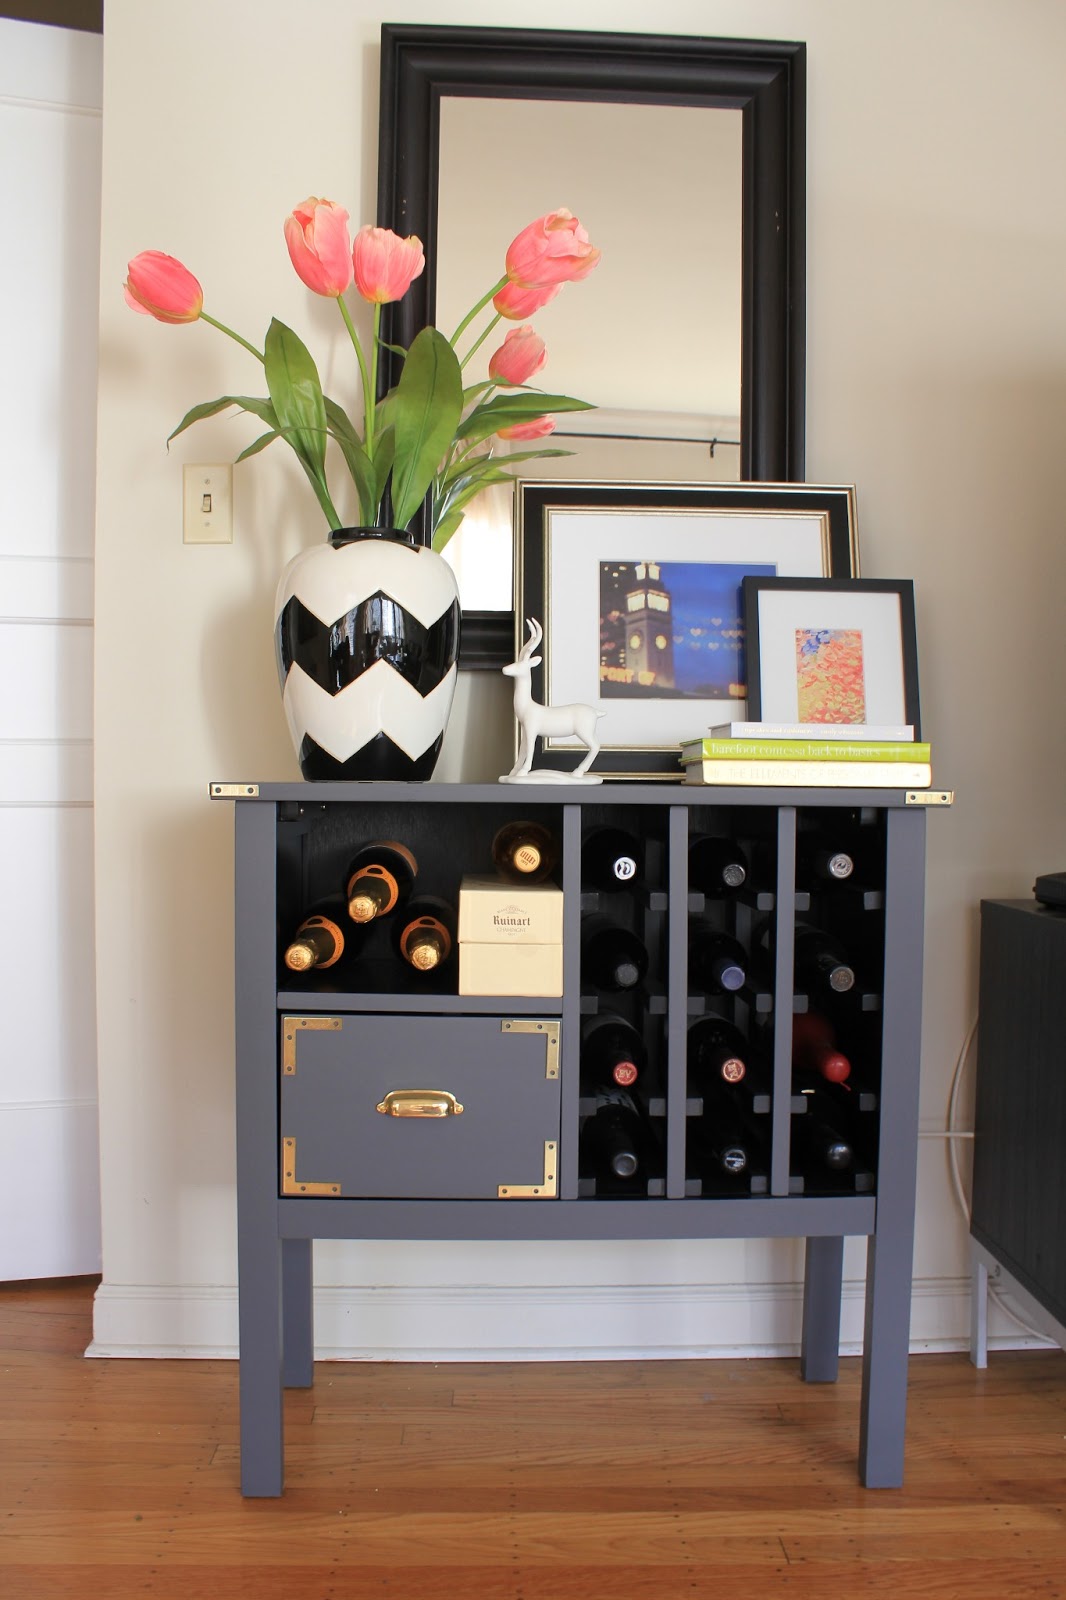
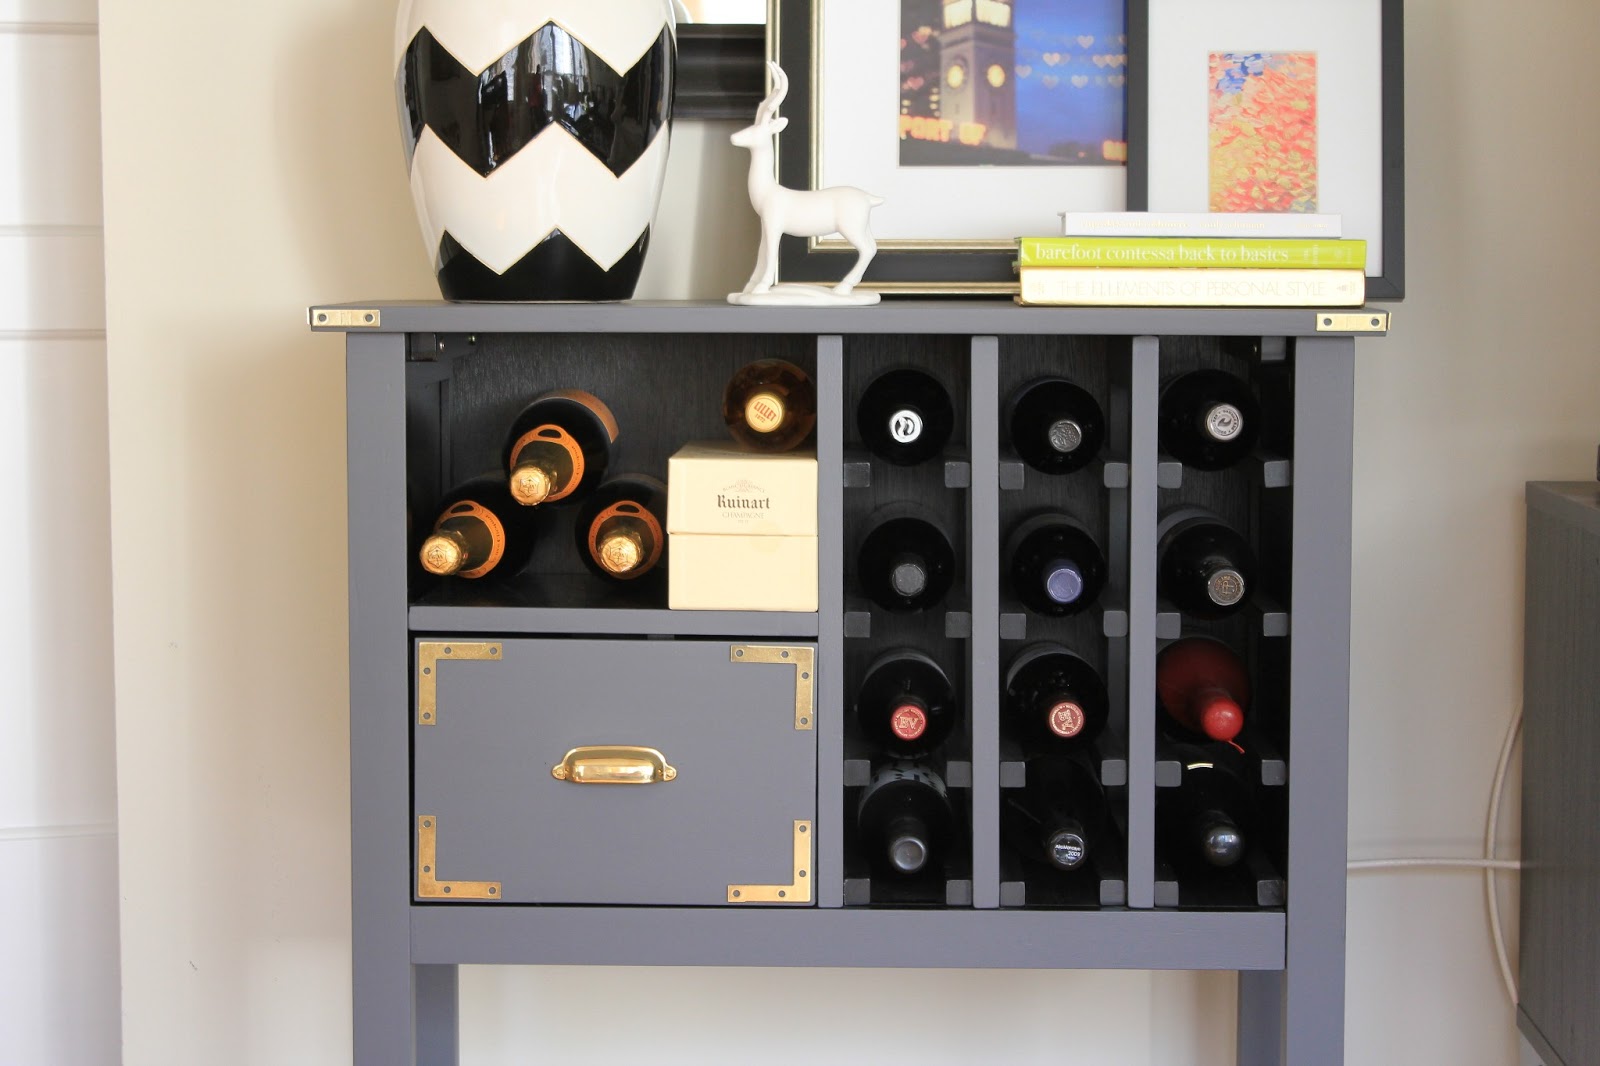
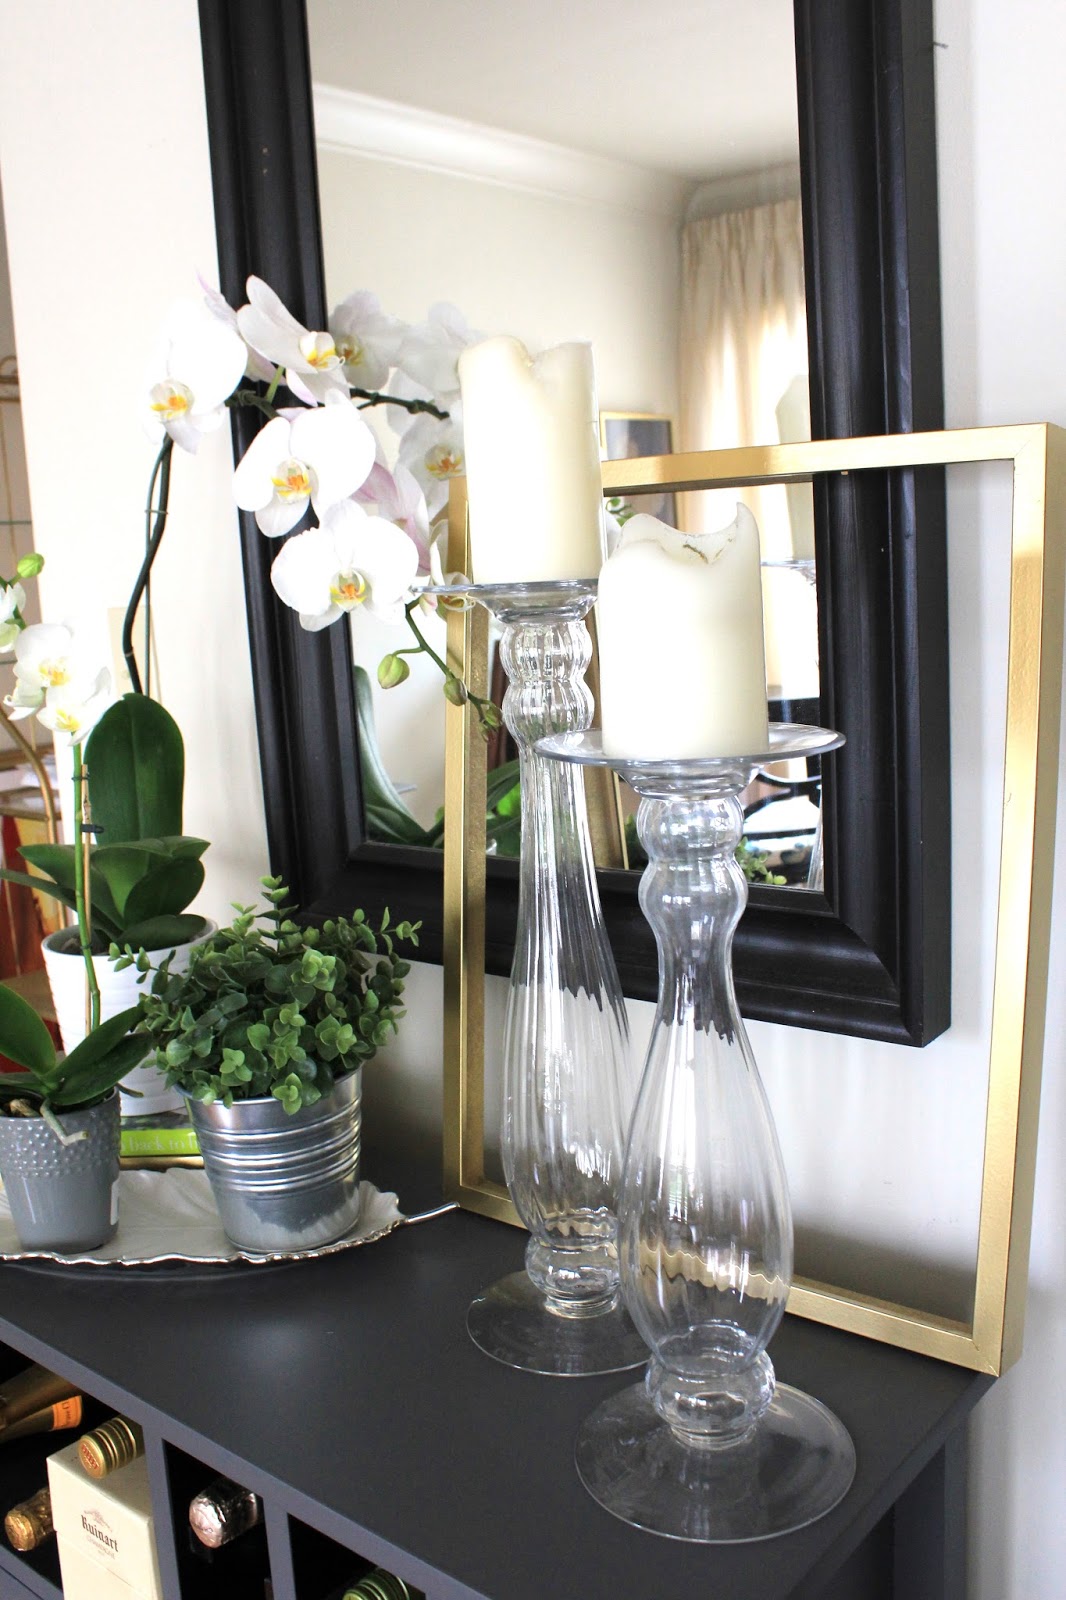
And now, looking to the left, I just posted about our new little vignette on the wine rack… well I felt that I owed it a few nicer photos, since I relocated the memory card for our DSLR camera.

The mirror will eventually be swapped out for something round or more ornate (like I’d posted about here) but since propping up the gold picture frame on the right, I kind of hate the mirror less… either way it will have to do for now.

Besides, the orchids are so arrestingly beautiful, I hardly notice the generic mirror lurking in the background….

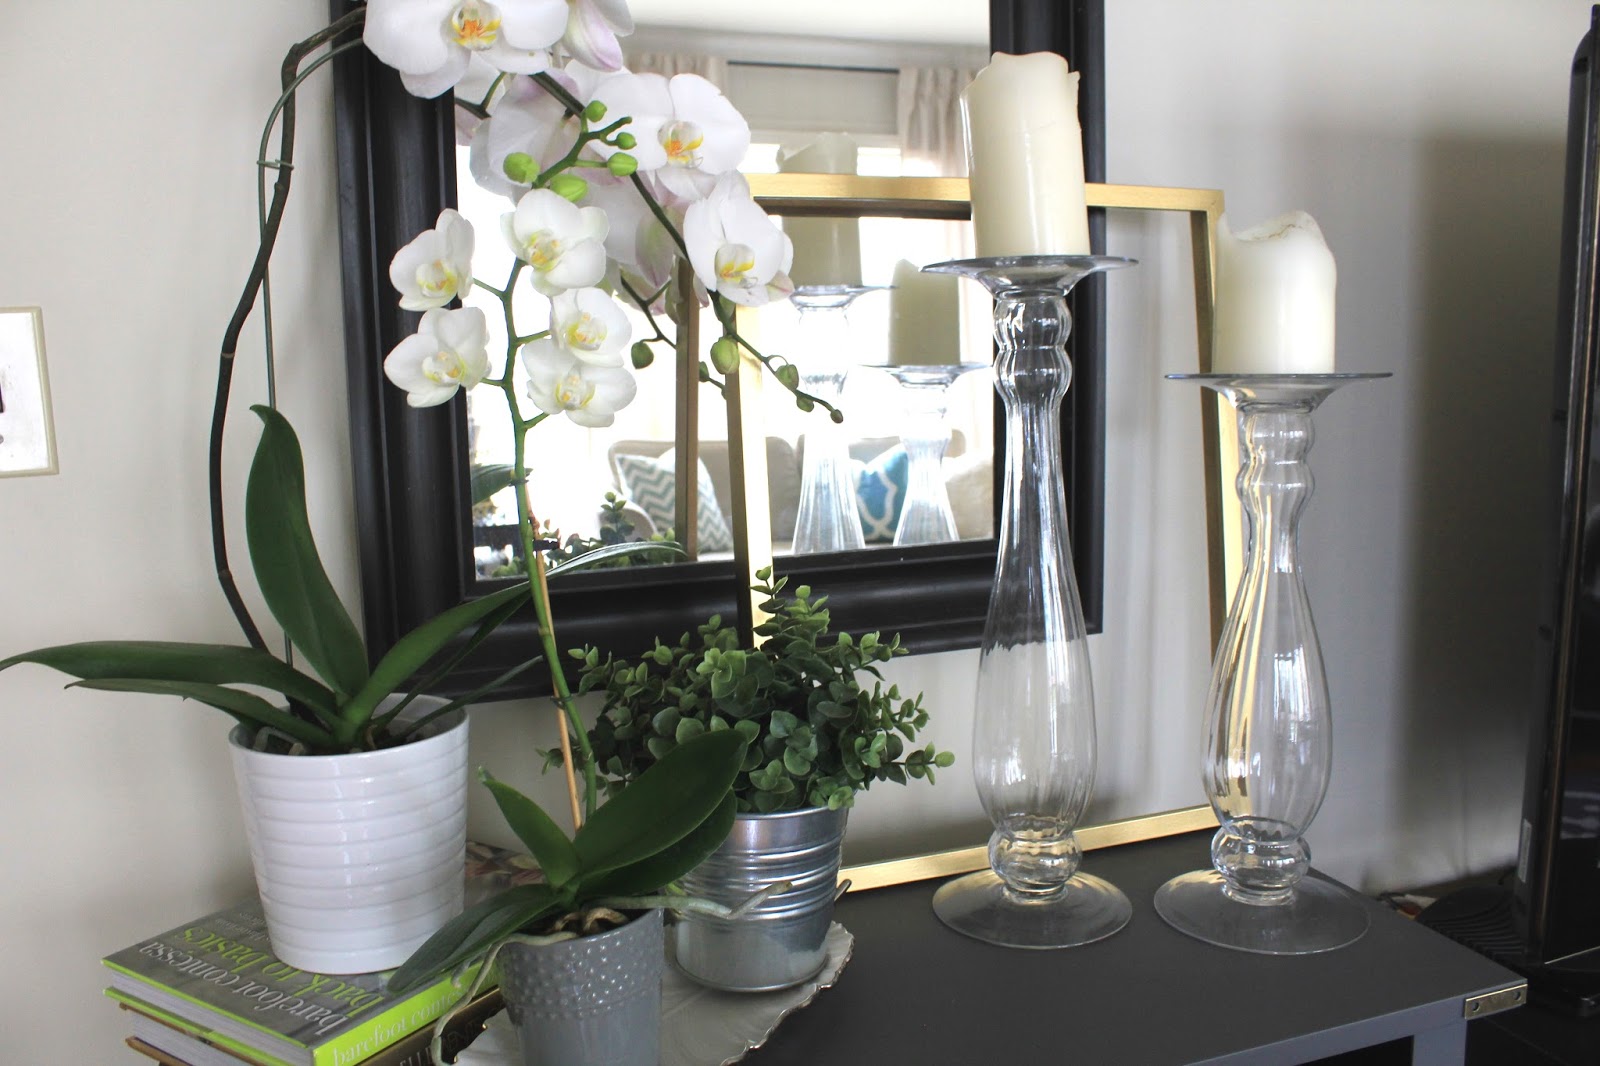
Yep, these plants are loving life – bright, indirect light… all. day. long.

I’d mentioned that I’d gathered the plants together on a small tray… here is said tray.  A little feather shape that I picked up from target on sale a few months back.

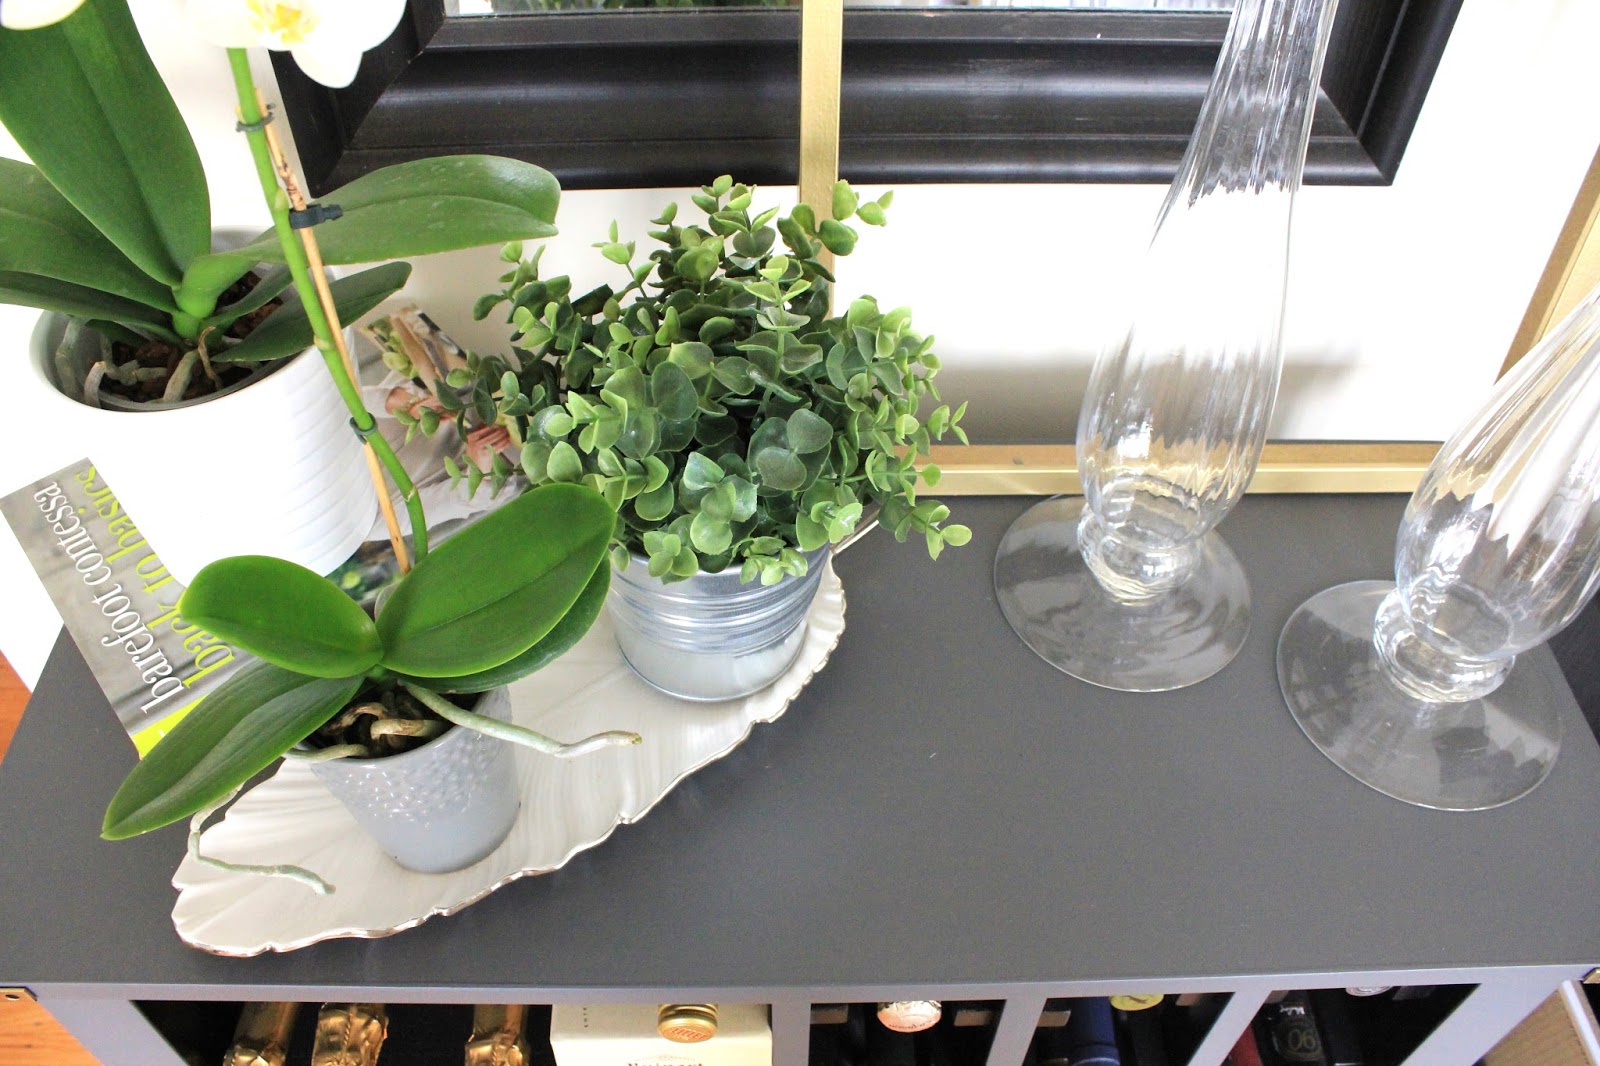
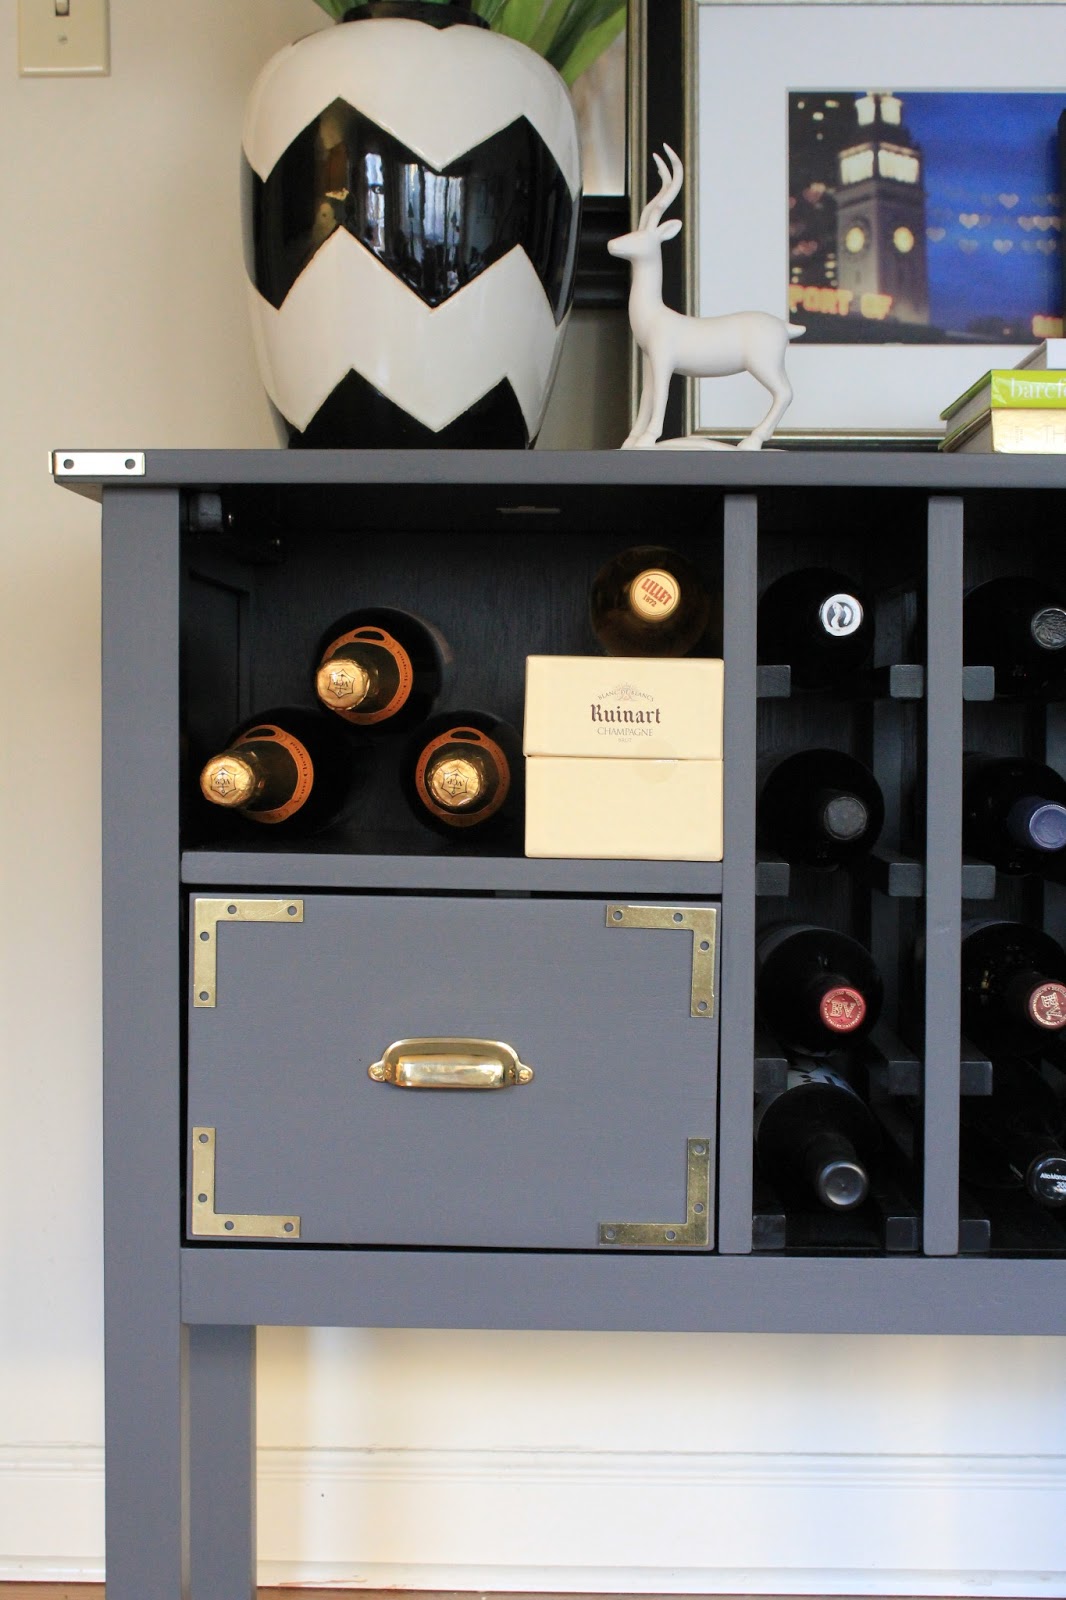
Ok, last picture of the wine hutch for now… I swear…

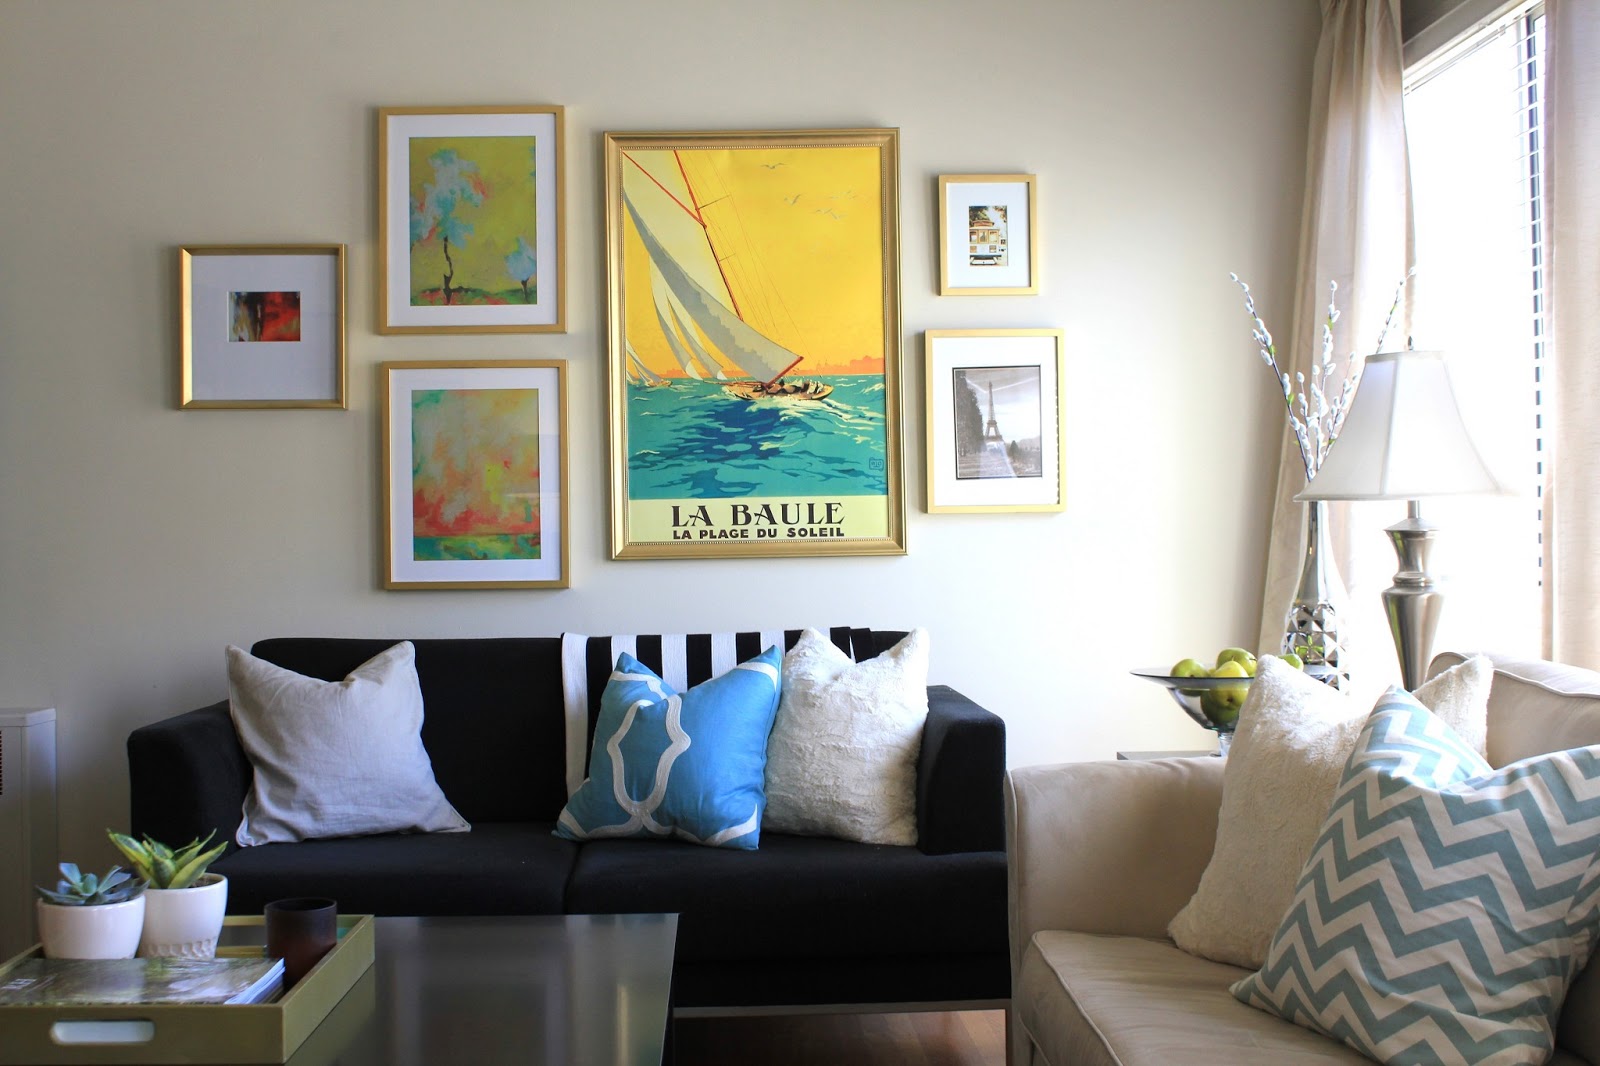
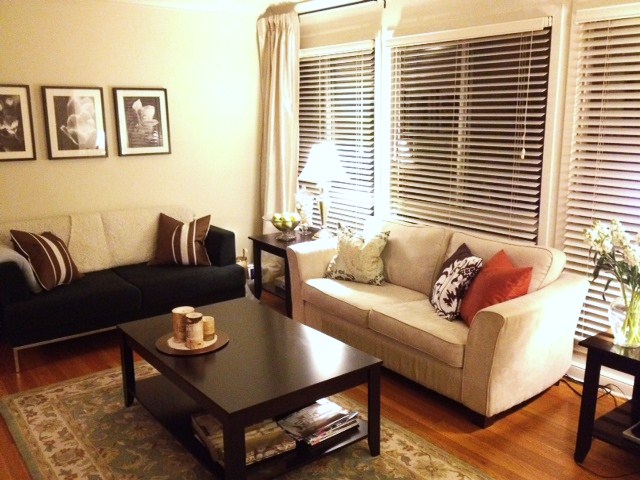
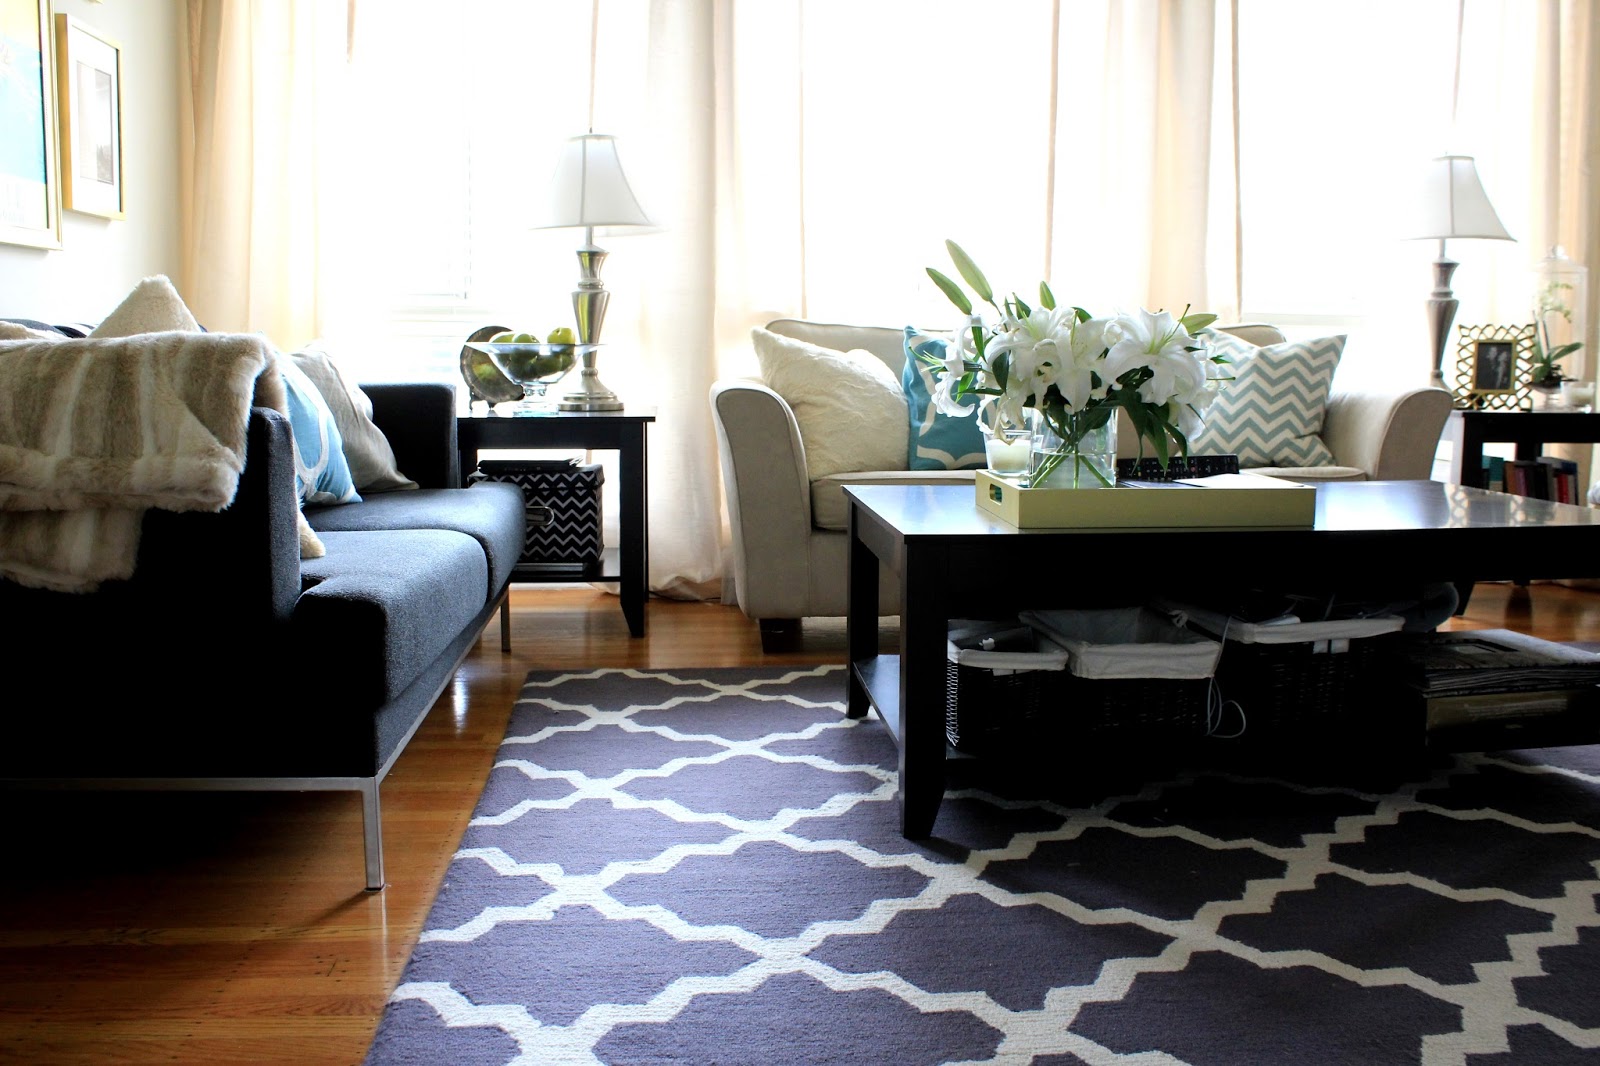
Now we are standing in the archway between the unfinished dining room and living room.  Looking back at the wall of windows, and our sofas.

When we first moved in, I absolutely despised Kris’ modern, black couch… but in the last year or so, I’ve either a) gotten used to it, b) piled enough pillows and throw blankets on it to distract the eye, c) balanced out it’s darkness with other dark colors in the living room, or d) all of the above… I kind of don’t hate it anymore.

Don’t get me wrong, that thing is going on Craigslist as soon as humanly possible, but I don’t think it’s the eyesore I used to…

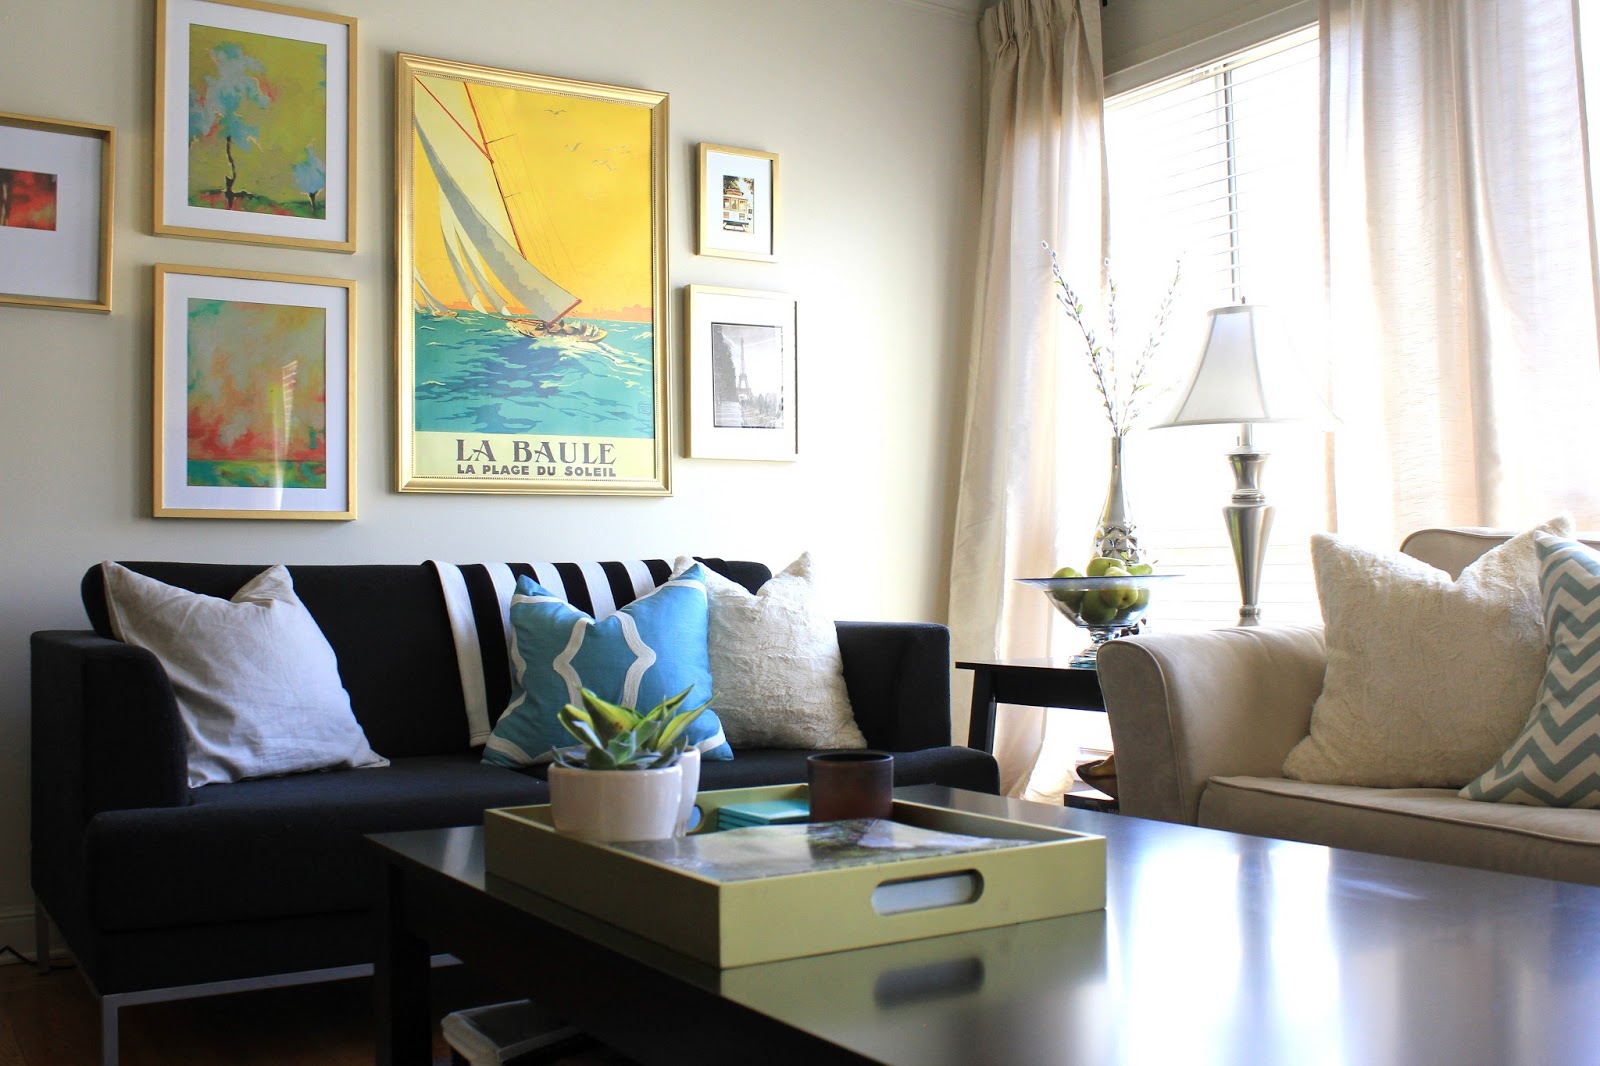
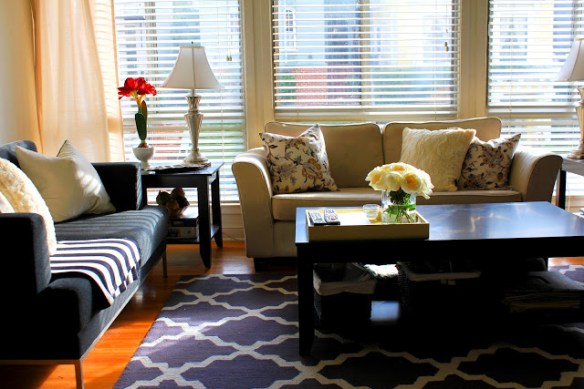
Here I am, scootching back into the dining room to get a little bit more of the room in to the frame…

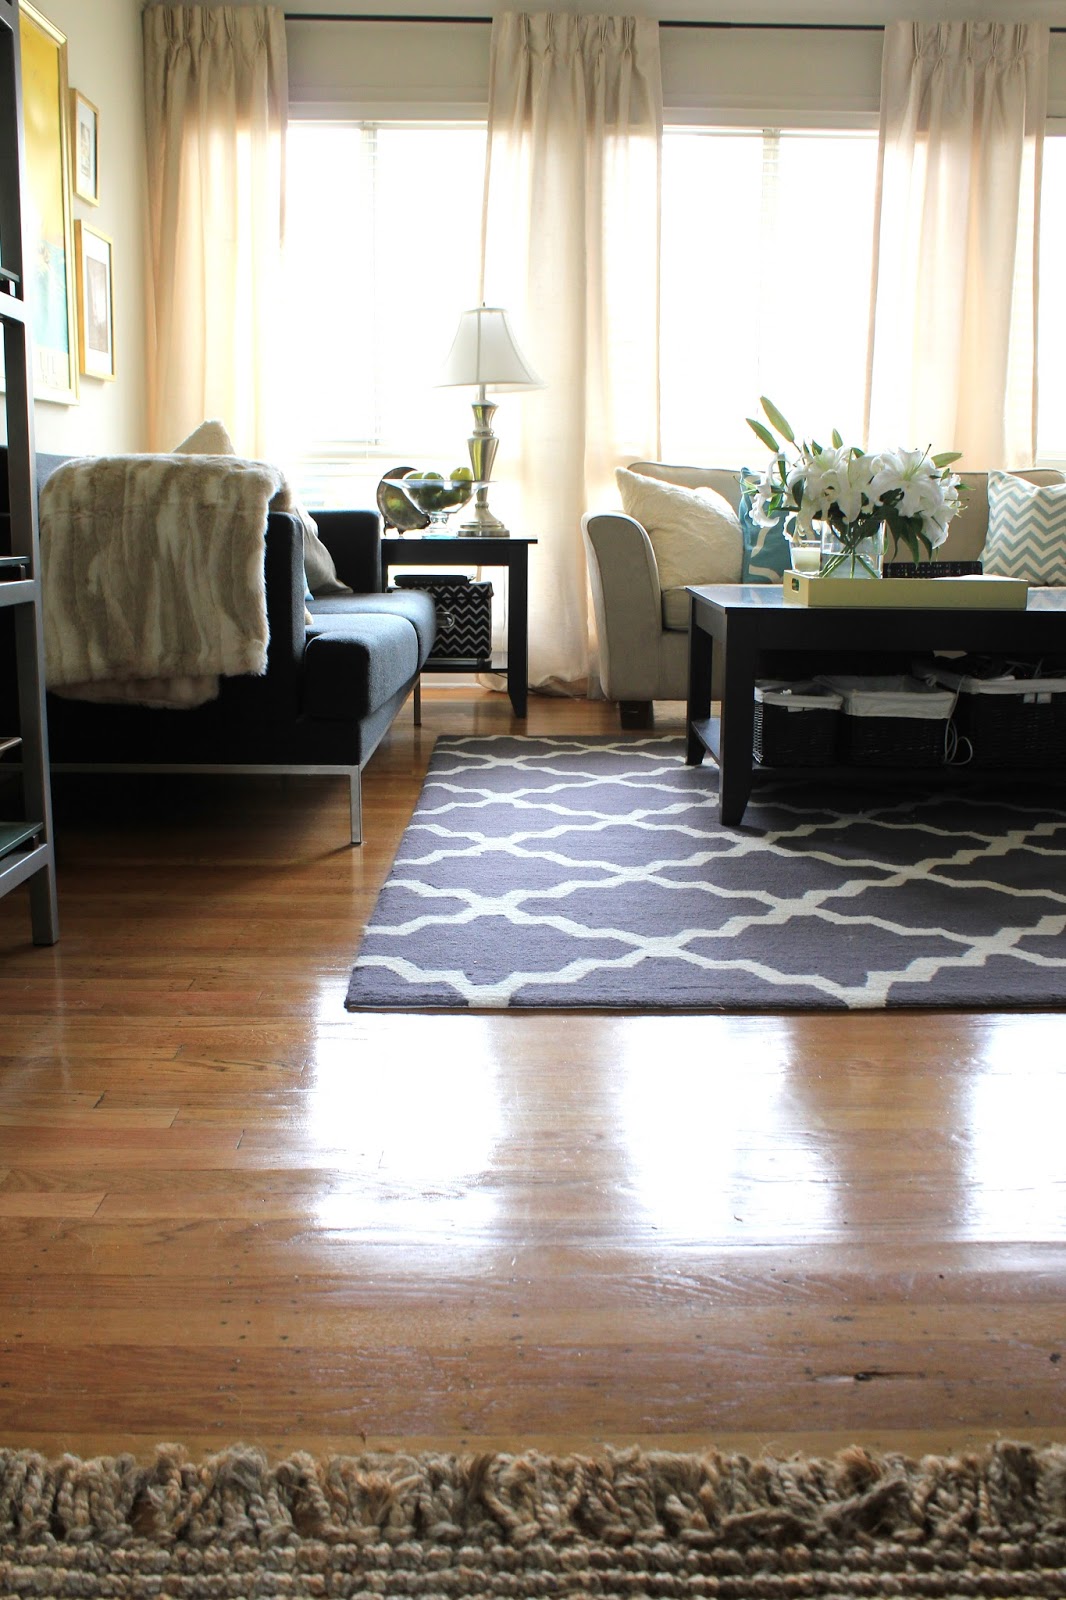
… and scootching back a little bit more to get the cowhide rug that I simply adore… I think having different textures in adjacent spaces has also really helped balance the room and make it feel less “big box store” than it really is.

Let’s be honest, everything we have in our living room is either from Ikea (frames, curtain rods, sofas), Target (wine hutch, fabric for throw pillows, baskets under the coffee table, lamps, trays), Bed Bath & Beyond (curtain panels), Craigslist (coffee table with matching side tables, console table), Homegoods (basically every accessory from the glass vases to the candle holders to the faux fruit).

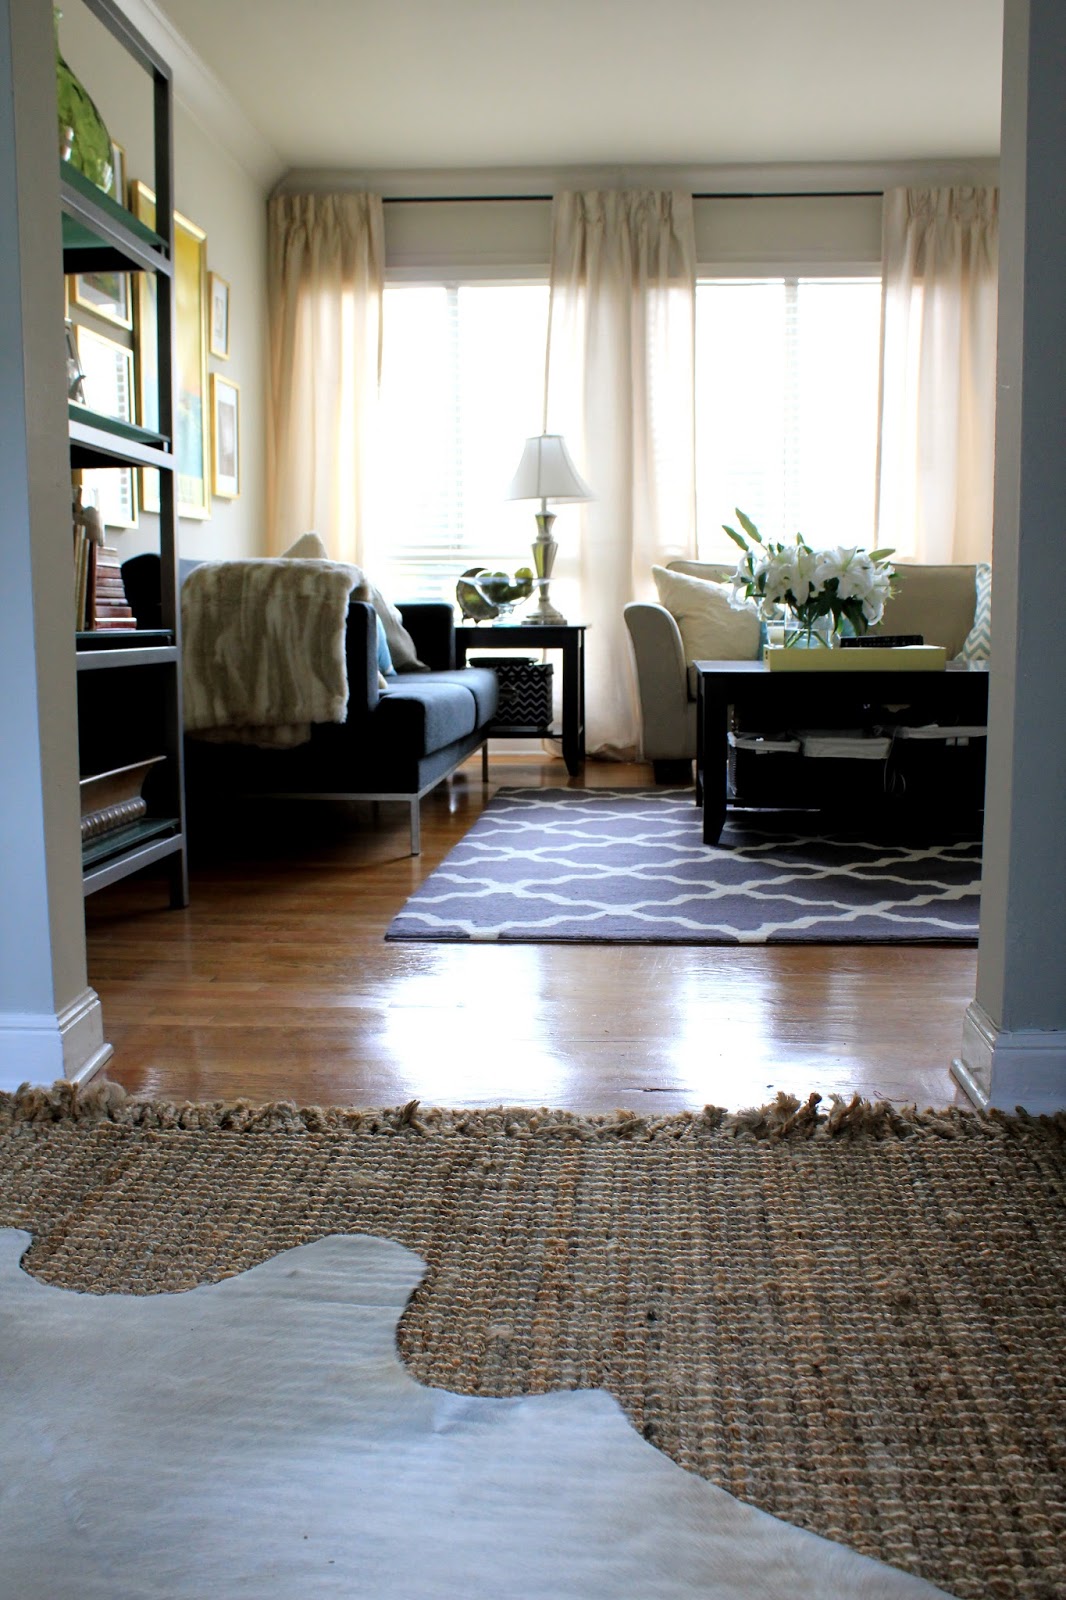
Right?!  The natural fiber gives a healthy dose of “organic” to an otherwise, completely in-organic feeling space… just what it needed if you asked me!

And this coffee table… so bad, but I just had to show you all how badly we need a coffee table with storage when we do replace this thing (which I pray to god is very soon!)

I mean, these three baskets in the forefront are stuffed to the gills with wires, cords, TV remotes, video game controllers (because my boyfriend is secretly a 13 year old boy at heart).  On the other side of the table – closest to the couch – the baskets are filled with blankets for cozying up on the couch, and the surplus of wine that won’t fit in that mini wine hutch!

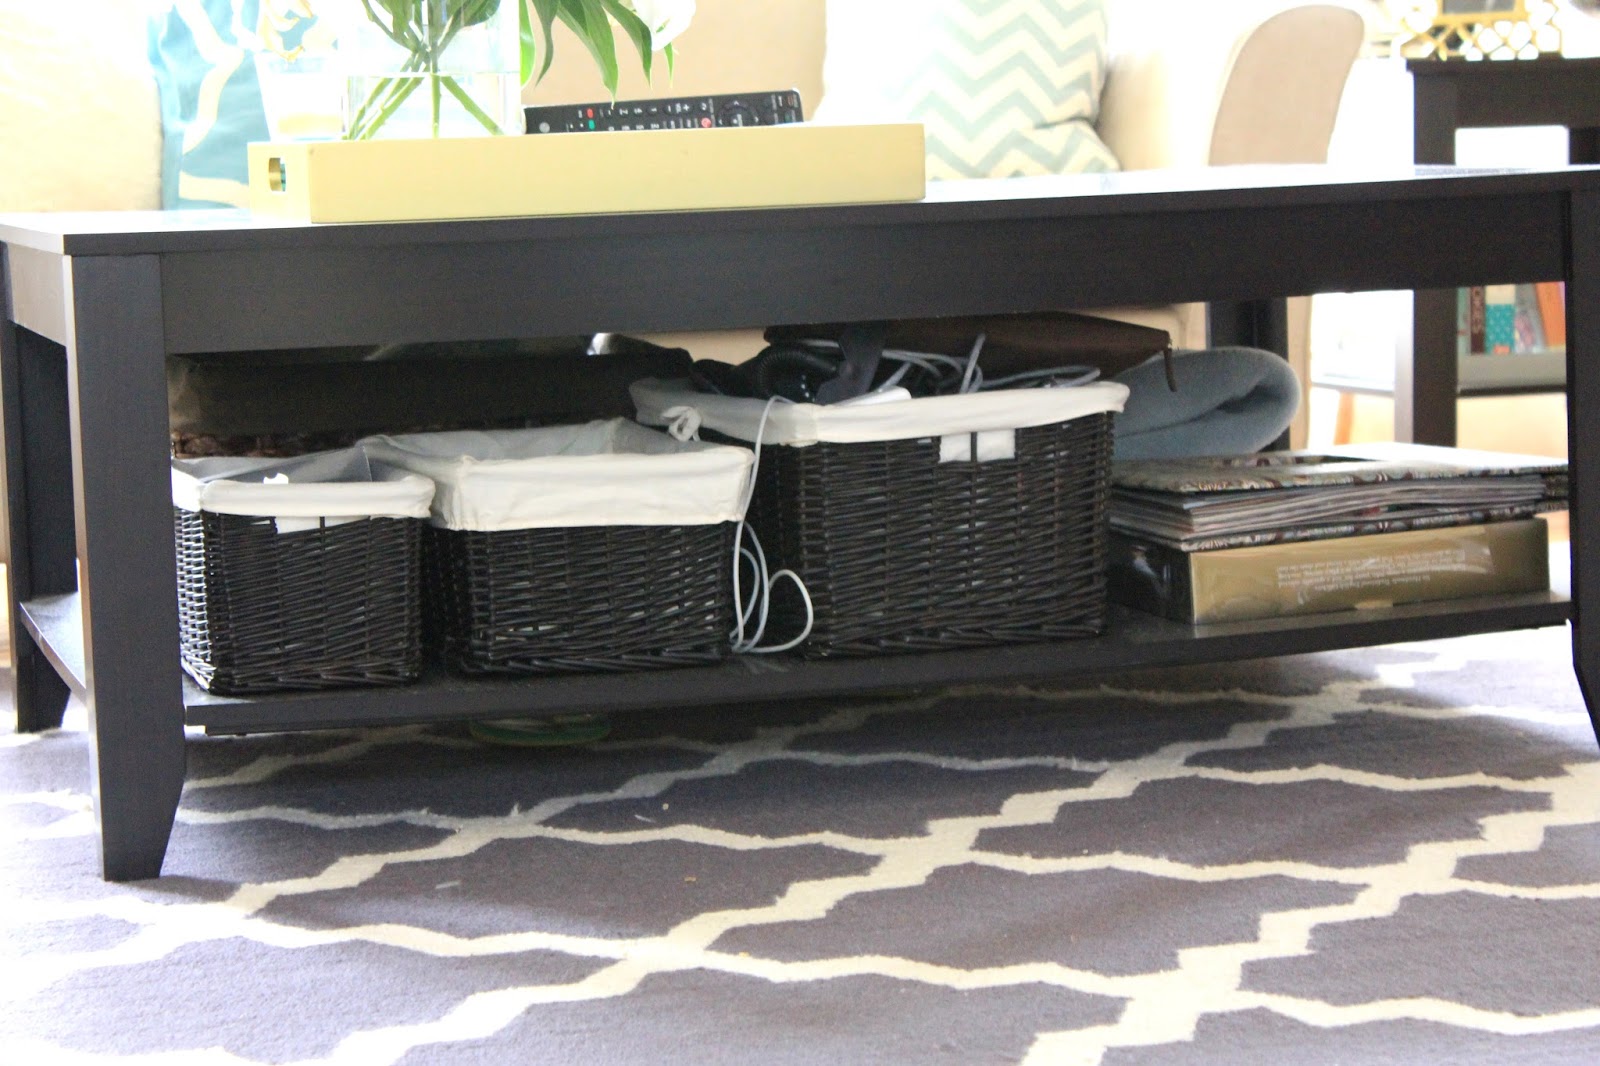
My point??  Storage is important.

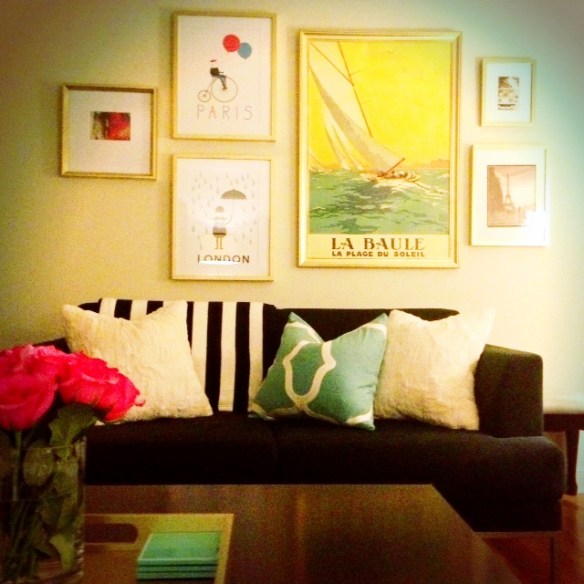
Ok, moving onto the other side of the room… let’s first get distracted by the gorgeous flowers I picked up at the grocery store.  They smell as good as they look, and since I’m not one to hide a good deal, they were only $3 for the bunch!!

I kind of hope they die soon so I can get more while the deal is still going… but they are onto their second full week and going strong!

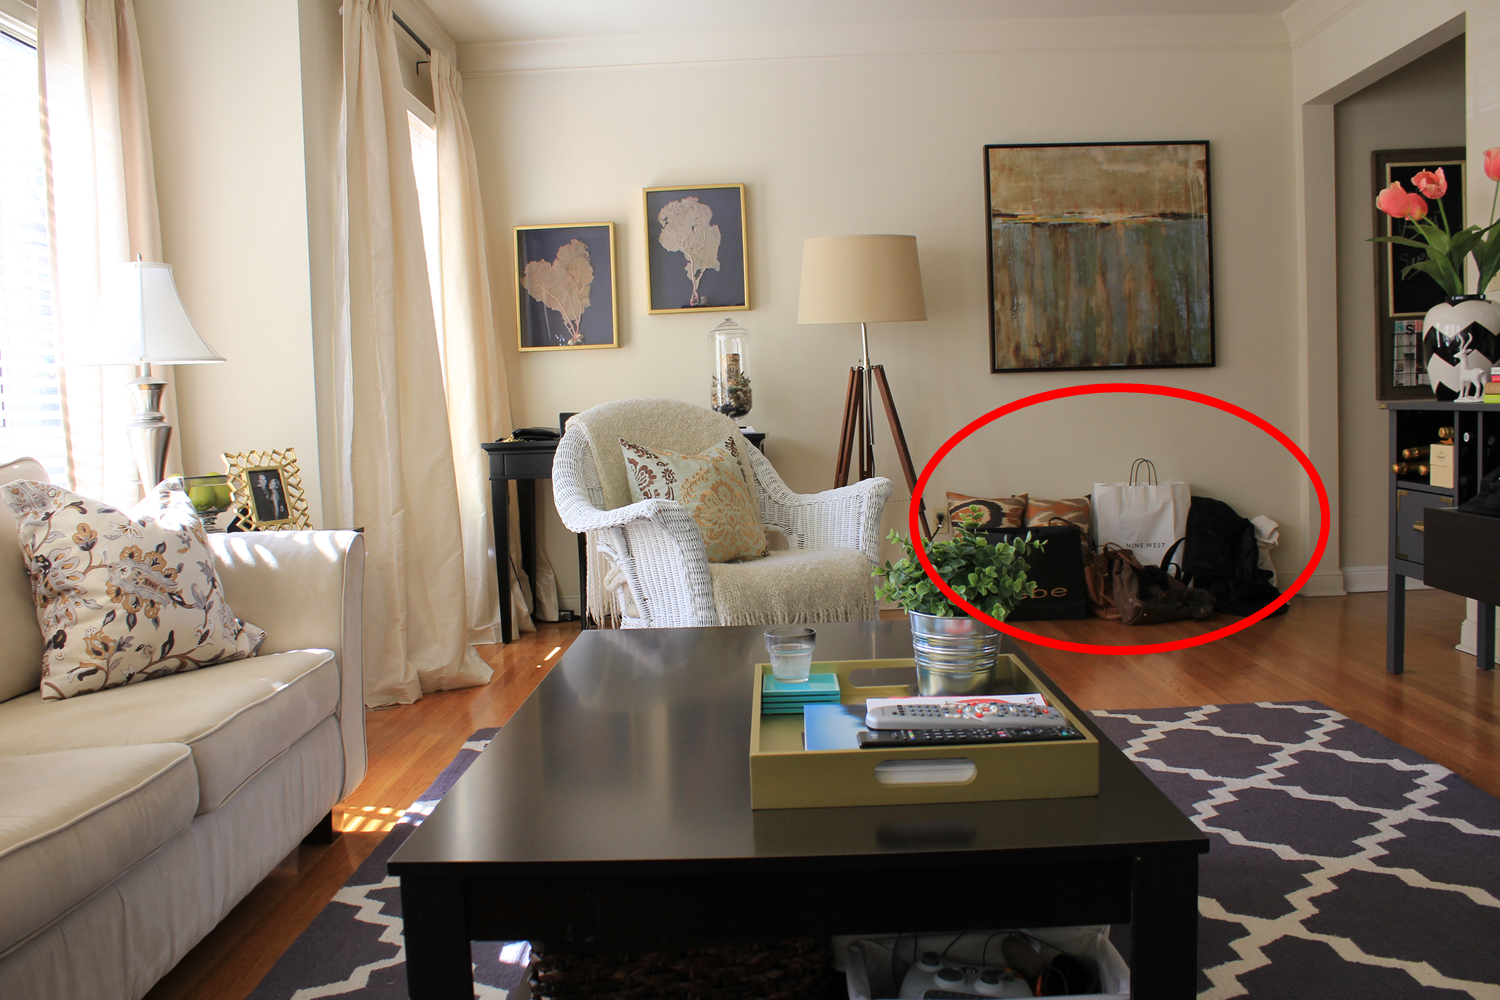
So here we are, sitting on Kris’ couch and looking across to the other side of the room… ignore the painting propped on the ground by the front door.  That came out of the dining room, and needs to find a new home somewhere else…

The white console table moved our of our hallway a few months back, and I has been hanging out on the far wall ever since.  I’ve had a really hard time trying to think of what should go here.  I’m thinking we may ultimately end up selling this console table (despite it’s fabulous new paint job), and maybe the fiddle leaf fig (FLF) can go there with another slightly smaller potted plant next to it?

Or maybe a white or light grey garden stool with a small plant on top of it, to go next to the FLF?

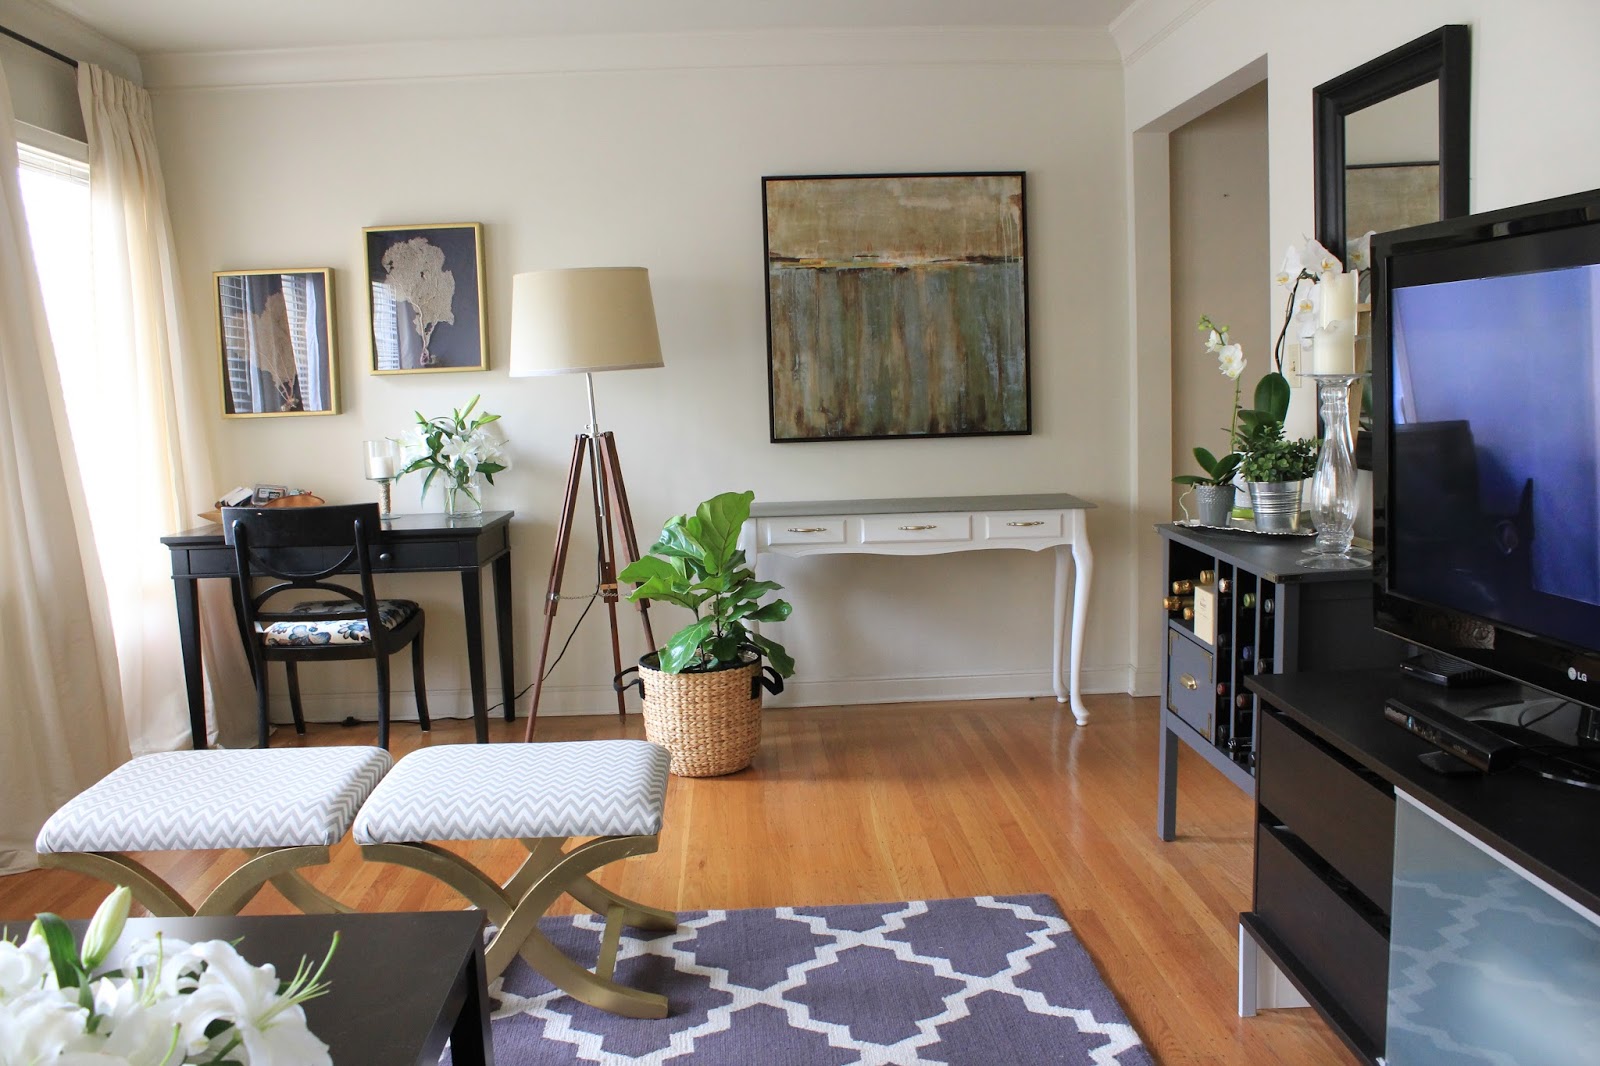
To be honest, the only reason the FLF is out here in the middle of the living room is because I nearly killed it in the dining room next to the heater.  It’s lost 5 leaves so far after moving it away from the heater, and it’s been a few days since the last leaf dropped… I’ve Googled the topic to death, and while I’m not 100% sure, I think we’re in the clear, and I’m going to work on nursing it back to health.  The bald spot on the plant is facing the wall, but you can see where it’s a little bare near the bottom left…

Anyways, I’m sure you’re all completely bored to tears after that story about my houseplant… long story short, unless I want to sign this plant’s death certificate right now, I need to find a home for it in here, and so it might just be at the sacrifice of the console table…

And that’s it!

More updates to come soon with the new sofa, a new coffee table (possibly?) and new or revamped side tables!!

Can you believe this room started out looking like this??

ME EITHER!!!

X Bench Makeover

Say hello to my little friend(s)…

Last week I mentioned how I’d been lusting after a pair of x benches for our space, but had all but given up on the idea of them, since every bench I found cost hundreds of dollars.  I’d stopped looking for a while, and then found a pair of these guys from Target for ~$50 each.  It was a no brainer to buy them and make them over since the cost of spray paint and fabric is minimal.

I am SO happy with how these turned out…

Especially considering how they started out…

Not attractive…

The dark faux leather was so bad in person… and when I say “so bad” I mean “SOOO BAD”.  The leather was rock hard, super shiny, and had no give – it was like sitting on a slippery brick… but I saw past their sad exterior, and whipped them into shape quickly…. here’s how it went:

Step I: detach the cushions from the base.  Easy peasy…

Step II: Spray the bases the color of your choice (I went with Rustoleum’s trusty gold spray paint – never fails my friends) – while the paint dries on the bases, head upstairs to gleefully rip off the faux leather from the plywood using whatever tools at your disposal.

**This was actually the hardest step for me since the manufacturer really stapled the hell out of each bench.  I was left with lots of bits of leather and random staples I couldn’t get out, but it’s fine… no one cares about the underside…

Step III: Throw away horrible faux leather and breath a sigh of relief.

Step IV: Lay out beautiful new fabric that you will be covering the cushions with, and cut the fabric to size (leave ~3-4 inches around the sides of the plywood and foam)

Step V: Staple fabric securely to the cushion starting with the sides, and finishing with the corners

Step VI: Grab the fully dried bases from the garage, and re-attach the cushions to them (or in my case, get lazy on this step and vow to attach them tomorrow)

Step VII:  Stand back and admire your handiwork

What do you think??  Pretty good right?!

I fid that taking pictures of my projects is super helpful… it really allows me to see the imperfections that I want to go back and fix.  In this case, there is a bit of marred wood on the front side of one of the benches that I’ll want to patch, sand, and repaint for a smooth finish…

I also see now that I’ll want to trim down the extra fabric from the bottom of the cushions and that I really do need to reattach the cushions so they sit flush with the base – easy fixes, but you get the idea overall!

Big picture, these benches under-went a major overhaul!  I think it’s a huge change from dark-and-sad to light-and-bright.

So let’s recap costs and savings for a minute… the two benches cost ~$110, the fabric was marked down to $30 a yard, (I needed just 3/4 yards which came out to $22), and the two cans of spray paint were $14.

All together, this pair of benches cost me $146!

It’s not the least expensive project I’ve ever done, but considering I’d been seeing single benches for $200 each, it’s $146 compared to $400.

Pretty dang good if you ask me!

Living Room Re-design

Do you ever have those moments when you turn around and completely hate everything in your space?? This happens to me most mornings when I try to get dressed – tons of clothes in the closet but nothing to wear…

Well, it’s started happening with decor now too – eek!

Our living room got a few updates earlier this year with a new rug, a gallery wall, and a dolled up wine hutch, but since then it has been at a complete standstill for many months.

I can’t stand the lack of change, so the time has come to switch things up.

I made a laundry list of the things I want to change, and came up with an inspiration board for how I want this space to feel – lighter colors, more natural wood elements, and overall a more organic feel…

Living Room Wishlist:
  – New sofa
  – “New” Area Rug
  – Cowhide rug (for layering)
  – Lighter colored side tables
  – Weathered wood coffee table
  – Additional Seating

I’m desperate for a new sofa (it’s about time!) and while I’ve been talking about getting rid of all the dark furniture (coffee table and side tables), it’s time!

The area rug is an easy fix – this creme colored trellis rug is the exact area rug that we have in our bedroom, and I think the rug currently in our living room would look fabulous in our bedroom with all the white bedding, and navy chevron curtains… so the easy solution is to swap rugs.  Bedroom rug moves to the living room, and living room rug moves to the bedroom.  The annoying part of this??  Moving the mattress, boxsprings, frame and headboard out of the way first…

Ok let’s not think about that… let’s talk about my plans for a cowhide rug… RugsUSA has a fab 75% off sale running over the 4th of July, making this cowhide rug just $245! I think I need to have it…..

Obviously, I can’t afford don’t plan to splurge on a new rug, new side tables, a new coffee table, a new chair (or pair of chairs) and a new sofa all at once, I’m thinking of making some temporary tweaks to what we already have in order to feel happier with this space overall… how will I do this??

PAINT.

Yep – that coffee table and side tables are getting a mini makeover in the meantime before I replace them.  They have no idea what is coming their way! I’m thinking a clean creamy white, or even a pretty light blue like the side table in the inspiration photo… although notice the card catalog drawers??? That side table is high up on my wish list….

I’m also contemplating changing up the layout of the room, but I’ll cross that bridge after making some of the initial changes to color palette…. stay tuned for more………..

X (bench) Marks the Spot

For anyone else out there that is a devout follower of the wedding blog, Style Me Pretty, you probably also follow their spin off blog, SMP Living.  Last week they had a FABULOUS feature on “how to makeover an x bench”.
I have been a long-time lover of the x-bench, and had been on the hunt for a pair for a while, to fill the empty space below the large piece of art in our living room (well the space occupied with bags for donation in this photo…)
A few months back, when I first found our tripod lamp, I even created a mock of how I saw this wall looking… complete with x-benches.  Unfortunately, not much has changed in this space since I posted this back in January:
SMP’s x-bench makeover gave me the inspiration to look into getting a pair of x-benches again, and so I hunted about for some additional inspiration…
X-Benches as a lovely accent under a console table…

X-benches are lovely at the foot of a bed…

X-benches are the perfect seat to tuck under a desk

X-benches are the perfect way to add seating in a living room…
Now the real trick is to find a pair of x-benches… they are apparently not available online, and so I suspect I’ll be making some calls to a few stores today…
Happy Monday!

Our Gallery Wall is up – TA-DAAAA!

I finally installed a gallery wall in our living room after 6 months of talking about it.  
I had agonized over every little detail for way too long… the layout of our future gallery wall, frame size, frame color, and about what would go in the frames… finally I’d had enough of talking about it.  It was time for action.  
And so one evening about a month ago, I picked up my hammer and some nails, and went to town… about 15 minutes later, we had a gallery wall.

Almost none of the original frames I’d bought for this project even made it up on the wall.  I’d been thinking black frames across the board, but after buying a few non-black frames, decided to flip this gallery wall on it’s head, and spray them all gold.  Rustoleum spray paint to the rescue!

Once the frames were all sprayed and dry, I hung the large vintage print of the sailboat first.  With the largest piece of the puzzle complete it was easy to see where the other frames needed to go, and so I just started nailing up frames around it…

The gallery wall actually needs a few tweaks – in my preview post (the grainy cell phone shot of this wall after I finished it) I mentioned that the left side needed to be evened out.  I’ve started on that process slowly – replacing the illustrated Paris and London prints with brighter abstract prints that coordinate eerily well with the La Baule sailboat piece.  The left side still needs something else, to make it feel “even” but we’re getting there slowly.  Maybe a few more smaller frames will do the trick…

This was how it started…

Not bad by any means, but you can really see how the abstract prints bring some much needed life to the space, and help tie things together…

Kris’ least favorite game in the world is the “do you notice anything different” game when he comes home.  His first response is usually… your hair looks really good… is that it?  Did you get your hair done??

A well trained man… but this time, he noticed the gallery wall first.

This wall was VERY blah for a long time with three undersized black and white prints from Ikea – one in a broken frame.  Classy.  Remember how it looked before?

Don’t be fooled… this is actually a REALLY good picture of how it looked before.

Here’s a better “before”:

This makes me realize and really appreciate how far this room has come since we first moved in…

I like that this space has a lot more character, and that there is a lot of color going on.  As much as I admire Restoration Hardware’s style, I could never live in a room devoid of color and pattern that way.  I love pieces from their collections, but all tan and white and grey and greige (grey / beige) is not my jam.

Color makes me happy, and so this gallery wall is making me REAL happy.

Another thing I really want to point out here… the blue pillows with the white stitching.  These were a little DIY I did a few months ago.

Do you know where I got the fabric?

Target – the happiest place on earth (next to Disneyland)  The fabric was actually a shower curtain in another life.  That $19.99 shower curtain is now two throw pillow covers in our living room.  And I made them!  Holla!

A little stitch witchery (iron on bonding), and presto-chango.  We’ve got a pair of inexpensive, vibrant pillow cases, that are summery and fun… and match PERFECTLY with the water in the print (that was totally unintentional since the pillows happened way before the print was hung).

And so that’s that… slow changes over time, mean big changes in the end.  I am really happy about my little gallery wall!

Gallery Wall

Remember how I’d been agonizing over putting up a gallery wall in our living room??  Well it’s happened!  In between my back to back weeks of travel between San Francisco, Los Angeles, and New York, I managed to get the gallery wall started , and here’s a little sneak peek…

GOLD.

Sorry for the extremely blurry photo, but I was excited, and wanted to share.  The wall isn’t quite finished, but it’s getting there… we’re still waiting on a few pieces to round out the left side, but I am loving the change and the addition of some much needed color.

I’m also thinking that we need some more solid prints, and less white mattes with the large La Baule vintage poster… just something a bit more solid to balance out the left side.  I’m thinking a dark grey/blue matte on that abstract piece, and a few other colorful prints?  What do you think?

It took me a long time to pull the trigger on the gallery wall.  I’m not entirely sure why… I guess the thought of putting all those haphazard holes in the wall scared me, but I just started eyeing it, and it ended up working out.  I’d put together tons of layouts (remember this post from back in October??) but ironically none of the layouts, and nearly none of those frames made it up on this wall.

I’m so happy with how things are coming together… better quality photos to follow soon – I promise!

Happy Thursday!
xo

Musical Curtains

So this isn’t TOO exciting, but I wanted to share a few updated shots of our living room, after playing musical curtains the other weekend.

Since hanging the chevron curtains in our bedroom, the creme colored silk panels that had been in the bedroom, made themselves a new home in the living room with the other silk panels.

AT LAST we have four panels hanging along the row of windows in our living room!

For pretty much everyone except me, the change is nothing you’d even think twice about, but for the longest time, these windows just had a single curtain flanking each end.

These aren’t great photos, but they’re evidence that it was a bit bare:

See the empty space between windows?  It just sort of bugged me, and felt unfinished…

Here is a better picture to illustrate how “empty” it felt to me……

Obviously this snapshot is from a long time ago… before the new rug moved in with us.  Don’t you agree that there was something missing?  It just needed a little something extra…

And now it does…

I think it makes the room feel larger, and more complete, and since we get direct sunlight in here ALL DAY LONG, I think the curtains really help soften and filter the light.

Here are a few more pictures since I know you’re as excited as I am… NOT.

Side note… the room is really neutral as of now since I wanted to simplify and de-clutter after all the excess of Christmas.  Now that we are getting closer to spring, I’ve got my eye on some brighter colors and fun patterns for the pillows, so the room will feel a bit more awake after all the neutral colors of January and February.

And, that’s it!  Just wanted to share the little update with you all!  Happy Wednesday!

Battle of the Occasional Chairs

This afternoon has been battle of the chairs…

Remember all my plans for the living room, and how I desperately want to replace that dang wicker chair with something lovely, and comfy, and grown up?? (BTW, I swear, this is one of the last time’s I’ll post this little diagram of the living room…)

Well, I’ve got a few contenders for the space – they are all lovely, and I want them all, but I have to make a tough call…

First runner up, is actually a pair of these white slipper chairs…

Source
Cute right??

I’m imagining them with a matching pair of sassy throw pillows in a bright print to wake them up (perfectly fluffed and chopped of course)

Yeah, yeah… I know, I know… my copy and paste of these pillows was not my finest moment in image formatting…

Ok, so I have a few issues with these slipper chairs – as cute as they may be.  These are nearly $300 each – and for $600, I think I can do a lot better than Target (no offense Target… I still love you).  The other concern?  They are super plain from the back, which isn’t ideal when these chairs are the first thing you see when you walk into the living room to view the seating area.

Finally, I’m not sure if they exactly say “come lounge in me” – they don’t look all that comfortable… but maybe I’m wrong, and they are the most comfortable chair you’ll ever sit in.  Who knows?!

So another option I found – and LOVE – is this cute little velvet number from Macys:

Trust me, I already know how awesome this chair is, with it’s sloped arms, and angled back.  It has rave reviews online about how comfortable it is, how durable it is, and how everyone just LOVES this chair… you’re probably thinking, what’s the hold up??  
The hold up is this couch… that I have lusted after for over a year… and I do not want the couch and matching chair…  I’m not a fan of the matching set (I learned my lesson after buying a coffee table/end table “set” a few years back – no more “sets” for this little lady).
So should I base my decision to buy (or not buy) this chair on a couch we don’t have any intention of buying in the next few months? Who knows when we’ll actually get around to replacing our small sad little love seats!  What if we go for this couch from Crate and Barrel (in taupe, not blue) that I’ve ALSO been lusting after… then it won’t matter that I got this chair from the “set”.
Ok, I can’t think about it anymore… because there is a third and fourth option on the table as well!
What about… one of these chairs… 

Yes, I realize it’s the same chair, but I am going back and forth on the colors!  On the one hand, a light taupe will work with whatever decor comes and goes, but the green is so dang lovely!  I love that sea-foam color and it brings some personality to the space…

And look how cute these are from the back!!

Pretty sweet right??  I found them online for ~$300 – the green version is more pricey for sure (closer to $400) but still a pretty great deal for the rave reviews it had on Overstock, Target, Brookstone, etc.  
I did a little comparison price check, and some places are selling it for up to $800!!  Crazy!

It pays to do a little research eh?

So… you can see my problem… I’m very torn on which chair to get.  And I’m a big proponent of trying things out before buying – what if the cushion is too hard?  Too cushy?  What if the color is completely different in person?

Since I want something comfortable, I think the slipper chairs, as clean looking as they are, are out for me, and it’s really between the chair from Macy’s, and the tufted nail-head Colin Club chair.

Any opinions would be welcome here!!

Accordion Style

Can you tell what it is in this picture that has me enamored??

Source

If you guessed the brushed bronze accordion style table in the forefront, than you’d be right on the money!!

Industrial chic is back in a big way – just ask Restoration Hardware.

Now that we are making progress in the living room, and I’ve crossed a few things off my never-ending list, I am thinking about what kind of chair I’d like to replace the wicker chair that’s currently in there.

Once I start thinking about what chair to put in there, I start to think… well do we need one chair or two?  If we have a chair that people actually use (as opposed to one that I just like to look at), then what will people set their drink down on… the coffee table is a long ways away.  And so then I start thinking about what kind of table would look cool, be functional, and still be small enough not to get in the way or look awkward floating in the middle of the room next to our chair.

See what happens when I start thinking about chairs??  If you give a Mouse a Cookie… (have you read that story?? If not, please do)

I mean how sweet are these little tables – narrow yet functional – this one here is just tucked away in the corner…

Source
And look how sweet this little accordion table looks tucked into this reading nook.  I decided to do a little recon, and see what I could come up with online…

This one is from Urban Outfitters, and it’s only $64!!  I mean COME ON!!  $64??  I spent more than that at happy hour last night!  And let me just say, this table does not look like $64.  Thank you Urban Outfitters – this is definitely better than the fake glasses and $50 t-shirts you sell.

And then after that steal… I found this one.  Holy cow, did you see the at price tag on this baby??? DEFINITELY out of my budget (yeahhh, not going to spend nearly a grand on a teeny tiny table), but I love the shiny brass finish, and the marble top – so pretty!

This beauty comes from the same seller as the $800 brass table, but its a) cheaper b) shorter c) wider.  I am LOVING the mirrored top too… more room to put my book, remote control and glass of wine!

What do you think of these little accordion wonders?  I’m in loveeeee.

Campaign Style Wine Rack – DIY

As you know, I have a laundry list of things I want to change in our home, but when it comes to crossing things off the list, I feel like I move at a snails’ pace!  Remember last month when I drew up the grand plans for rearranging the living room?? (original post here)  Well, for once, I got right on it, and have a few updates to share!!

To refresh your memory, this was the old layout:

Awkward short table next to the TV, wicker chair in the corner, desk blocking entry from entry-hall into the living room.  Not ideal.

This was the updated plan for the changes I wanted to make:

On the list…
 – Move the chair into the seating area (ultimately replacing the wicker with something else)
 – Get rid of that awkward short table next to the TV
 – Replace the awkward table with a bar cart or wine bar
 – Move the desk next to the window
 – Get a standing lamp
 – Put two small x-benches where the desk used to be

First change (and the easiest one so far) was moving the desk next to the window – it really opens things up when you first walk in the room, and it’s so nice to work in this sunny nook!  The standing lamp was also an easy decision to make, and I love how it looks next to the desk!

Moving on to the second change… here is a good snapshot of that awkward little table next to the TV.

It was WAY too short, and this is pretty much how it stood for the last year since we moved in.  It’s not AWFUL, but it always drove me crazy.  To say I wasn’t sad to see it go is a gross understatement!

Sayonara sucka!

While I’d been lusting after a bar cart like these bad boys, they really are not in the budget at $700 a pop (for the cheap ones!) and so I had to get creative.

We had a wine rack in the dining room, sort of tucked into the corner – you couldn’t see it, and it ultimately made the room feel a bit cramped.

One day I had an ah-ha moment, and decided that the wine rack would be the PERFECT solution for this area of the living room.  Moving it out of the dining room would open up that space, and re-purposing it for the living room would mean one less thing to buy!

It’s not some unique, heirloom piece (it was from Target to be completely honest) but it was the right height and width, so I was determined to make it work…

I snapped these photos really quickly after I moved it over from the dining room – I was super happy that it was just the right height for the mirror but the cheap look of the faux wood was not doing it for me.  
I’m also VERY over the black/brown wood look, which I went a little crazy with a few years ago when we were buying furniture for our first apartment.  Now, I feel like EVERYTHING is black / brown wood, and it HAS to change.
Here is a close-up of the finish, and that glorious hardware…

Blah.  Boring. Cheap.

I’ve long admired the look of campaign furniture – the brackets, and hardware really dress things up, and so with this image in my mind, I set out for a mini makeover…

Source

I needed paint, and hardware, but the weather had been really cold here, so I was in no mood to walk down to the hardware store and pick up a new quart of paint.

Feeling lazy, I decided to try mixing some paint I had laying around.  I had a dark blue-grey quart of oil based paint that I had used to paint the back of our bookshelves with, and another quart of taupe chalkboard paint that I had used on the console table in our hallway.  My little experiment could have ended disastrously but I figured that if it looked awful, or I ended up with peel-y paint, I could just sand it off, and start over.

I grabbed a Tupperware, started mixing, and much to my surprise, the color was PERFECT – a true grey, with blue undertones – JUST what I wanted.

I wasn’t quite sure how the paint would go on since it was half oil, and half chalkboard, but I have to say, the combination brought the best of both worlds.

The oil based paint made the application go on super smooth, and since the chalkboard paint was also in there, it dried really fast, and feels REALLY durable.  Time will be the true test to it’s durability, but after waiting 24 hours for the paint to “cure” it was ready to get some hardware!

While I really admire the look of the traditional campaign pulls, most of them require you to bevel out an indent in the drawer so that it lays flush with the piece.

I decided that trying to bevel out an indentation on a drawer that is probably made of particle board (god knows what it’s made of) would be a terrible idea… even if it were real wood, I think that’s probably way above my skill level.
With images in my head of myself royally messing up the face of the drawer I decided to go with an alternative – cup pulls have a similar look and feel, but I could just drill them right in – no muss, no fuss.
I laid everything out, and started drilling – since there was just one drawer, I just eyeballed it for the center, and the pull strategically covered up the centered hole from the original knob – no need to fill it, sand it and paint it.
Holla!
Here she is – the finished product!

Isn’t she pretty??   
I love how the grey paint looks with the brass hardware, and most of all, I love how we now have a little variation to our living room that is FULL of black/brown furniture.  I left the back of the wine rack black – mainly because it was too hard to fit my hand back there to paint it, but I like the contrast.

I’d had grand visions of putting casters on the bottom, but I think with all the brass hardware I added that casters would have been a bit much.
The best part of this project was that it cost me next to nothing!
The whole project cost me about $9 – mainly the cost of the hardware – the paint was free, and I used a $1.00 foam brush that I tossed afterwards.
My list is slowly dwindling in the living room, and I LOVE crossing things off…  after these updates, here’s how the list stands:

 – Move the chair into the seating area (ultimately replacing the wicker with something else)
 – Get rid of that awkward short table next to the TV
 – Replace the awkward table with a bar cart or wine bar
 – Move the desk next to the window
 – Get a standing lamp
 – Put two small x-benches where the desk used to be

Of course, I’ve since added to the list…
 – Hang two additional curtain panels on the center windows
 – Replace wicker chair (with a white slipper chair perhaps)
 – Replace black and white Ikea prints
 – Replace or revamp coffee table

I’m sure as I continue to make progress, the list will continue to grow, but at least I’ve made some headway!!