This DIY idea started with this necklace….
It’s like jewelry for your fridge! I am sooooo loving this idea…
Buy the magnets HERE
Buy the spray paint HERE
So cool, right??
This DIY idea started with this necklace….
It’s like jewelry for your fridge! I am sooooo loving this idea…
Buy the magnets HERE
Buy the spray paint HERE
So cool, right??
Meet my new little friend…
The large round Iron and Rope from Restoration Hardware…
He’s rustic and cool and old timey, but welcoming him into your home won’t make you seem like a suspender wearing, fake-old-timey poser… but just a cool collector of rad things…
The problem??
$650 for a mirror???
I think not!
But how easy could this possibly be to replicate?? Sure, those knots are the complicated knots of a skilled sailor, but heck, I’m sure it’s nothing a quick Google search (or help from my father… who is a skilled sailor) can’t fix!
Let’s find some eligible mirrors, eh?
Here are a few contenders… I’m liking both the size and thin rim around the Ikea version – and that could EASILY be painted black.
This is how I see it all coming together…
I’d mount the mirror on the wall (as opposed to appending the rope and using that to hold the mirror’s weight.
Then I’d find some good rustic rope (I’m sure any hardware store supplies it), and tie some ornate knots at each end.
Glue to the sides of the mirror.
Get a largish door knob, and spray paint it black.
Mount the doorknob on the wall where the rope can loop over it… to give the illusion that it’s hanging
And voila! For a lot less than $650 (and dare I say it… probably quite a bit less than $100) you have a very close substitute for the Restoration Hardware Iron and Rope mirror…
And how cute is this one… much more “wedding-y” and a little more rustic since they actually used chalk on it, instead of a chalk pen like the above photo…
Or white – I’m loving the black bottles much more, but a group of these (in varying sizes and shapes) in white could look kind of rad on a mantle…

Like I need an excuse to pop open a bottle of wine… but if I were looking for one, I’d say these are a pretty good reason!
Say hello to my little friend(s)…
Last week I mentioned how I’d been lusting after a pair of x benches for our space, but had all but given up on the idea of them, since every bench I found cost hundreds of dollars. I’d stopped looking for a while, and then found a pair of these guys from Target for ~$50 each. It was a no brainer to buy them and make them over since the cost of spray paint and fabric is minimal.
I am SO happy with how these turned out…
Especially considering how they started out…
Not attractive…
The dark faux leather was so bad in person… and when I say “so bad” I mean “SOOO BAD”. The leather was rock hard, super shiny, and had no give – it was like sitting on a slippery brick… but I saw past their sad exterior, and whipped them into shape quickly…. here’s how it went:
Step I: detach the cushions from the base. Easy peasy…
Step II: Spray the bases the color of your choice (I went with Rustoleum’s trusty gold spray paint – never fails my friends) – while the paint dries on the bases, head upstairs to gleefully rip off the faux leather from the plywood using whatever tools at your disposal.
**This was actually the hardest step for me since the manufacturer really stapled the hell out of each bench. I was left with lots of bits of leather and random staples I couldn’t get out, but it’s fine… no one cares about the underside…
Step III: Throw away horrible faux leather and breath a sigh of relief.
Step IV: Lay out beautiful new fabric that you will be covering the cushions with, and cut the fabric to size (leave ~3-4 inches around the sides of the plywood and foam)
Step V: Staple fabric securely to the cushion starting with the sides, and finishing with the corners
Step VI: Grab the fully dried bases from the garage, and re-attach the cushions to them (or in my case, get lazy on this step and vow to attach them tomorrow)
Step VII: Stand back and admire your handiwork
What do you think?? Pretty good right?!
I fid that taking pictures of my projects is super helpful… it really allows me to see the imperfections that I want to go back and fix. In this case, there is a bit of marred wood on the front side of one of the benches that I’ll want to patch, sand, and repaint for a smooth finish…
I also see now that I’ll want to trim down the extra fabric from the bottom of the cushions and that I really do need to reattach the cushions so they sit flush with the base – easy fixes, but you get the idea overall!
Big picture, these benches under-went a major overhaul! I think it’s a huge change from dark-and-sad to light-and-bright.
So let’s recap costs and savings for a minute… the two benches cost ~$110, the fabric was marked down to $30 a yard, (I needed just 3/4 yards which came out to $22), and the two cans of spray paint were $14.
All together, this pair of benches cost me $146!
It’s not the least expensive project I’ve ever done, but considering I’d been seeing single benches for $200 each, it’s $146 compared to $400.
Pretty dang good if you ask me!
It all started with this image…
Can you imagine anything more extravagant?? To have a side table that is upholstered with ostrich leather?? And that brass hardware… stunning. You all know how I feel about gold. To die for…
A piece like this would cost the big bucks (can you hear the ca-ching sound in your head???)
But oh how amazing it would be to own a fabulous side table JUST. LIKE. THIS. Since I’ve been put on a budget, and I could never fathom spending thousands on a side table anyway, I had to get a bit creative in brainstorming up a little DIY for this end table…
Here’s what I came up with…
X-benches are lovely at the foot of a bed…
X-benches are the perfect seat to tuck under a desk
Happy Friday friends!! Are you as ready for the weekend as I am??
I’ll be heading down to Orange County this weekend for my beautiful friend’s bridal shower, but before I hop on my flight, I wanted to share with you an idea I had for painted curtains… I’m not sure if you remember the chevron painted curtains I made and posted about here, but after seeing the below image on Pinterest (unfortunately no source folks) I had a brilliant idea for another take on painted curtains.
I gave you all a sneak peek of our new headboard last week, but yesterday afternoon, it finally made it’s debut in our bedroom!
It took a lot of hard work, and a FULL weekend of sawing, sanding, measuring, drilling, screwing, gluing, upholstering, stapling, over-analyzing, band-aiding, nailing, un-nailing, re-nailing, and perhaps a little cursing somewhere in the middle, but it’s finished, and while it almost ended up face down in the middle of the freeway (another story for another day), it’s finally in our bedroom, safe and sound at last!
Literally blood, sweat (no tears), and a little stain remover went into this headboard, and I could not be more thrilled with how it turned out. I am SO PROUD to say that with A LOT of help from my parents, I successfully made my own headboard!
We joked the entire time that the “A-Team” was working on it, and that the “A” stood for “type-A”. It’s genetic I swear – we are all just as anal-retentive as one another… so that’s probably why it took us two full days instead of one. It had to be JUST PERFECT – down to the stained (and lacquered) legs that no one will ever see behind the bed.
The full tutorial on what you need, and what we did is on it’s way, but in the meantime, here is a full photo dump of my pretty headboard in all it’s glory!
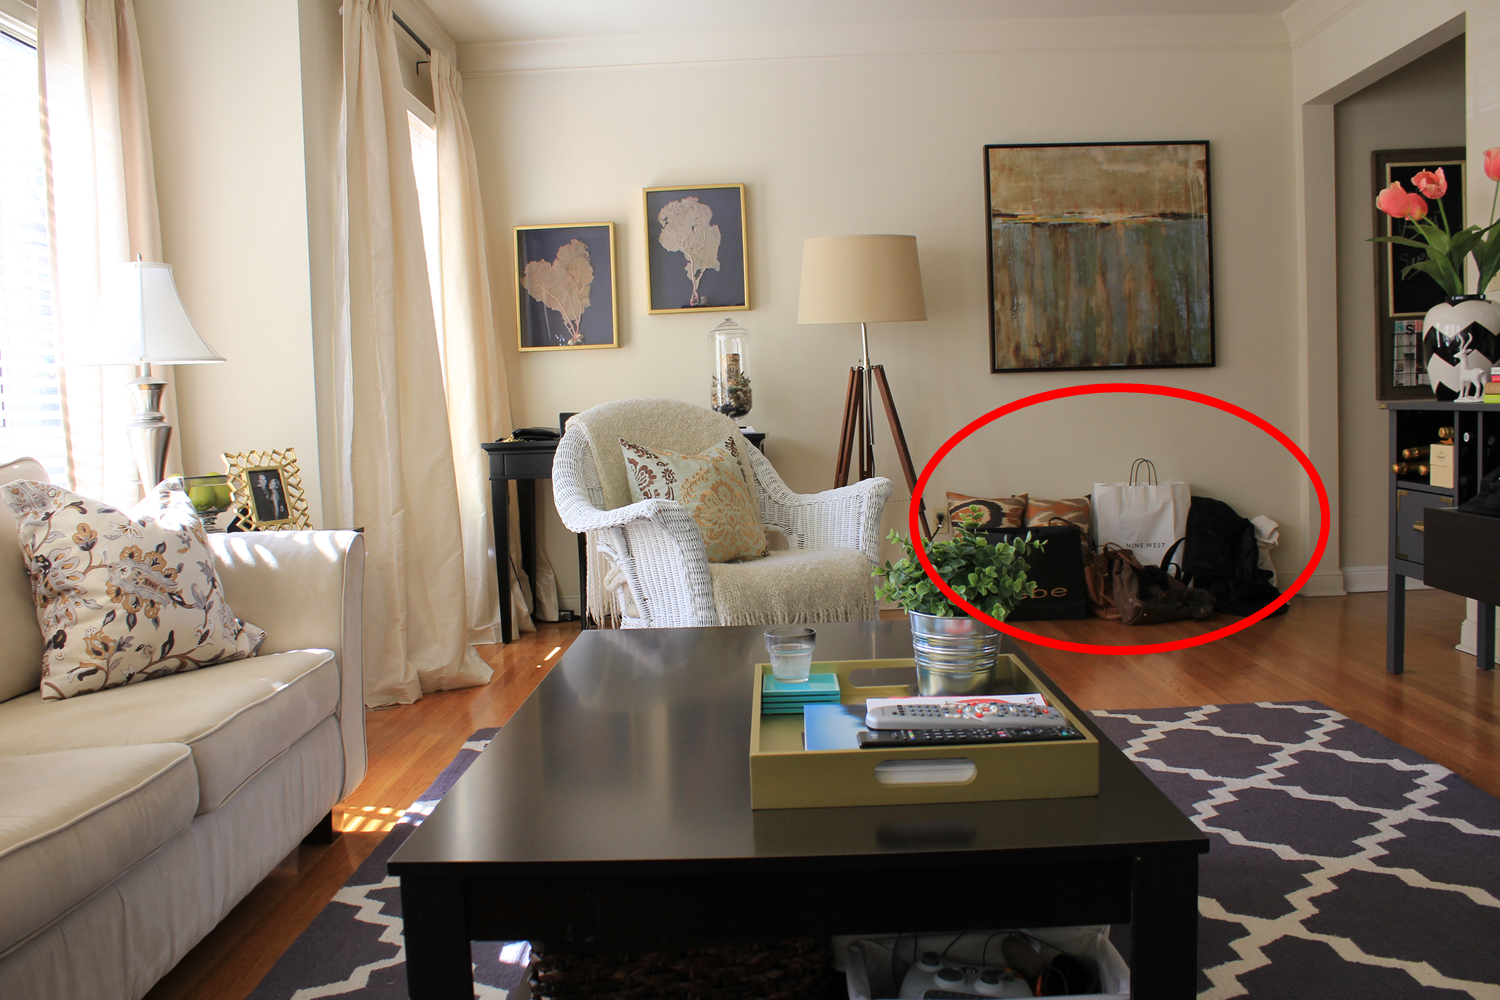
After living in this apartment for over a year and a half, this room is FINALLY a room that we want to spend time in. Up until recently, it had been a catch-all for rejected furniture that didn’t belong in the rest of the house. Slowly but surely, I’ve been making small updates to the room… making some chevron curtains, painting my furniture, replacing the dinky lamps that were there before, getting a new bed, new rug, new bedding… and the headboard is the final piece to tying this room together.
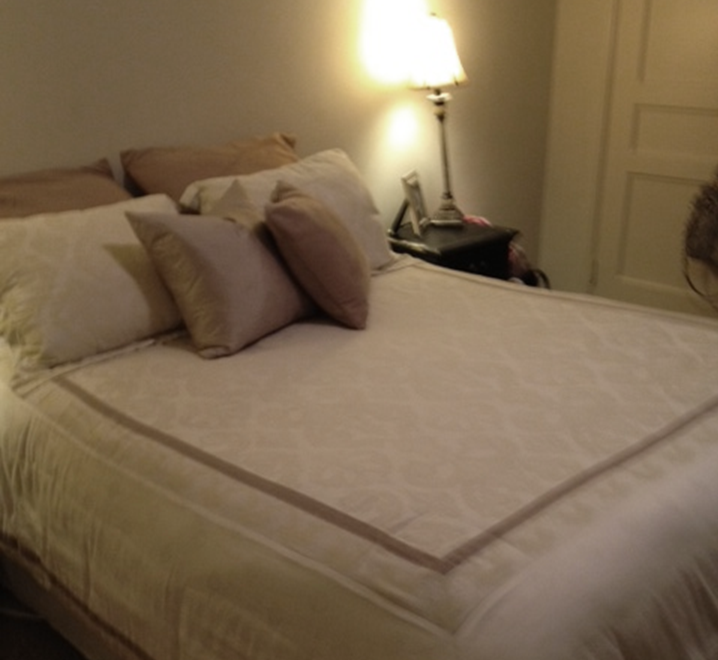
Do you even remember how this room started out?? Let me refresh your memory…
Scary!
I think I’ll also do a post on “the evolution of our bedroom” since it has gone through quite a few changes. Anyway, getting back to our headboard…
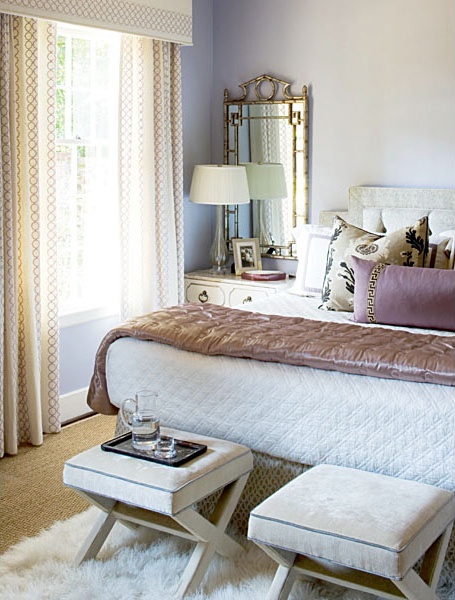
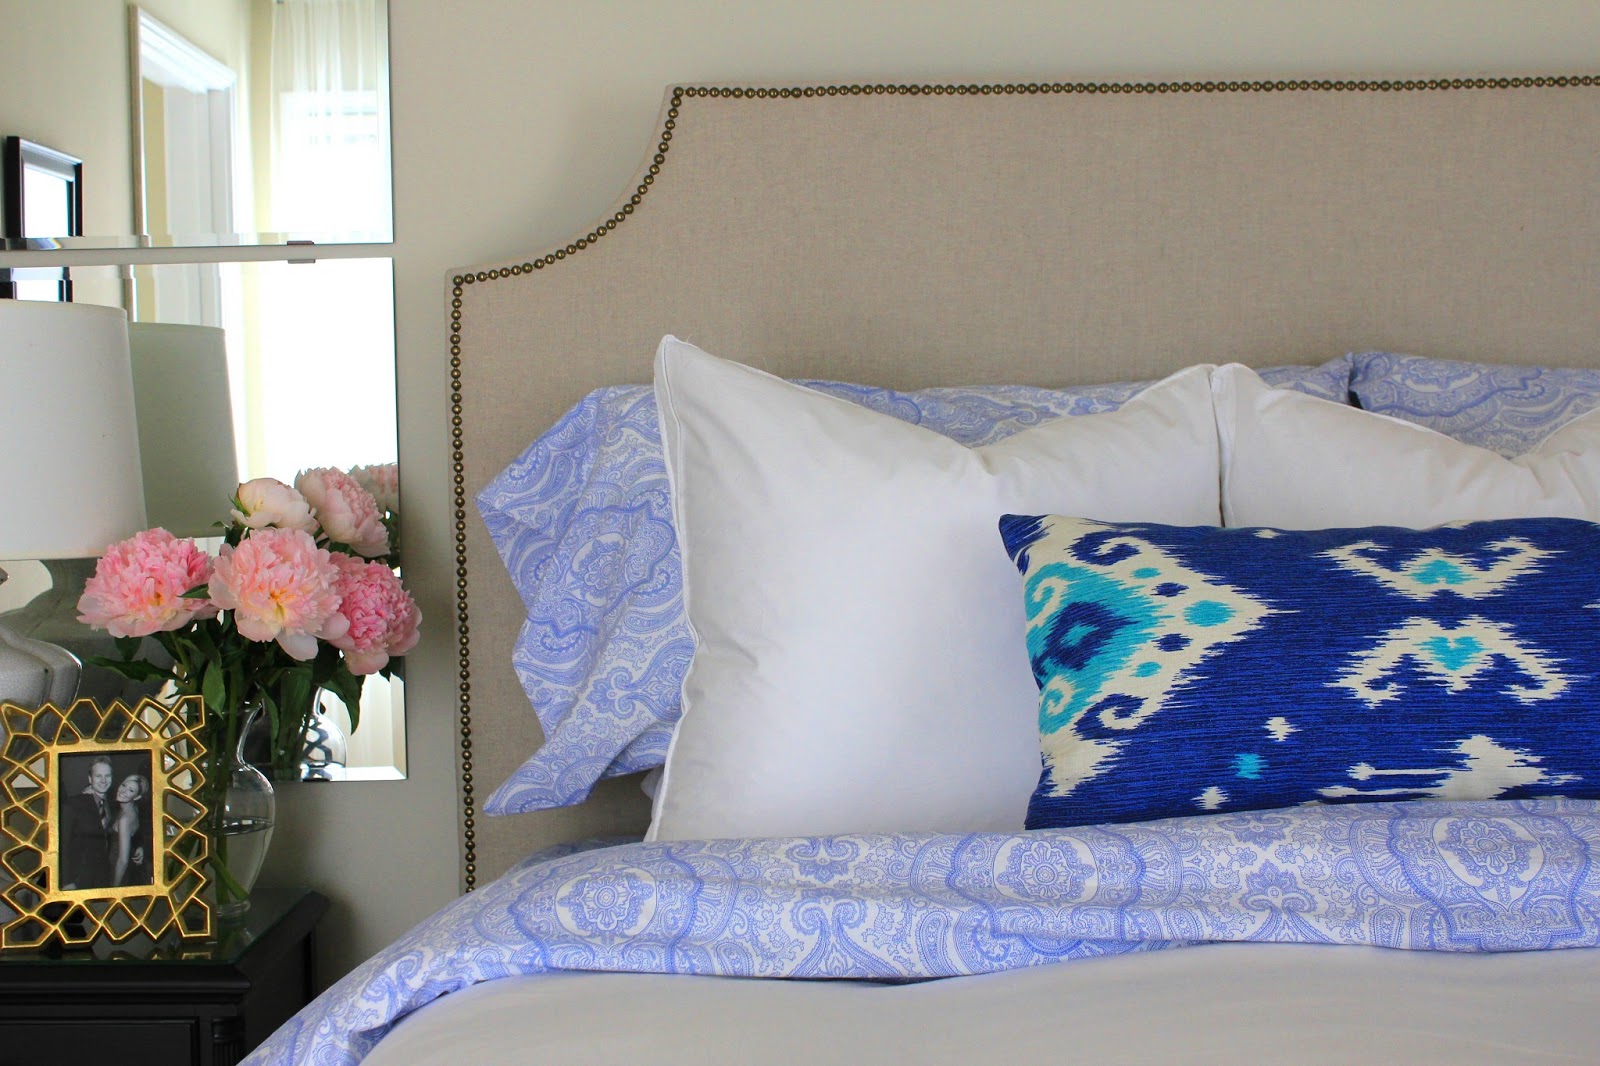
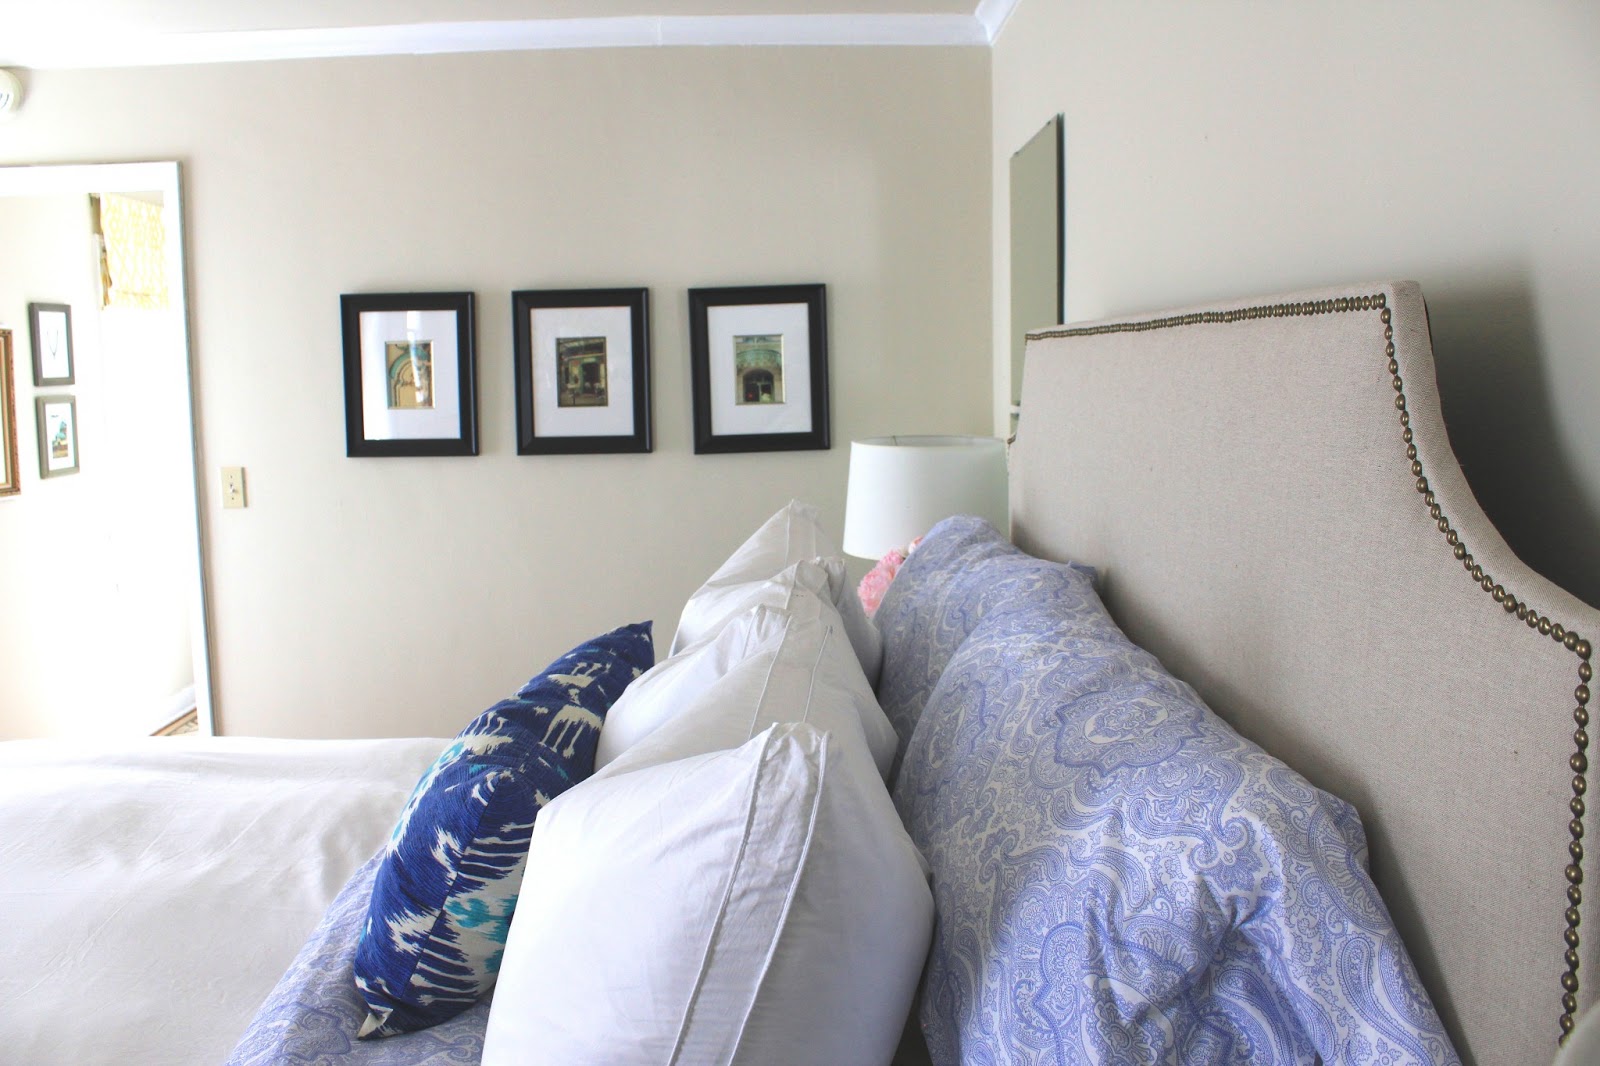
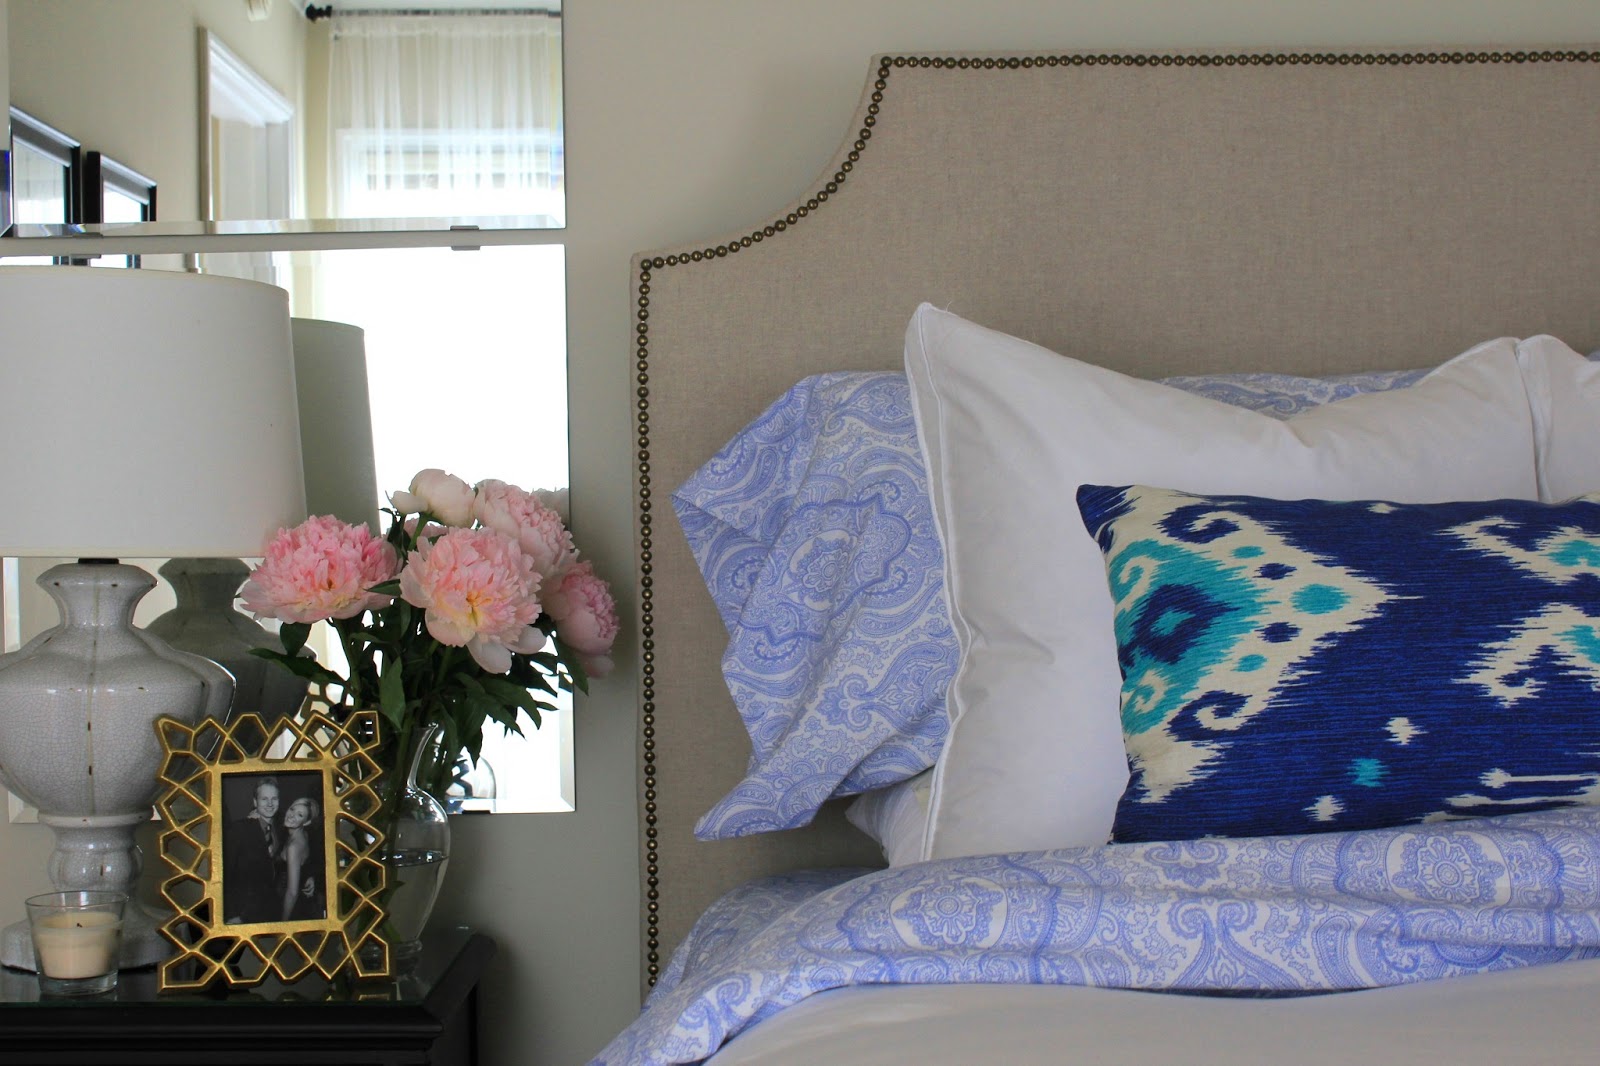
The headboard really anchors the room, and makes the bed the focal point in the space. While our bedroom gets less light than any other room in our house, I think we finally got it right with the light bedding and pretty blue accents. Late morning is my favorite time of day in this room – it gets direct light, and feels bright and airy for a few hours before the sun moves beyond these windows.
The mirrors I hung behind the nightstands help reflect light for the rest of the day, and open up the space.
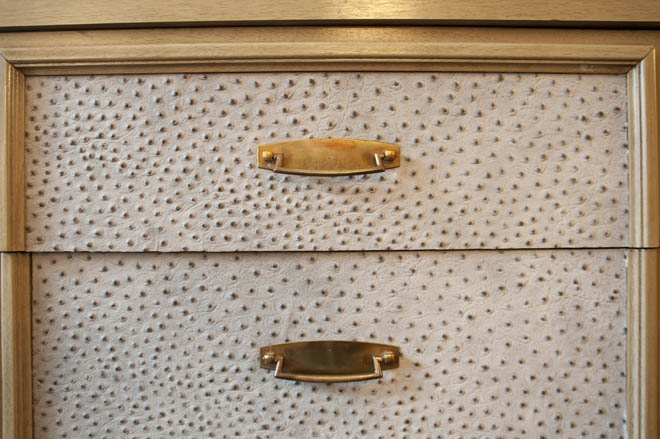
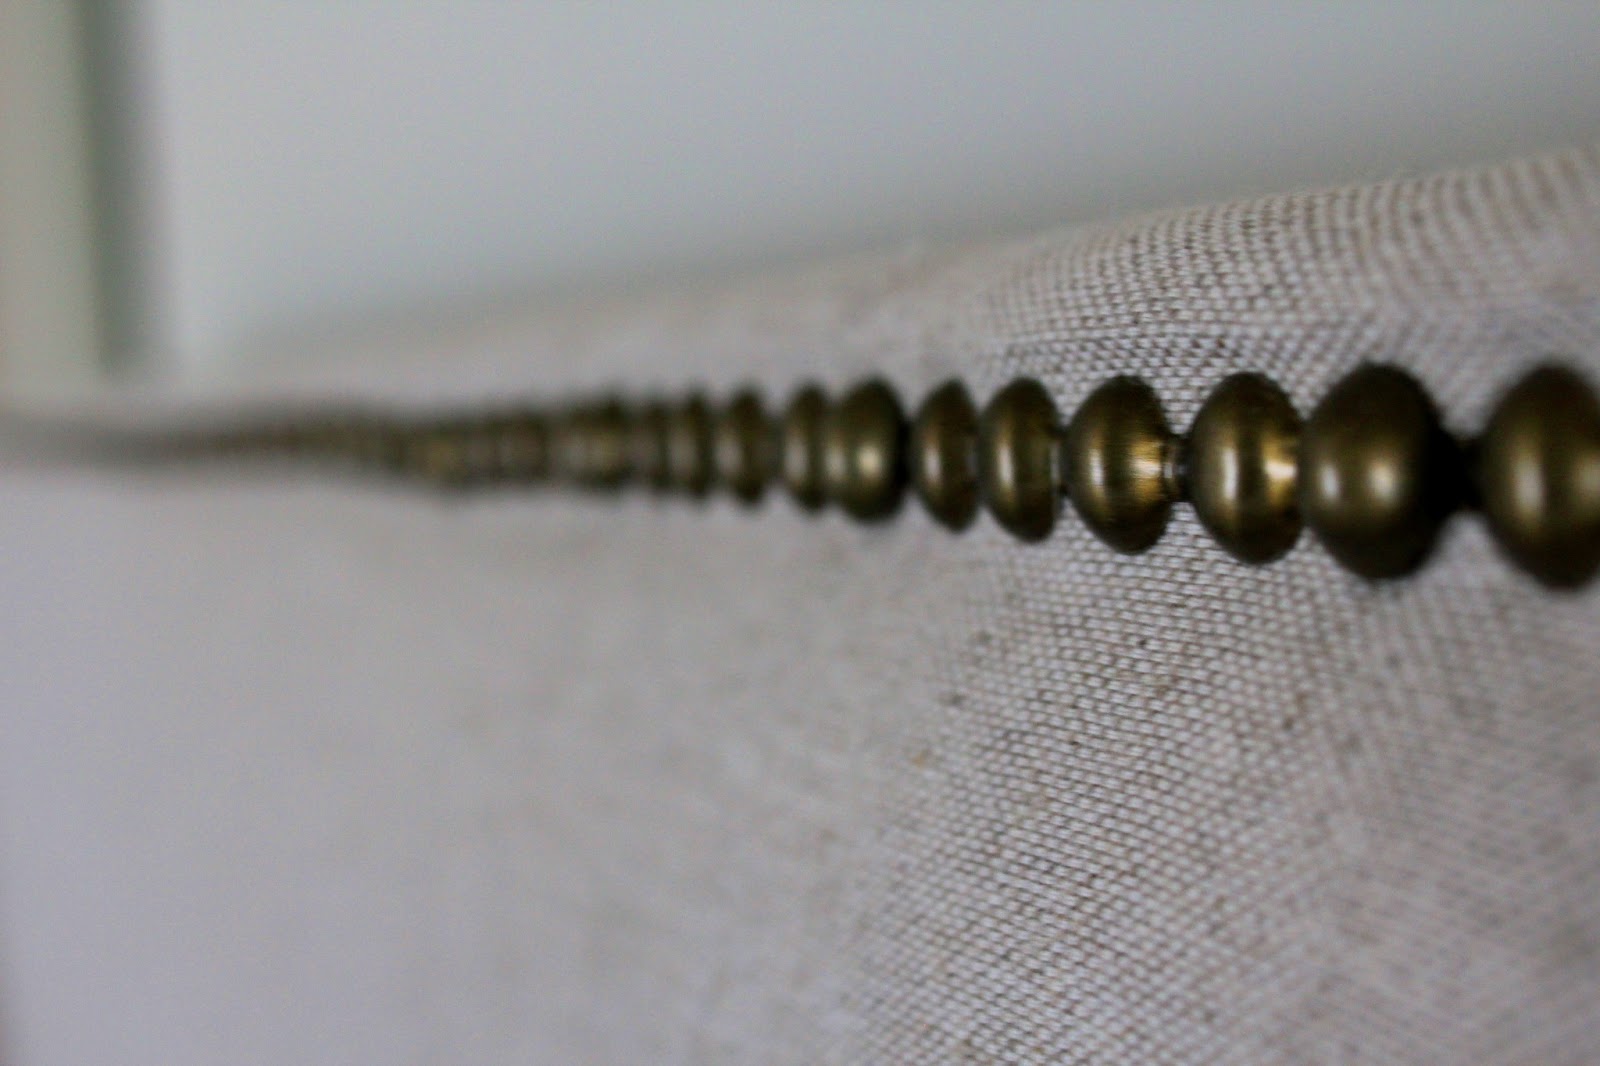
Let’s get a close-up of this fabric!
From a distance, you can’t see the texture, but it is one of my favorite things about the headboard. I am usually a VERY indecisive person, but when choosing this fabric, it took me maybe 5 minutes to make up my mind on it. The nubby texture is my favorite part… and I feel that it has the perfect mixture of tan and grey together, so wall color and bedding will never be an issue.
I started out comparing solid colored linen fabric swatches, but my concern was that if I ever picked out a bedding in a similar neutral tone that it would look like I tried (unsuccessfully) to match the fabrics, but with this texture, there is no risk of that. I toyed with the idea of white or creme fabric, but if I ever wanted creme colored bedding and had a white headboard, or white bedding but had a creme colored headboard, it wouldn’t look right either.
So long story short, the fabric was an easy choice, and I am so in love with it!
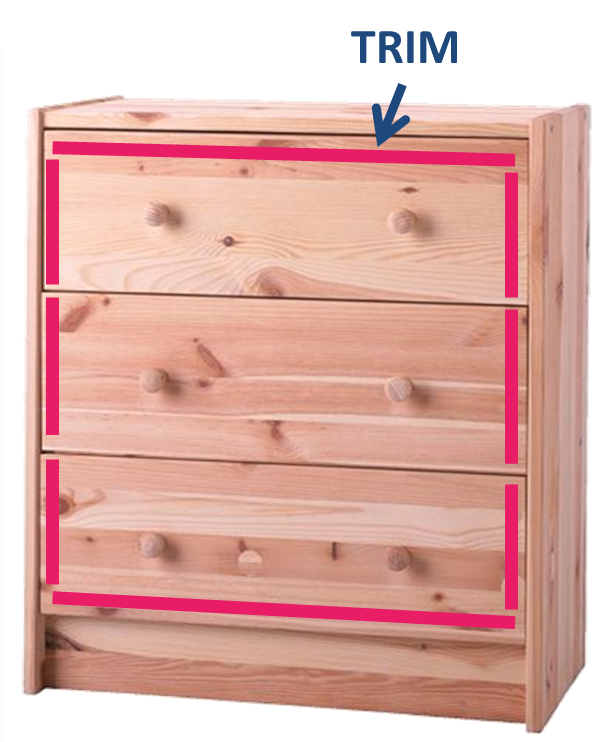
I’ll also talk about this more in the DIY tutorial, but we went with a nailhead trim – it’s actually a strip of connected nail-heads where you nail in every 5th nail or so. This made it WAY easier to keep our lines straight, nail-heads evenly spaced, and after going through the process, I can’t even IMAGINE tacking in individual nail-heads. What a nightmare that would have been!
This shot is facing the hallway that connects our bedroom (and bathroom) to the dining room, kitchen, and living room. It’s a bit washed out due to the exposure (I swear, I am going to learn how to take better photos!) but you can KIND OF see the roman shade I made last year.
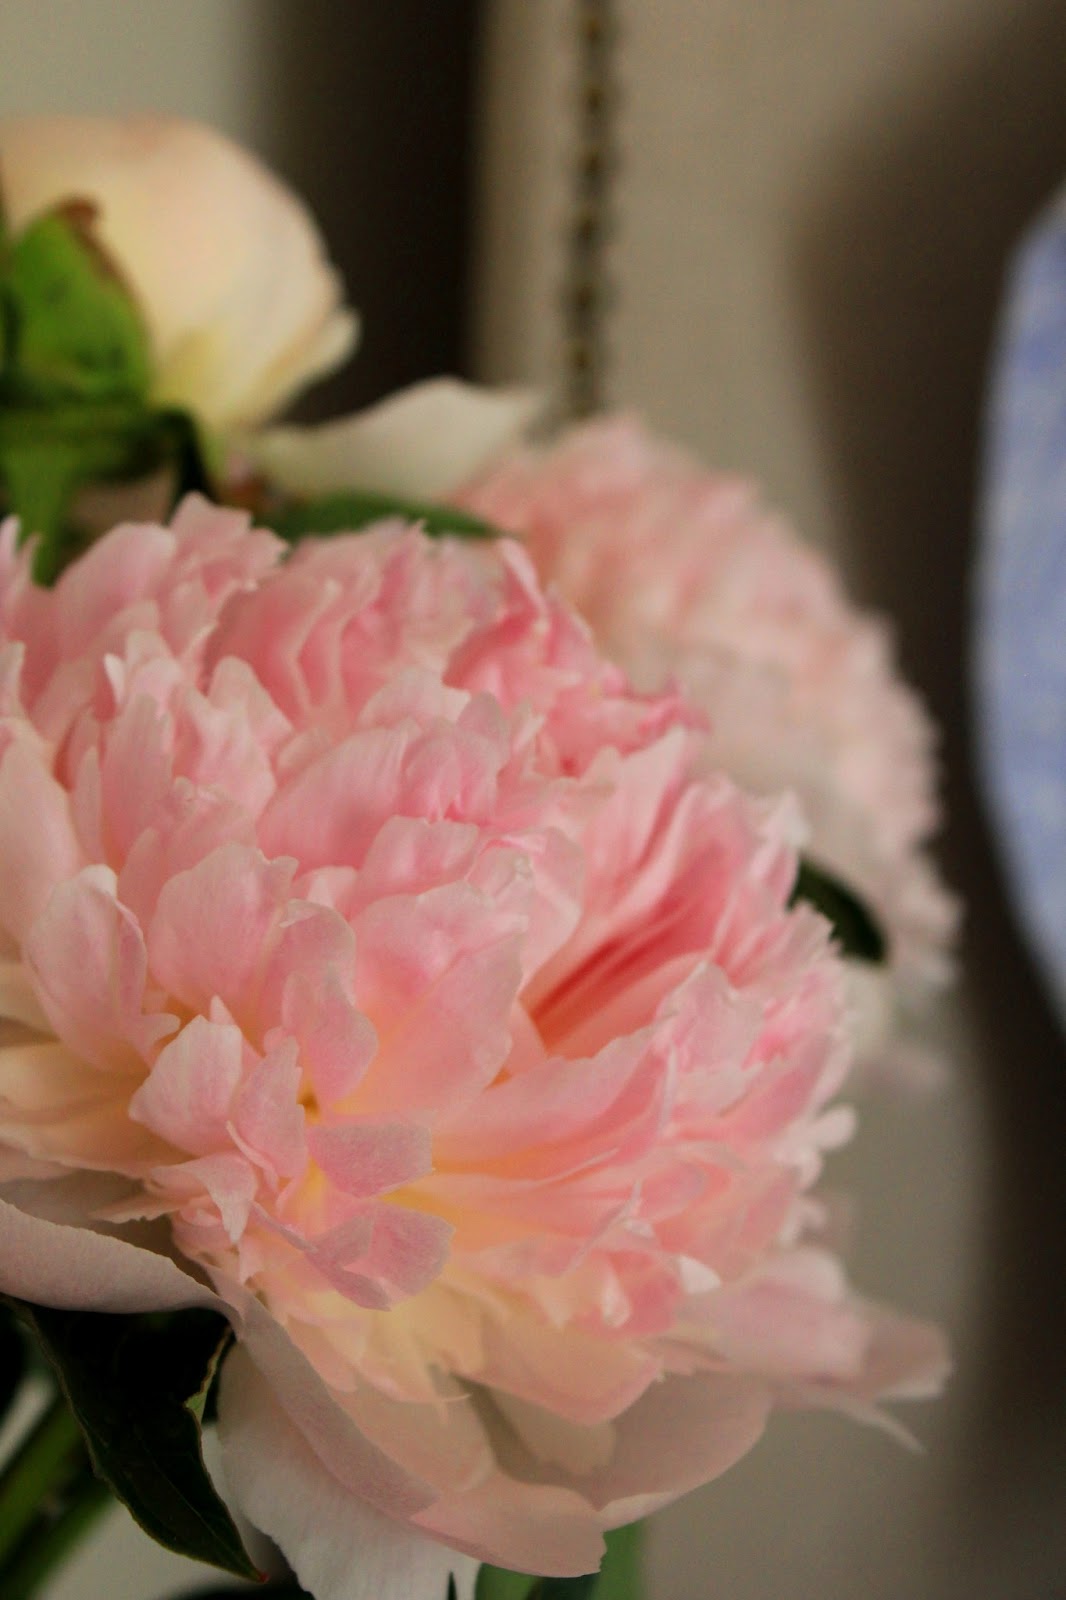
And as if the universe knew my headboard would be done, it’s peony season! And is there anything better than a big bunch of ruffled pink peonies??
Here, it’s almost like a piece of art in a zen indoor-outdoor space with lots of natural light.