Dorothy Draper DIY

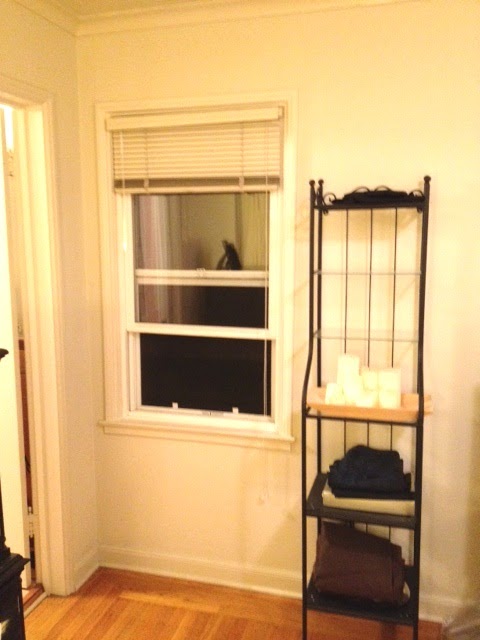
I’ve been casually looking to replace our existing TV stand that we have in our bedroom.  The stand is relatively low to the ground, which makes it really hard to see the TV unless I sit upright.  These are real problems people!!

Because of the dilemma of needing a taller TV stand, I’ve been scouring the internet for inspiration.  Segue to… the Dorothy Draper chest.  Ta-da!!

Dorothy Draper dresser

It’s beautiful, with classic lines and awesome ring pulls.  I love the gold detailing you’ll find on most of them, and best of all, Kris approves!  It’s retro but timeless, and while it sounds like the perfect solution, there is a hitch.  They are REALLY expensive.  Trust me when I say, they are hard to come by – even on Craigslist, I am seeing Dorothy Draper pieces in the $500-$900 range (which is definitely more than I want to pay for the TV stand that goes in our bedroom).  A fully restored piece from an antique dealer could run well into the thousands, and so you can imagine my joy when I stumbled upon this Ikea Hack.

Everyone loves a good Ikea hack (I know I do), and while this one has already reverberated across the web, it’s new to me, so I am beyond excited!!  Does that nightstand below not look pretty much identical to the piece above??  Could have fooled me!

To make your own Dorothy Draper chest, you start out with a Rast Dresser from Ikea – this will run a whopping $30.

Not the most beautiful piece of furniture, but I’ve seen this bad boy transform before, so you know what it’s capable of – its the little dresser that could!

Assemble the dresser first and once it’s together, move on to the sanding phase.  The grain of the wood is pretty rough (I’ve seen it in stores), so don’t skip the sanding step.  Once it’s nice and smooth, wipe it clean with a tack cloth, and then move onto the priming phase.  Once the primer is dry, you can go the old fashioned route and paint the piece with a brush (or roller) or you can go Marcus’ route and use spray paint  (using the spray attachment for even coverage).

Marcus got crafty, and made a stencil based on several Draper pieces he’d seen online.  I’m not the free hand type, so I’d definitely go the stencil route.  If you don’t feel like making the stencil and cutting it out with an exacto knife like Marcus, you can go the easy route and get an overlay from O’verlays (I blogged about them here, and you can get their stuff here.)  A word of caution, the O’verlays will look nice, but they don’t offer the classic Draper shape below… you’ll end up with the look, but not exactly.  If you want the beveled outline, do the stencil.

Moving along, with the stencil’s cut, he used gold paint to transcribe the shape to the drawers, and with round ring pulls from here, the project was complete!  I made it sound way easier than it probably was, but that’s pretty much all there is to it.

Fabulous, no??  I’ll have to do two, and push them together for this to accommodate our enormous TV (it’s a pet peeve of mine when the TV hangs over the edges of it’s stand, I I’d like our new Dorothy Draper inspired chest(s) to be at least two inches longer than the TV on each side).

Anyway, the classic color combo is the black with gold – if you Google Dorothy Draper, you’ll find it’s pretty much all black and gold out there, but we have so much black furniture in our bedroom already… should I deviate from the classic Draper look and go for something lighter?

I saw this one online, and its nice.  I’m not loving it as much as the black ones I’ve seen, but it could work – plus with all the gold detail (at least twelve “drawers” with twelve ring pulls) maybe the black would be overkill??

So much to think about!!

Quickie Makeover: Etagere and Side Table

Since I’m still sick as a dog, I’ve been taking it easy which means staying at home, and resting.  Unfortunately, I’m not very good at that (you can only take so many naps) so while loafing around the house yesterday, I decided it was time to do a little sprucing up around here.
Right now, our nedroom is very dark.  Not only does it not get a ton of natural light since it faces another tall building (love city living) but the bedroom furniture is also dark (remember my struggle to refinish my armoire and nightstands last fall?)  Anyway, it’s bugged me for months, and since a total bedroom makeover hasn’t been on the agenda (or in the budget) just yet, I want to start making a few small changes to help lighten things up.
    

Which brings me to this black shelving unit, aka: the etagere (well that’s what I’m going to call it).  This beast was one of the first things I bought when I moved to San Francisco over five years ago… perhaps I thought it was elegant at the time (woof), and as much as I’d love to give it the heave-ho, we need it to house all the things that we simply don’t have storage for – aka, my jewelry, accessories, books that don’t fit in our bookshelf, etc.
These are the few “before” pictures I could find of this cheapo metal shelving unit.  I didn’t want to put a lot of time or money into this project since it was dirt cheap to begin with, and it may not even be here three months from now, so I grabbed a can of spray paint from the home depot (Rustoleum’s metallic gold) and went to work.  
I also did a small side table that goes in our living room – here are the before pics of that:
    
I dragged these bad boys out to the garage, and went to work.  The guys at home depot took pity on me (granted, I probably looked somewhat lost in the aisles of power tools in my leopard print flats), and they sent me off with a super cute face mask and gloves.  Double score! Aside from the fumes which would have made me hack up a lung from this sexy cough, I would have ruined my manicure – a true tragedy (I mean, look how cute the neon pink is):
Anyways, back to the point… here are the “during” pics – super exciting:
      
And finally, the afters.  The whole project took maybe 45 minutes from start to finish – from dragging the furniture to the garage, to the actual spraying, the dry time, and clean-up.  
               
Not bad right?!  Keep in mind, I snapped these pics with my iPhone, so they aren’t the best quality…
You might look at the “etagere” and think, “Storage? What storage“, but it looks somewhat dwarfed in this photo – there are two boxes on the second the bottom shelf, and they hold all my jewelry that doesn’t look very nice on display (bangles, long strands of necklaces, chunky earrings, etc) along with hair “stuff” (headbands, pins, velcro rollers, a bump it – don’t ask).  I also have a tray that holds my pretty statement necklaces (below) and another dish for my dainty pieces (studs, rings, and small chains).


This was my first time spray painting, and aside from feeling like a badass (I totally wanted to tag the wall with some white girl graffiti… perhaps a knee jerk reaction from holding a can of spray paint??) I learned a thing or two for next time…

Key Learning #1: Hold the bottle far away from the piece, to avoid heavy coats
The shelves don’t look so hot close up because I didn’t hold the can far enough away – they are blotchy. There are also a few drip marks from being too close.  This stuff dries fast… really fast, so by the time I noticed the drips it was too late.   Oh well, live and learn.

Key Learning #2: Spray multiple thin coats.  
This ensures even coverage, and fast thorough drying time.

Do I care that I messed up?  Not really… Is that bad?  Eh… not at all!  They were both dirt cheap finds to begin with, (the shelf was originally from Ikea, and the table was from Craigslist) so the mistakes don’t faze me at all.  My guess is that within the year, both will be either left on the street corner for some other 22 year old to find, or back on Craigslist for $5, but while they are still here, I think they both look one-hundred-million times better.

Bookshelf Revamp

Using the pictures below, can you guess what is happening at our house this weekend??  The bookshelf in our dining room is getting a bit of a face-lift!  Ever since I saw the number Emily A Clark (my new design crush) did on her office bookshelves, I keep noticing dark backings on bookshelves everywhere, and I want some of my own!

bookshelf display for office nook
Recently
I looooove the color on these two bookshelves (above and below) – the paint is an inky blue, which is so rich and pretty.  My fear with mirroring this type of color is that it won’t “go” with the existing colors in the dining room.  The room is currently painted a light powdery aqua, I don’t feel like the almost navy would compliment it… maybe I’m totally wrong?


Luxe and Lilies

These next two bookshelves are a bit closer to the color I’m going for – its a dark grey – a true grey, so it will make the back of the bookshelves quite dark.  A good contrast against the books we’ve got in there, however I’m realizing that while we’ve got quite a few books, they aren’t ideal for staging a bookshelf.  There are no cute bindings, and not a ton of variation in color.

I’m also realizing that our bookshelf is quite a bit more functional than any of these here (coral overload in the photo below).  Ours will still have to be functional – living in a small apartment, we need somewhere to store our books, so this bookshelf can’t just be a vehicle to store cool stuff (For example… that egg below on a pedestal… A mini globe… Tortoise shells… A scull…)

Worst case scenario?? I just wasted $15 bucks on paint.  No big loss 🙂

Wish me luck!
def my style
Little Green Notebook

IMG_9982
Emily A. Clark

Office
Emily A. Clark

DIY – No Sew Throw Pillows

The living room has been getting a gradual face-lift, and while we haven’t gone so far as to buy new sofas (a major purchase off my growing apartment wish list), the addition of a new rug, curtains, potted succulents, and some sea fan art have helped re-vamp this room.  The throw pillows on the sofas have been mismatched since we moved in (last November), and while this has bugged me endlessly, I hadn’t gotten around to replacing them… until now!
I’d been looking for throw pillows, but since they run anywhere from $30 (on the low end) to $100 (on the high end… well, MY high end) I couldn’t commit!  It started feeling like a big purchase, and I didn’t want to make the wrong decision.
Finally, one of the mismatched throw pillow covers ripped, and that was pretty much the straw that broke the camel’s back.  Hallelujah – a good excuse to get some new (matching) pillow covers!  
Since I’ve been such a commitment-phobe over buying throw pillows, I decided that I’d make them – a pretty aggressive decision since I do not know how to sew – I don’t even own a sewing machine.  I thought to myslef, how hard can it be??  Famous last words, right?  Wrong!  If you have a hot iron, you can make a throw pillow – I promise.
Read on for my crafty tutorial!
Step I: Buy Fabric

I am admittedly frugal – always looking for a way to save a few dollars, even though I like nice things.  Interior fabrics that have a good weight AND an attractive pattern can get pricey pretty quickly.  Enter my solution – the shower curtain.

I was at Target, when I stumbled upon this shower curtain – it measures 6’x6′ which means I have plenty of fabric to mess up a few times, and at $20, you can’t beat it!  This pattern in particular picks up all the colors in the rest of the room – blues, golds, and grays, on a creamy background – just what I was looking for!  I told my best friend that I bought a shower curtain to make pillows and she laughed so hard.  Little did she know what a genius I was… after showing her the finished product, she’s not laughing anymore.

Step II: Measure fabric 

Since these pillows are “no sew” there are no zippers.  An envelope pocket on the back makes this work, so this means that for each pillow, you will be cutting out three pieces of fabric. The front panel, and the two back “envelope pocket” panels.  Knowing that my pillow insert measured 20″x20″ I wanted to be sure I cut out plenty of fabric to account for the seams.  After messing up my first few pillow covers, I figured out the right measurements to make a tight fit.  I learned the hard way that if the pocket pieces aren’t long enough, the fluffy pillow pops out of the pocket (fail) so the key to making this work is having the pocket flaps overlap by at least 8 inches.

  – The front should measure 22″x22″
  – The back pocket panels should measure 22″x17″

(for those of you who know what you are doing, you can probably make the front panel 21″x21″)

Step III: cut out all the pieces you’ll need

I like to work in assembly line fashion – cut out all the pieces you’ll need at once, so you can move on to the next step – it’s just faster this way… trust me.

Step IV: Gather your supplies

Once the pieces are cut out, get everything set up to make these pillows.  Make sure your iron is filled with water for the “steam” function.  Plug it in, and get it hot.  Pull out the ironing board, and grab a damp washcloth, and your iron on fusing (aka the glue that holds these pillows together).  I used Singer Regular Hold Iron-on Fusing Web – grabbed it at Target (conveniently located in the same aisle with the ironing boards)

Step V: Assemble

Take a look at these diagrams – it will make it a lot more clear when assembling

Lay the “front” pattern side up, and lay the first envelope flap on top of it pattern side down (patterns should be facing each other.

Measure out the fusing web, and place it between the two panels of fabric.

Take the damp washcloth, place it over the fabric, and press the hot iron for 20-30 seconds.  The combination of the moisture and the heat will make the fusing web melt and bond the fabric.  Do not just try to use the steam from the iron – it’s not enough!

At this point, the fusing web should have connected the front panel to the first envelope pocket flap on three sides – see dotted line int he diagram below:

Lay the second panel face side down on the other side, and fuse to the first envelope flap and the pillow front.  The panels will (and should) overlap.  See diagram below:

Once the fusing is done (it takes deceivingly longer than anticipated), let the pillow cool (so the “glue” doesn’t come apart) and carefully flip pattern side out.  Put the pillow in, and voila… insta throw pillows – no sewing required… they look pretty good!  Best shower curtain EVER.

Dear Diary…

I’ve never been much on journal keeping.  It starts out with the best intentions – Dear diary, it’s New Year’s Day, and one of my resolutions this year is to keep a running journal.  This way I can document my life, and look back when I’m old and laugh at how funny/cool/carefree I was in my 20’s. I’m going to write in you every day….

First and last entry.  Every time.


One of my favorite bloggers of Little Green Notebook is crafty, and a total genious, and had the lovely idea for her kids to make notebooks for their teachers as a gift on the last day of school.  Theirs were adorable (handdrawn pictures of what they thought their teachers would be doing for their summer vacation) but I LOVED the one she made – using charpak markers, and a blender marker.  It looks like watercolors meets tie-die, and I’m convinced that with a cool notebook like this, I could successfully keep a diary… maybe.

The notebooks started out looking like this:

She taped them off like this (to keep the pages fresh and white):

Her kids’ notebooks ended up like this (so adorable):

But I just love the abstract, color wash effect of hers… might totally copy this idea

Check our her entry here!

How Pinteresting – Week II!

Here we go my friends!  Here is a round-up of all my Top 10 faves from Pinterest for the last week!  The most inspiring, pretty, funny, or useful… let’s just call it, the best of the best!  Feel free to follow me if you can’t get enough ❤

–  —  –  —  –  —  –  —  –  —  –  —  –  —  –  —  –  —  –  —  –  —  –  —  –  —  –  —  –  —  –  —  –  —  –  —  –

1. Lauren Conrad’s Two-Week Bikini Boot-camp
Sounds hard since it requires more than an ounce of discipline, but look how FABULOUS she looks!  It really goes to show what dedication to a regular workout routine and careful eating choices can do!  Definitely want to test out this two week Bootcamp!

–  —  –  —  –  —  –  —  –  —  –  —  –  —  –  —  –  —  –  —  –  —  –  —  –  —  –  —  –  —  –  —  –  —  –  —  –

2. Chalkboard Serving Dish DIY

Originally from Wit and Whistle I am just LOVING how easy (and inexpensive) this one is – perfect for labeling cheeses, cookies and other little goodies!
Inexpensive serving dish + Chalkboard Paint = Awesome idea! 
(shop Ikea for some awesome inexpensive serving dishes – you can’t beat $5)

Chalkboard serving platter.  Love the idea!

–  —  –  —  –  —  –  —  –  —  –  —  –  —  –  —  –  —  –  —  –  —  –  —  –  —  –  —  –  —  –  —  –  —  –  —  –

3. Peonies in the Bedroom
Do I really need to explain any more??  Best of all… they are in season!
peonies in the boudoir

–  —  –  —  –  —  –  —  –  —  –  —  –  —  –  —  –  —  –  —  –  —  –  —  –  —  –  —  –  —  –  —  –  —  –  —  –

4. House Beautiful’s Chandelier in the Bathroom
This room was also featured in their magazine, but the entire home was one of my favorites in a long time.  Home owner Annie Brahler has a STUNNING chandelier adorning every room in her home, and I love her for it!  How dramatic are these dark chocolate walls with the white floors, claw foot tub, and blown glass chandelier??  It’s food for the eyes I tell you!
Such an Awesome Bathroom - thank you HB

–  —  –  —  –  —  –  —  –  —  –  —  –  —  –  —  –  —  –  —  –  —  –  —  –  —  –  —  –  —  –  —  –  —  –  —  –

5. Bright Bud Vases
From a first look, these stand out to me as a cool DIY – simply glue down a graphic paper to a cheapo glass vase, but these are so much cooler than that!  What a great option for bringing some color into a room without a huge commitment.
bright patterned vases

–  —  –  —  –  —  –  —  –  —  –  —  –  —  –  —  –  —  –  —  –  —  –  —  –  —  –  —  –  —  –  —  –  —  –  —  –

6. Turquoise and Yellow Statement Necklace
Is this not the perfect statement piece for summer?  Bright colors that go with so much!  If you are feeling bold, pair this with tangerine, or just wear it to spruce up a neutral outfit!


–  —  –  —  –  —  –  —  –  —  –  —  –  —  –  —  –  —  –  —  –  —  –  —  –  —  –  —  –  —  –  —  –  —  –  —  –

7. Framed Chalkboard DIY
This idea struck me as being so cute and SO useful as soon as I saw it!  Can you imagine keeping this in the kitchen to write down shopping lists as soon as you run out of something?  Leave cute notes for your honey in the mornings? Doodle…  I have a few empty frames, and I think I know JUST what their purpose is going to be…
Chalkboard for kitchen!

–  —  –  —  –  —  –  —  –  —  –  —  –  —  –  —  –  —  –  —  –  —  –  —  –  —  –  —  –  —  –  —  –  —  –  —  –

8. Wall Garden
Living in San Francisco, we have zero outside space (sad face) but for the lucky who do (my old apartment had a fabulous deck), this would be the ideal way to get some greenery around without taking up the square footage.  And succulents need so little maintenance… how perfect!!
vertical garden - cool idea for a compact outdoor area

–  —  –  —  –  —  –  —  –  —  –  —  –  —  –  —  –  —  –  —  –  —  –  —  –  —  –  —  –  —  –  —  –  —  –  —  –
9. Homemade Oreos
Um…. such an easy recipe, and these look mouth watering.  If it weren’t for this dang “get healthy /lose weight for summer” nonsense, I’d be making these tonight!

Homemade Oreos

–  —  –  —  –  —  –  —  –  —  –  —  –  —  –  —  –  —  –  —  –  —  –  —  –  —  –  —  –  —  –  —  –  —  –  —  –

10. Neon Yellow Skirt
It does not get hotter than this!  Short skirt, high neck lace.  So chic, and so flattering!  Must find full pleated skirt like this ASAP!

neon yellow

Sunburst Mirror Update

Remember this post when I used a little paint to transform a cheapo sunburst mirror from Bed Bath & Beyond into something much cooler?  Well it’s only taken me two months or so to actually hang it (oh the shame), but there it is!  It’s made a home in our hallway that after looking at these pictures could quite frankly use a bit of sprucing.


After several years of service, the once life-like silk hydrangias are looking a bit sad.  I’d like to replace them with something a bit fresher.  This little hallway table is where all the stuff that doesn’t have a home goes.  The candles need to be downsized and stored, (but on the plus side, we are totally prepared for a power-outage) and I’d really like to find a new runner for this spot – something with a bit more contrast and color.  It’s hard to see from these photos, but its dark, and brown, and it served its purpose for many years, but it’s ready for retirement.


Here is a view of the hallway from the dining room.  Wouldn’t it be great if we could paint the storage cabinet in the hallway with a fun pop of color?  A light Kelly green would really wake things up, or even a darker version of the wall color in the dining room for continuity.  I used Benjamin Moore’s Opal Essence (look here for a photograph that really showcases this color).

For more intense versions of the dining room’s blue, I really like Kelley Moore’s Fair Farmington, Sherwin Williams’ Eerie Island, and Behr’s Gazebo.  All of them are very pretty blues with a little aqua and grey.  If it weren’t so permanent, that cabinet would be painted in a nano second.

Unfortunately for me, I’ll already be repainting the dining room when we move out – no fun!

Sea Fan Shadow Box: DIY

This DIY project has been a long time coming – mostly because I was too lazy to hang hooks on the wall (shameful, I know).  After lusting over this sea fan shadow box on Etsy for several months, I finally emailed the seller to find out how much she was selling it for.  I won’t totally throw her under the bus, but it was about 4x what I was willing to spend.  Eeps!

After the initial shock, I decided it didn’t look so hard to me, and that I could fairly easily re-create it on my own!  What do you think – pretty close!
Inspiration:

Sea Fan Shadow Box

Reality:

Bound and determined to recreate this project, I did a Google search for “sea fans” and found a little online shop, Sea Side Inspired, that sold the exactly what I was looking for: sea fans between 12-18 inches.  At $22 each, I was sold!  All the sea fans I’d seen online were dark – almost black – so I had resigned myself to the fact that I would be spray painting these suckers a light grey or buff.  To my delight, when they arrived, they were a perfect sandstone color with tinges of pink and lavender!  So pretty – no spray paint needed!
To be honest, the hardest part of this project was finding shadowboxes that were large enough to accommodate my sea fans!  I hunted around, going to Target, Aaron Brothers, and a few small frame shops in San Francisco.  What did I learn?  Shadow boxes are hard to come by, and custom framing costs an arm, a leg, and your first born child.  (Do people actually pay for that?!)
Anyway, after I was about to give up, my mom gave me the idea of Michaels, and with a coupon in hand, I headed over there.  
Bingo!  
I found 20″ x 16″ shadow boxes with my name written all over them.  The problem??  The only colors they came in were black and this awesome terracotta color (why god, why?!).  I ended up picking up the terracotta color because they were the cheapest, and I was going to have to paint them no matter what.


Don’t you just love the little cherub on there?  He says, “this frame is classy… trust me”.  I told him, “agree to disagree.”
A little painters tape around the edges, and I was ready to rock and roll.  The trick to taping it off well is wedging the tape almost underneath the edges between the glass and the frame – this way the paint won’t bleed onto the glass and you won’t need a razor to scrape it off later.

I liked the aged gold look of the frame in my Etsy inspiration, so I thought, “I’ll gold leaf it!”   I wasn’t born with the patience for gold leafing, so I got got gold leaf paint (same thing, right) – Martha Stewart calls it liquid gilding paint… potato potahto.  
I picked up a cheapo foam brush and used a left over birthday cake plate as my palette – hey, it was easy clean up (throw it all in the trash and call it a day).
The first coat went on splotchy, but this stuff dries fast (by the time you finish the final side of the frame, the first side you painted is dry).  Since it was so fast drying, I was able to do all the coats without stopping for a break (the picture below shows after one coat).  I ended up painting three coats in total – the first for a base, the second for coverage, and the third for artful imperfections.  I really should have sanded them for the paint to stick better, but I felt lazy, and it worked just fine without sanding.

For coats one and two, I brushed the paint on, but on coat three, I used the sponge to stipple the paint.  Some may not like the look, but I happen to really love it.  It created texture, and made it a bit more interesting.
I wish I had an up-close “after photo” of the painted frames, but the light was bad, I was tired, and I forgot.  Oopsy.
Final steps: I bought half a yard of dark grey blue linen to back the frames.  I just used fabric clue to adhere the fabric to the backing – very technical.  I think the Etsy version uses plaster – if you look closely you can sort of see the texture, but fabric was easier, and I was ok with that.
After getting the fabric on there, I positioned the fans on the backing, and used small silver sewing pins to secure them in place – you can’t even see the pins, and it works just fine!  I put the backs into the shadow box frame, wired the backs for hanging, and got a few picture hooks in the wall (after about a month and a half of these sitting on the floor in the dining room).
Originally, I toyed with the idea of tacking decorative frames onto the facade – something with a bit more ornate detail (see the terrible quality iPhone picture  here.  I love the look, but these frames are likely not made of wood, and after all the work of taping and painting, the idea of securing a heavy facade to the front seemed like a lot of unnecessary work.
My mom said she likes them better without the facade, so I’m going to go with that.  Simple is also probably better so this wall doesn’t look like there is TOO much going on.  If we move into a larger place, I may append a more ornate frame like this, but for now, I like them as they are.
Anyway, here they are hanging in the living room, and I’m pretty happy with the final result.  
I HATE that you can see my reflection here, but there was no other angle where I could avoid the glare from the windows… dah.
So here it is at dusk – I love how the room looks all lit up at night.  The tones of gold, creme, and amber really comes to life, and the cool greys and blues act as a nice balance (at least I think so).
Finally, just wanted to toss in a close up photo of the new throw pillows I picked up randomly.  I had been agonizing over pillows – what colors to go for, what patterns to get.  I picked up the gold and grey ikat from Cost Plus World Market of all places (do you remember this post on my debate over a grey / brown and yellow Ikat… hey now!), and the grey and white pillow from Target (oh, how I love Target.  I went in for toilet paper and came out with throw pillows).

I think they work well together, but I’m a bit worried that its a lot of pattern next to each other.  I’m actually looking at a taupe linen pillow to pair up with the Ikat pillows (there are two), and the grey pillows may live on the sofa.

Anyway, our little home is coming together, and I’m so excited for my honey to come home and see the new sea fans, framed, and hanging in our living room!

DIY Headboard Inspiration

I’ve recently been struggling with the idea of buying a new headboard for our bedroom.  Being completely honest, the headboards I like are WAY outside of my price range, and I just cannot justify spending upwards of $500 for a quality tufted headboard.

Last night, I stumbled across an amazing Pinterest find: 34 DIY Headboard Ideas.  Um, hello, where have you been for the last several months?!
While I am still toying with the idea of making my own tufted headboard, some of these ideas are so cool, it’s really given me some different ideas that are outside of my comfort zone.
First up – Laser cut metal roofing!  Who’d have thunk?  Somehow it has a glamorous feel, despite using the most un-sexy of materials.  Pretty sure Kris would say no, but it’s so creative, I kind of love it!
Talk about getting a bang for your buck – this headboard is just a decal on a bold colored wall – you could easily stencil it on with paint as an alternative, but it’s dramatic, and EXTREMELY cost effective.  Perhaps not my taste, but this would be so fun in a teenager’s room.  16 year old me would have gone wild for this!
A similar idea to the last headboard, this one here uses chalkboard paint so you can have fun with it.  Again, not quite what I had in mind, but such a cool idea!
Take some reclaimed wooden boards, cut to size, nail gun to wall.  Easy, cheap, and very shabby chic.  Where I will find reclaimed wood lying around in SF, I do not know… I also don’t think I’d want that anywhere near my bed if I found it on the street here, but that’s a whole separate issue.
A huge piece of art has taken over this next bed – very chic & very minimalist while being very dramatic.  I love how this looks, but it’s a bit stark for my taste.
Why have I never thought of this before?!  Use a folding screen as a large dramatic headboard.  I recently saw one at Cost Plus for less than $200 – it was natural colored linen with nail head trim… may need to go back and swoop that up!!
Ok, I want to live here!  Look at those amazing old doors propped up behind the bed – amazing.  And that chandelier?!  WOW
Anyway, check out the rest of the article for more unique DIY headboards!
xo