The Shops at Target

Is anyone else as excited as I am for the new shops at Target?!  They have partnered with four AWESOME local shops in a major way… New York’s Odin and Kirna Zabete, Boston’s Patch NYC, and San Francisco’s The Curiosity Shoppe.  My favorites are Patch and the Curiosity Shoppe, mainly becuase they have the cutest, funkiest little accessories for the home.

Patch NYC’s collection is full of pieces with a woodsy vibe (think fuzzy wool blankets, and woodland creature figurines), and for extremely affordable prices, you can prepare for hibernation with new lamps, pillows, dishes, and throw blankets.

I think the owl lamp and owl bookends are endlessly charming – I also love the woodpecker lamp!  As darling as these would be paired up in a sophisticated child’s bedroom, I also think they’d be really cool in an office, hallway, or entryway.
      

Their woodsy pillow collection is pretty awesome too.  I actually think the stag pillow would be great for the holidays since this little guy looks quite a bit like a certain red nosed reindeer (without the red nose)
And for any fox lovers out there (aka my sister’s friend Rebecca), they have an array of fox themed goods from lamps to candle holders, to sweet little dishes
           
The Curiosity Shoppe has a lot of great things for entertaining, from fun straws, and drink mixers, to photo booth props, cheese platters, and gift wrap!  They had really cute dishes, cake stands, and even journals!  Looking through the collection, it dawned on me that this is the perfect one-stop-shop for a funky bride on a budget.  Am I right or am I right?! (Tip: I’m right)

How cute are these props for a photo booth, and these old timey straws??  They remind me of mini barber poles!  Isn’t there something about fake mustaches that are so fun?!

I LOVE the USA cutting board – quirky and cute!  It would also work really well as a cheese platter – what would be REALLY adorable is if you featured different cheeses from different regions like a Humboldt Fog Bleu near San Francisco, or a Wisconsin Cheddar up near the great lakes…

They also are featuring some super cute gift boxes and tags – for anyone (like me) who struggles when trying to wrap a present, these boxes are so pretty, you won’t want to cover them up!!  I especially love the yellow one with the wood grain print on the top…


**As a side note, this is NOT an advertisement for Target, or any of these individual vendors.  I just happen to be obsessed with how awesome they are  🙂

Fall is Here!!


Photo via Pottery Barn (where else?)
I don’t know what happened, but all of a sudden this morning, something in me switched, and it’s fall.  Going by technicality, it’s still summer until September 22, but to me, it’s fall now so I am bound and determined to go home tonight, and get out some of my “fall” decor to replace some of the more summery things.
What will I be switching out??
1. The Wreath on the Front Door
Right now, we have a really pretty summer wreath out, but I am itching to take it down and replace it with something autumnal.  What I will hang up in its place is still a mystery to me, but I think a quick trip to Target, may fix that.
I can think of nothing worse than some fake leaves glue gunned onto a circular frame, so I am using these pictures as inspiration.  I am looking for berries, twisted brambles and maybe a few dried flowers.
     
2. Candles
I love having candles in the house – they look so pretty at night – and make the room all cozy with the lights off.  I normally keep cream colored candles around, but for fall and winter, I have some fabulous candles wrapped in birch bark.  They are obviously more decorative than they are funcional – I really try to keep the burning of them to a minimum since I have had a hard time finding more of them.  I originally got them from World Market, but I know Pottery Barn carried some for a while.  Aren’t they pretty?
3. Apples and Pumpkins and Gourds… oh my!
Fall is synonymous with the harvest, drinking apple cider, carving pumpkins for Halloween, and roasting squash for dinner. The market always has really pretty colored gourds and pumpkins at this time of year, and I love rounding them up in a big basket or bowl for decor.  Don’t you just love the wierd shapes and bumps of the gourds?  Kind of reminds me of a witch’s face
I am LOVING this arrangement with the white pumpkin – it’s less “loud” and in your face than some of the other arrangements I’ve seen…  Hopefully Whole Foods has a variety today…
As we get further into fall, there will of course be additions to the fall decor, but these are a few of the easy ones, that I can’t wait to get to after work!!

Dorothy Draper DIY

I’ve been casually looking to replace our existing TV stand that we have in our bedroom.  The stand is relatively low to the ground, which makes it really hard to see the TV unless I sit upright.  These are real problems people!!

Because of the dilemma of needing a taller TV stand, I’ve been scouring the internet for inspiration.  Segue to… the Dorothy Draper chest.  Ta-da!!

Dorothy Draper dresser

It’s beautiful, with classic lines and awesome ring pulls.  I love the gold detailing you’ll find on most of them, and best of all, Kris approves!  It’s retro but timeless, and while it sounds like the perfect solution, there is a hitch.  They are REALLY expensive.  Trust me when I say, they are hard to come by – even on Craigslist, I am seeing Dorothy Draper pieces in the $500-$900 range (which is definitely more than I want to pay for the TV stand that goes in our bedroom).  A fully restored piece from an antique dealer could run well into the thousands, and so you can imagine my joy when I stumbled upon this Ikea Hack.

Everyone loves a good Ikea hack (I know I do), and while this one has already reverberated across the web, it’s new to me, so I am beyond excited!!  Does that nightstand below not look pretty much identical to the piece above??  Could have fooled me!

To make your own Dorothy Draper chest, you start out with a Rast Dresser from Ikea – this will run a whopping $30.

Not the most beautiful piece of furniture, but I’ve seen this bad boy transform before, so you know what it’s capable of – its the little dresser that could!

Assemble the dresser first and once it’s together, move on to the sanding phase.  The grain of the wood is pretty rough (I’ve seen it in stores), so don’t skip the sanding step.  Once it’s nice and smooth, wipe it clean with a tack cloth, and then move onto the priming phase.  Once the primer is dry, you can go the old fashioned route and paint the piece with a brush (or roller) or you can go Marcus’ route and use spray paint  (using the spray attachment for even coverage).

Marcus got crafty, and made a stencil based on several Draper pieces he’d seen online.  I’m not the free hand type, so I’d definitely go the stencil route.  If you don’t feel like making the stencil and cutting it out with an exacto knife like Marcus, you can go the easy route and get an overlay from O’verlays (I blogged about them here, and you can get their stuff here.)  A word of caution, the O’verlays will look nice, but they don’t offer the classic Draper shape below… you’ll end up with the look, but not exactly.  If you want the beveled outline, do the stencil.

Moving along, with the stencil’s cut, he used gold paint to transcribe the shape to the drawers, and with round ring pulls from here, the project was complete!  I made it sound way easier than it probably was, but that’s pretty much all there is to it.

Fabulous, no??  I’ll have to do two, and push them together for this to accommodate our enormous TV (it’s a pet peeve of mine when the TV hangs over the edges of it’s stand, I I’d like our new Dorothy Draper inspired chest(s) to be at least two inches longer than the TV on each side).

Anyway, the classic color combo is the black with gold – if you Google Dorothy Draper, you’ll find it’s pretty much all black and gold out there, but we have so much black furniture in our bedroom already… should I deviate from the classic Draper look and go for something lighter?

I saw this one online, and its nice.  I’m not loving it as much as the black ones I’ve seen, but it could work – plus with all the gold detail (at least twelve “drawers” with twelve ring pulls) maybe the black would be overkill??

So much to think about!!

Decor Trends from Blogland: Casters

Is anyone else as fascinated as I am about the concept of casters in the home?  They have become big-time trendy on nearly all the home decor blogs I follow.  To be honest, I was not a fan at first.  They are industrial, so can come off looking clunky and out of place on some pieces, this is a look that has grown on me over time, and at the risk of being a total follower here, I think I’m jumping on the caster bandwagon!!  Here are some of my favorite looks, where castors are cool, unique additions to the furniture.

This table is rustic and industrial – a huge look in the 2012 – 2013 Restoration Hardware catalog.  Obviously, in this lofted space, this farmhouse meets factory table is perfection – it would be all wrong (not to mention way too large) for our apartment, but I love it!
Casters
Marshall Matlock

One of my favorite DIY bloggers featured casters a while back, and this is another look I love.  Wouldn’t this rolling shelf be awesome in a kitchen?  It would look awesome as an open pantry (an organized pantry that is) or even as a bookshelf in a casual living room.
casters
Centsational Girl

Not a lot of homes could pull this off, but the rolling doors remind me of a barn – in the best way possible of course.  Country living featured these in a North Carolina home, and I think it fits perfectly with the laid back vibe (guitar casually leaned against the wall???).
casters and pipe
Country Living

A traditional looking Toile armchair gets an update with these casters – I think the look works mainly because they used small casters – anything larger would like mismatched – and who doesn’t love a chair that easily rolls around?!
toile and casters
Inspired Design

Could I really feature casters and leave out Restoration Hardware??  Obviously not!  This bookshelf is so cool with it’s reclaimed wood (probably not really reclaimed) and pipe framework.  This masculine piece would be great in an office, a man cave, or even a bathroom.  Can’t you just picture some fluffy white towels and clear jars of cotton balls on there??
bookcase on casters
Restoration Hardware

I imagine this slatted coffee table in a bright sun room – perfect for the herbs growing there.  In this case, the large casters don’t bother me because they blend in with the dark rug – with a lighter floor, I’m not sure I’d love this table, but since it looks like it was wheeled in from the garden, I think it works.
pallet&casters
My Ideal Home

Bedroom Makeover: Painted Trim

So, last week I had been agonizing over paint colors.  Which shade of Beige / Oatmeal / Desert Wind / Sherwood Tan would I choose to saturate our bedroom walls.


Well it turns out, I found a shortcut, and I’m not going to paint our bedroom at all.  Yep – I discovered that our landlord had painted every surface our our apartment such an “off” off-white, that all I needed to do was paint the trim pure white.  Voila!  All it took was a few coats of semi-gloss in Whitest White – a “custom” color the hipster guy at the Benjamin Moore in the Marina mixed for me (side note here: there was nothing custom about it… while you won’t find Whitest White on any paint chips, it consists of the base color that comes in the can with a single drop of blue to “brighten it up”… alrightyyyyy then).

The result is shocking.  I have the least observant boyfriend in the world, and even he immediately noticed the difference when he came home from work.  He thought I’d painted all the walls, but really I’d just painted the trim.  After work.  And made us dinner.  I’m THAT good.  And modest.

Anyway, since everyone loves a good before and after, here we go:

Before: Blah “Off” Off-White Everywhere

 
After: Crisp, Clean, Contrasting Trim
You can still see out in the hallway how the trim is monotone with the walls – the hallway is next… and then the dining room… and then the living room… and then the kitchen.  I’m on a roll!!

Also, look at the first “before” picture – those were the temporary curtains we had up until recently.  WAY too dark for the room, but I still love them… just not in here.  Those will be fabulous in my one-day office.  Anyway, seeing the dark curtains hanging, don’t you think the light silk ones are the the winners??  What a huge difference already!

Looking at the progress that I am slowly but surely making on the bedroom, the walls and trim are done, curtains are done… now we have to sort out the bed / bedding situation.

Lions and Tigers and Bears… and Zebras??

Rugs USA is having a big 50% of blowout sale this weekend, and I’m seriously considering getting this zebra print rug for the bedroom.  It’s an amazing deal, and I don’t know if I have the strength to resist.  I know what Kris’ reaction will be… Um… animal print?? Really Becky??  But I think I may do it anyway…
Am I going crazy, or is this rug awesome?? (Answer: It’s awesome)

Ive seen several rooms where zebra is used as a neutral and I love it!  Look at it in this living room!
love this room- teal, lime and grey.  love the subtle grey zebra rug and the teal behind the bookshelves
June and Bear

And here again!!  I think I’m not crazy… and I think I might just end up with a rug on it’s way in the very near future…
Grey Zebra rug + yellow accents + original artwork
Decorpad

I’m also loving this pale blue chevron printed rug….

This modern damask rug…

The awesome Flokati Rug I mentioned before
And the sky blue moroccan trellis rug…

Oh I have some serious decisions to make!  The discount code for 50% off your RUGSUSA order through Monday is Private50!  Happy shopping!

Decisions Decisions

Don’t hate me for this post, but I really need to think out loud about the layout of our room.  Hi my name is Becky and I’m an over-analyzer.

As I try to plan for our bedroom make-over, I’m on the fence about re-arranging the furniture.  As it stands, the room has a few REALLY annoying features that are making it difficult to decide on a layout I’m happy with.  We have a very inconveniently placed steam heater that comes out of the wall a solid ten inches… so that’s awesome. Not only do I not want the heater blowing directly on us in the middle of the night, but I don’t like the idea of the bed sitting so far off the wall with that awkward gap.  That means that that wall is out.

The wall between the bathroom door and closet door is not nearly wide enough for a bed, so that’s out as well.  That leaves the wall between the windows and the wall directly opposite.

This is the current set up of our room:

In this set-up, the bed is directly to your left when you walk in, so there is a direct pathway to the bathroom.  I actually never even had to think about the layout when we moved in – our movers put the furniture in the room this way, and since it made sense, I left it.  Now I’m on the fence about whether or not we should switch it up.

Here is the other layout I was thinking of…

The main problem I see with Layout II is that when you come into the room, you walk directly into the bed.  I also don’t like that the bed can be seen from the living room, and I don’t like that it obstructs the flow for guests that need to pass through the bedroom to the bathroom.

Now that I’ve said what I don’t like, let’s move onto what I DO like – In all my “dream rooms”, I love when the nightstands line up with the windows, and the bed is nestled between – it creates really nice symmetry, and “frames” the bed.  In the current set up (Layout I) I do not like that our bed and nightstands are up against a blank boring wall.  I don’t really know what to do to make that “emptiness” behind the bed and nightstands go away.

The other problem is that, the closet door swings wide open into the room (even though I keep it closed when I’m not using it), so the area right outside the closet has to stay empty so we can open the door up.  You might be wondering what the problem with that is?? Well, in order to keep this space open for the closet door, the bed and nightstands are no longer perfectly centered on the wall – they are just off to one side, and not lined up with the windows on the opposite side of the room… am I totally losing it or does it matter? (I think it matters).

Now that I’ve got it all down on paper, there seems to be more con’s to switching to Layout II than there are to keeping it as is, but even so, I’m still not loving how it looks, and I feel stumped for ideas.  I’m hoping that once the paint is on the walls, things will feel less empty, but I’m kind of at a loss!

I saw several rooms that used tall mirrors behind the nightstands and lamps to open things up, and give the feel of windows, but how many mirrors do we really need in one bedroom?  Remember those existing Quadrefoil mirrors? Should I get rid of those for now and store them for another time? Should I seek out longer window-like mirrors and try something like this?  It looks great here, but I really hate the idea of abandoning my quatrefoil mirrors!!

Pretty.

The mirrors behind the nightstands does look pretty good here, but admit it – windows flanking the bed just look better!

Bedroom
DecorPad

pretty
centsational girl

headboard
centsational girl

Oh I am so confused now!

Quickie Makeover: Etagere and Side Table

Since I’m still sick as a dog, I’ve been taking it easy which means staying at home, and resting.  Unfortunately, I’m not very good at that (you can only take so many naps) so while loafing around the house yesterday, I decided it was time to do a little sprucing up around here.
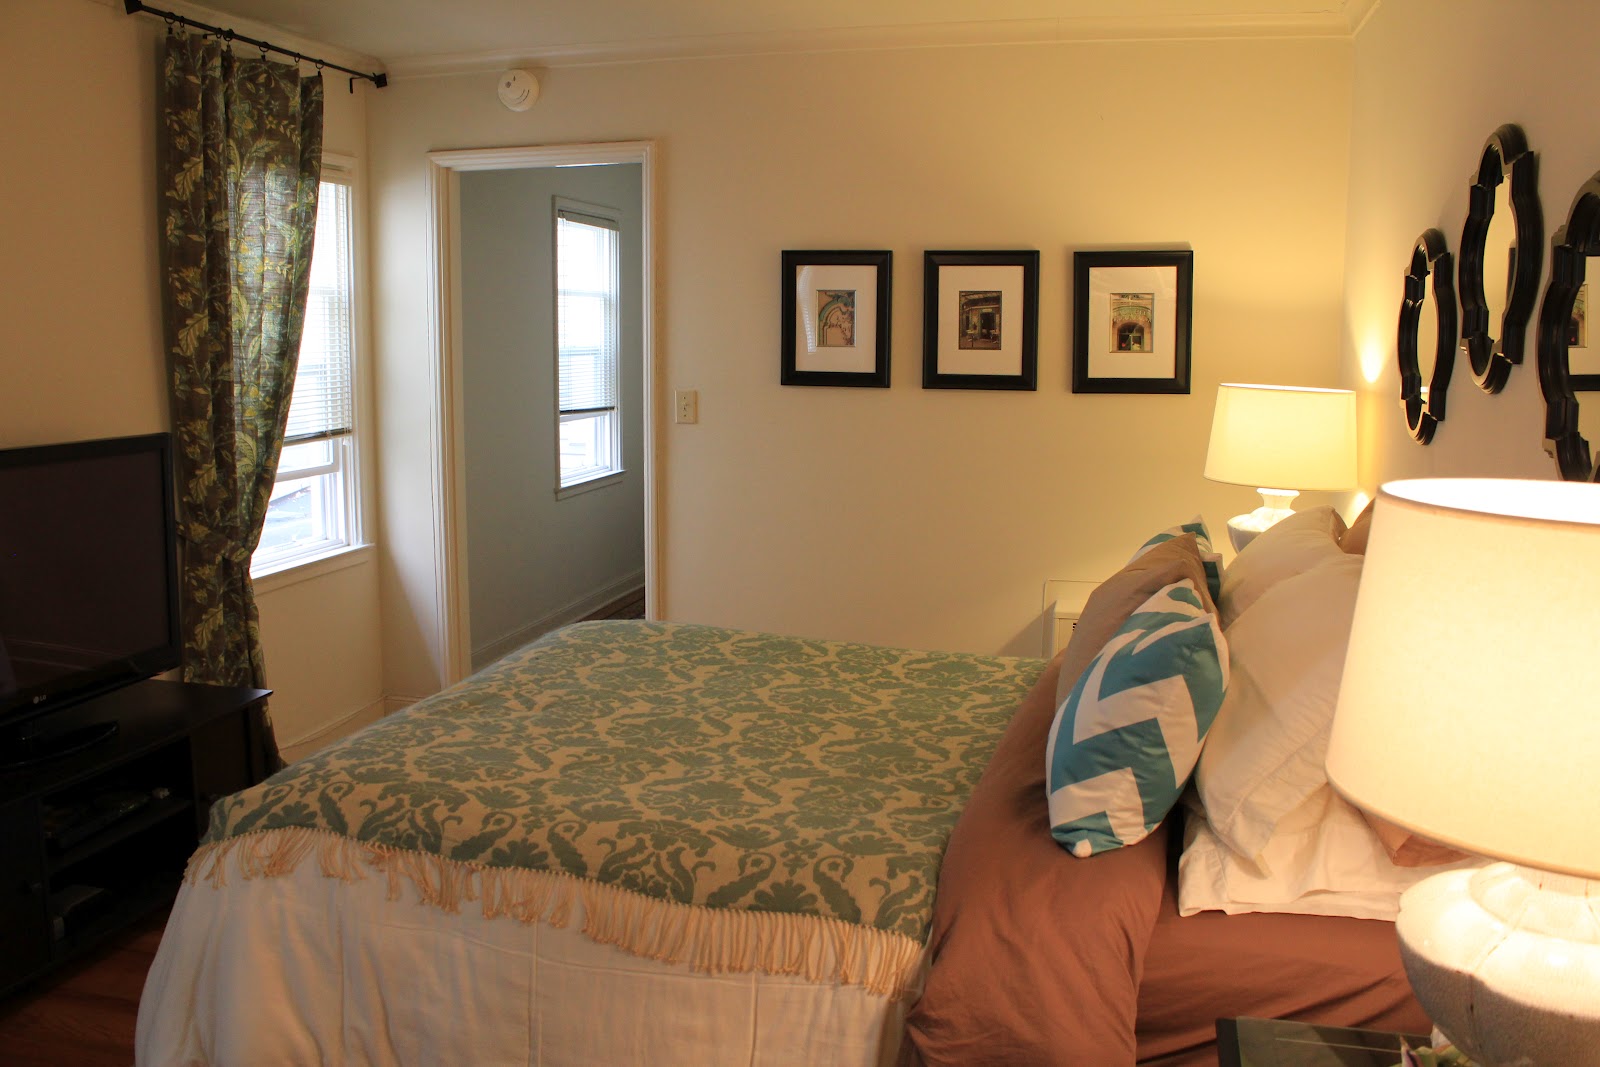
Right now, our nedroom is very dark.  Not only does it not get a ton of natural light since it faces another tall building (love city living) but the bedroom furniture is also dark (remember my struggle to refinish my armoire and nightstands last fall?)  Anyway, it’s bugged me for months, and since a total bedroom makeover hasn’t been on the agenda (or in the budget) just yet, I want to start making a few small changes to help lighten things up.
    

Which brings me to this black shelving unit, aka: the etagere (well that’s what I’m going to call it).  This beast was one of the first things I bought when I moved to San Francisco over five years ago… perhaps I thought it was elegant at the time (woof), and as much as I’d love to give it the heave-ho, we need it to house all the things that we simply don’t have storage for – aka, my jewelry, accessories, books that don’t fit in our bookshelf, etc.
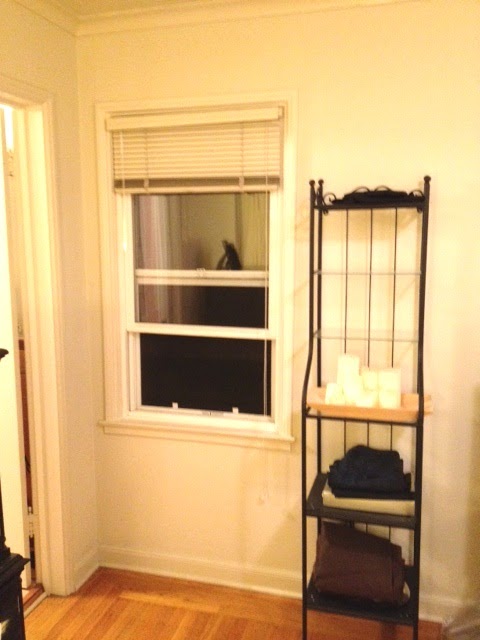
These are the few “before” pictures I could find of this cheapo metal shelving unit.  I didn’t want to put a lot of time or money into this project since it was dirt cheap to begin with, and it may not even be here three months from now, so I grabbed a can of spray paint from the home depot (Rustoleum’s metallic gold) and went to work.  
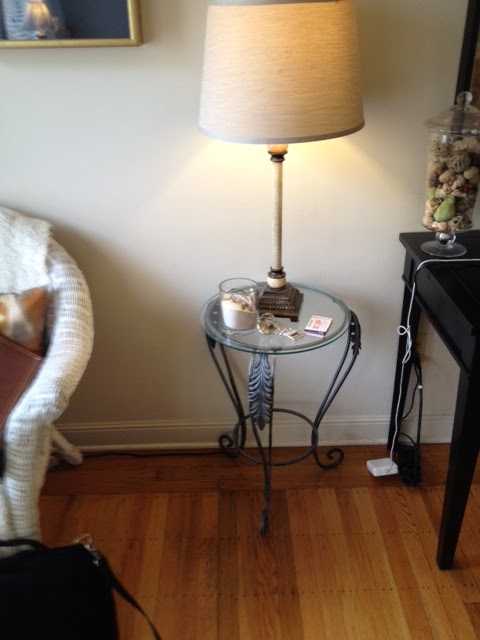
I also did a small side table that goes in our living room – here are the before pics of that:
    
I dragged these bad boys out to the garage, and went to work.  The guys at home depot took pity on me (granted, I probably looked somewhat lost in the aisles of power tools in my leopard print flats), and they sent me off with a super cute face mask and gloves.  Double score! Aside from the fumes which would have made me hack up a lung from this sexy cough, I would have ruined my manicure – a true tragedy (I mean, look how cute the neon pink is):
Anyways, back to the point… here are the “during” pics – super exciting:
      
And finally, the afters.  The whole project took maybe 45 minutes from start to finish – from dragging the furniture to the garage, to the actual spraying, the dry time, and clean-up.  
               
Not bad right?!  Keep in mind, I snapped these pics with my iPhone, so they aren’t the best quality…
You might look at the “etagere” and think, “Storage? What storage“, but it looks somewhat dwarfed in this photo – there are two boxes on the second the bottom shelf, and they hold all my jewelry that doesn’t look very nice on display (bangles, long strands of necklaces, chunky earrings, etc) along with hair “stuff” (headbands, pins, velcro rollers, a bump it – don’t ask).  I also have a tray that holds my pretty statement necklaces (below) and another dish for my dainty pieces (studs, rings, and small chains).


This was my first time spray painting, and aside from feeling like a badass (I totally wanted to tag the wall with some white girl graffiti… perhaps a knee jerk reaction from holding a can of spray paint??) I learned a thing or two for next time…

Key Learning #1: Hold the bottle far away from the piece, to avoid heavy coats
The shelves don’t look so hot close up because I didn’t hold the can far enough away – they are blotchy. There are also a few drip marks from being too close.  This stuff dries fast… really fast, so by the time I noticed the drips it was too late.   Oh well, live and learn.

Key Learning #2: Spray multiple thin coats.  
This ensures even coverage, and fast thorough drying time.

Do I care that I messed up?  Not really… Is that bad?  Eh… not at all!  They were both dirt cheap finds to begin with, (the shelf was originally from Ikea, and the table was from Craigslist) so the mistakes don’t faze me at all.  My guess is that within the year, both will be either left on the street corner for some other 22 year old to find, or back on Craigslist for $5, but while they are still here, I think they both look one-hundred-million times better.

I’ve got Throw Pillows on the mind… Again

DSC_0329

If you weren’t sick of hearing my talk about throw pillows, then you definitely will be now!  Yep… we’re back on the topic.  AGAIN!  I’ll be brief, but I can’t promise this will be the last time you see me agonize over them…

Quite awhile ago, Emily Clark posted photo’s of her friend’s living room, and after stumbling upon this post, I thought, hmm… that rug is pretty much the same as the rug we have in our living room… and yet… even with all those crazy colors and patterns on the pillows, it looks just right.

And, that’s when it hit me… I’ve been going about it all wrong!  I’ve been looking at patterns that are too big and mirror the pattern in our rug.  I need to look for smaller, scaled back versions of that pattern, and invert the colors of our rug to avoid feeling like the pillows are competing.  Duh.  Why I had such a hard time with that, I have no idea.  What I do know, is that come this weekend, I’ll be hunting down a small grey and white patterned fabric (similar to the two outermost pillows above) to compliment, our lovely trellis rug.

DSC_0319

Also, not sure if you noticed, but she’s also got the Chiang Mai Dragon Print throw pillows (in china blue).  I’m still holding out for Mocha, but they look pretty fabulous, no?  Perhaps that will be my Autumn splurge once October rolls around….

Sophisticated Entryway: Design Inspiration

Clean traditional.  Like the smokey mirror + animal print done right
Houzz

This room (or should I say hallway) is sexy… to me, it’s a slinky dress, dirty martini, smudged red lipstick kind of sexy.

Am I right, or am I RIGHT?!

Between the dim lighting, smoky mirrors, and animal print, I’m all about it.  It’s really pulled together and tailored, but very masculine at the same time.  From the cubist modern framed prints, to the dark wood chest of drawers, to the angled lamp and tribal accents… it says “manly” to me.  While there are aspects of this that I really love, I don’t know if I’m brave enough to have a space like this in my own house. Unfortunately, the original room was featured on Houzz.com and I can’t find the original page now, so all the details are lost!

Anyway, enjoy an inspiration board I pulled together for this room.  I’m sure there are so many more (and better) furniture and accessory options if you dug around in thrift shops, antique stores, and flea markets, but working with the instant gratification of online, here is what I came up with…

Zebra Chairs: Wayfair
Apothicary Chest: V&M Curators
Angled Lamp: World Market
Antiqued Mirror: Bronson Design
Driftwood Charger: World Market
Vase: World Market
White Stone Sculpture: Etsy
Wall Sconce; Lamps Plus
Jute Rug: Rugs USA

What originally drew me to this room are those fabulous chairs!  I’m sure they are quite costly (even custom), and as I discovered, pretty much impossible to find online.  Above, I found a pair from WayFair for around $700 for both.  Not shabby since accent chairs can run up the bill quickly.
Aside from those chairs, a staple in this space is a sturdy dark wood chest of drawers, that really reminded me of an apothecary chest.  As a side note, while I was searching for the perfect apothecary chest online, I could not stop thinking about that one episode of friends, where Rachel gets an apothecary table from Pottery Barn… anyways… if you haven’t seen it, please do yourselves a favor and watch this clip.
Back to the inspiration – several of the table accessories came directly from Cost Plus World Market – they are great for the worldly, tribal, or eastern influenced accessories, and unless you are looking for an original piece, they are pretty cool.  Speaking of, I just saw some really cool globes there, and I’m seriously thinking of picking one up.  Where it will go in our apartment is beyond me, but I just loved spinning it around in the store.  Etsy is also probably a goldmine here – support the small business owner!
Moving onto the art – it’s totally subjective.  In the original room, they went for cubist art (a la Pablo Picasso) but you could go for black and white photographs, old maps, whatever.  The floor looks like it’s possibly inlaid wood, but I also included a jute rug for a bit of texture – an old faded tapestry esque floor covering would also look pretty amazing in a space like this.
Finally, the lighting should be ambient – I wouldn’t try this space in a really bright area of your home.  It’s all about moody lighting, so go for low wattage bulbs to bring the warm tones in the paint to life, and create a bit of mystery.