Sunburst Mirror Update

Remember this post when I used a little paint to transform a cheapo sunburst mirror from Bed Bath & Beyond into something much cooler?  Well it’s only taken me two months or so to actually hang it (oh the shame), but there it is!  It’s made a home in our hallway that after looking at these pictures could quite frankly use a bit of sprucing.


After several years of service, the once life-like silk hydrangias are looking a bit sad.  I’d like to replace them with something a bit fresher.  This little hallway table is where all the stuff that doesn’t have a home goes.  The candles need to be downsized and stored, (but on the plus side, we are totally prepared for a power-outage) and I’d really like to find a new runner for this spot – something with a bit more contrast and color.  It’s hard to see from these photos, but its dark, and brown, and it served its purpose for many years, but it’s ready for retirement.


Here is a view of the hallway from the dining room.  Wouldn’t it be great if we could paint the storage cabinet in the hallway with a fun pop of color?  A light Kelly green would really wake things up, or even a darker version of the wall color in the dining room for continuity.  I used Benjamin Moore’s Opal Essence (look here for a photograph that really showcases this color).

For more intense versions of the dining room’s blue, I really like Kelley Moore’s Fair Farmington, Sherwin Williams’ Eerie Island, and Behr’s Gazebo.  All of them are very pretty blues with a little aqua and grey.  If it weren’t so permanent, that cabinet would be painted in a nano second.

Unfortunately for me, I’ll already be repainting the dining room when we move out – no fun!

Sea Fan Shadow Box: DIY

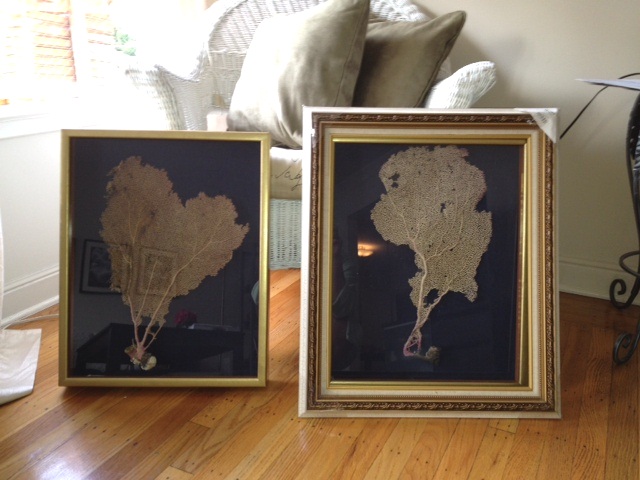
This DIY project has been a long time coming – mostly because I was too lazy to hang hooks on the wall (shameful, I know).  After lusting over this sea fan shadow box on Etsy for several months, I finally emailed the seller to find out how much she was selling it for.  I won’t totally throw her under the bus, but it was about 4x what I was willing to spend.  Eeps!

After the initial shock, I decided it didn’t look so hard to me, and that I could fairly easily re-create it on my own!  What do you think – pretty close!
Inspiration:

Sea Fan Shadow Box

Reality:

Bound and determined to recreate this project, I did a Google search for “sea fans” and found a little online shop, Sea Side Inspired, that sold the exactly what I was looking for: sea fans between 12-18 inches.  At $22 each, I was sold!  All the sea fans I’d seen online were dark – almost black – so I had resigned myself to the fact that I would be spray painting these suckers a light grey or buff.  To my delight, when they arrived, they were a perfect sandstone color with tinges of pink and lavender!  So pretty – no spray paint needed!
To be honest, the hardest part of this project was finding shadowboxes that were large enough to accommodate my sea fans!  I hunted around, going to Target, Aaron Brothers, and a few small frame shops in San Francisco.  What did I learn?  Shadow boxes are hard to come by, and custom framing costs an arm, a leg, and your first born child.  (Do people actually pay for that?!)
Anyway, after I was about to give up, my mom gave me the idea of Michaels, and with a coupon in hand, I headed over there.  
Bingo!  
I found 20″ x 16″ shadow boxes with my name written all over them.  The problem??  The only colors they came in were black and this awesome terracotta color (why god, why?!).  I ended up picking up the terracotta color because they were the cheapest, and I was going to have to paint them no matter what.


Don’t you just love the little cherub on there?  He says, “this frame is classy… trust me”.  I told him, “agree to disagree.”
A little painters tape around the edges, and I was ready to rock and roll.  The trick to taping it off well is wedging the tape almost underneath the edges between the glass and the frame – this way the paint won’t bleed onto the glass and you won’t need a razor to scrape it off later.

I liked the aged gold look of the frame in my Etsy inspiration, so I thought, “I’ll gold leaf it!”   I wasn’t born with the patience for gold leafing, so I got got gold leaf paint (same thing, right) – Martha Stewart calls it liquid gilding paint… potato potahto.  
I picked up a cheapo foam brush and used a left over birthday cake plate as my palette – hey, it was easy clean up (throw it all in the trash and call it a day).
The first coat went on splotchy, but this stuff dries fast (by the time you finish the final side of the frame, the first side you painted is dry).  Since it was so fast drying, I was able to do all the coats without stopping for a break (the picture below shows after one coat).  I ended up painting three coats in total – the first for a base, the second for coverage, and the third for artful imperfections.  I really should have sanded them for the paint to stick better, but I felt lazy, and it worked just fine without sanding.

For coats one and two, I brushed the paint on, but on coat three, I used the sponge to stipple the paint.  Some may not like the look, but I happen to really love it.  It created texture, and made it a bit more interesting.
I wish I had an up-close “after photo” of the painted frames, but the light was bad, I was tired, and I forgot.  Oopsy.
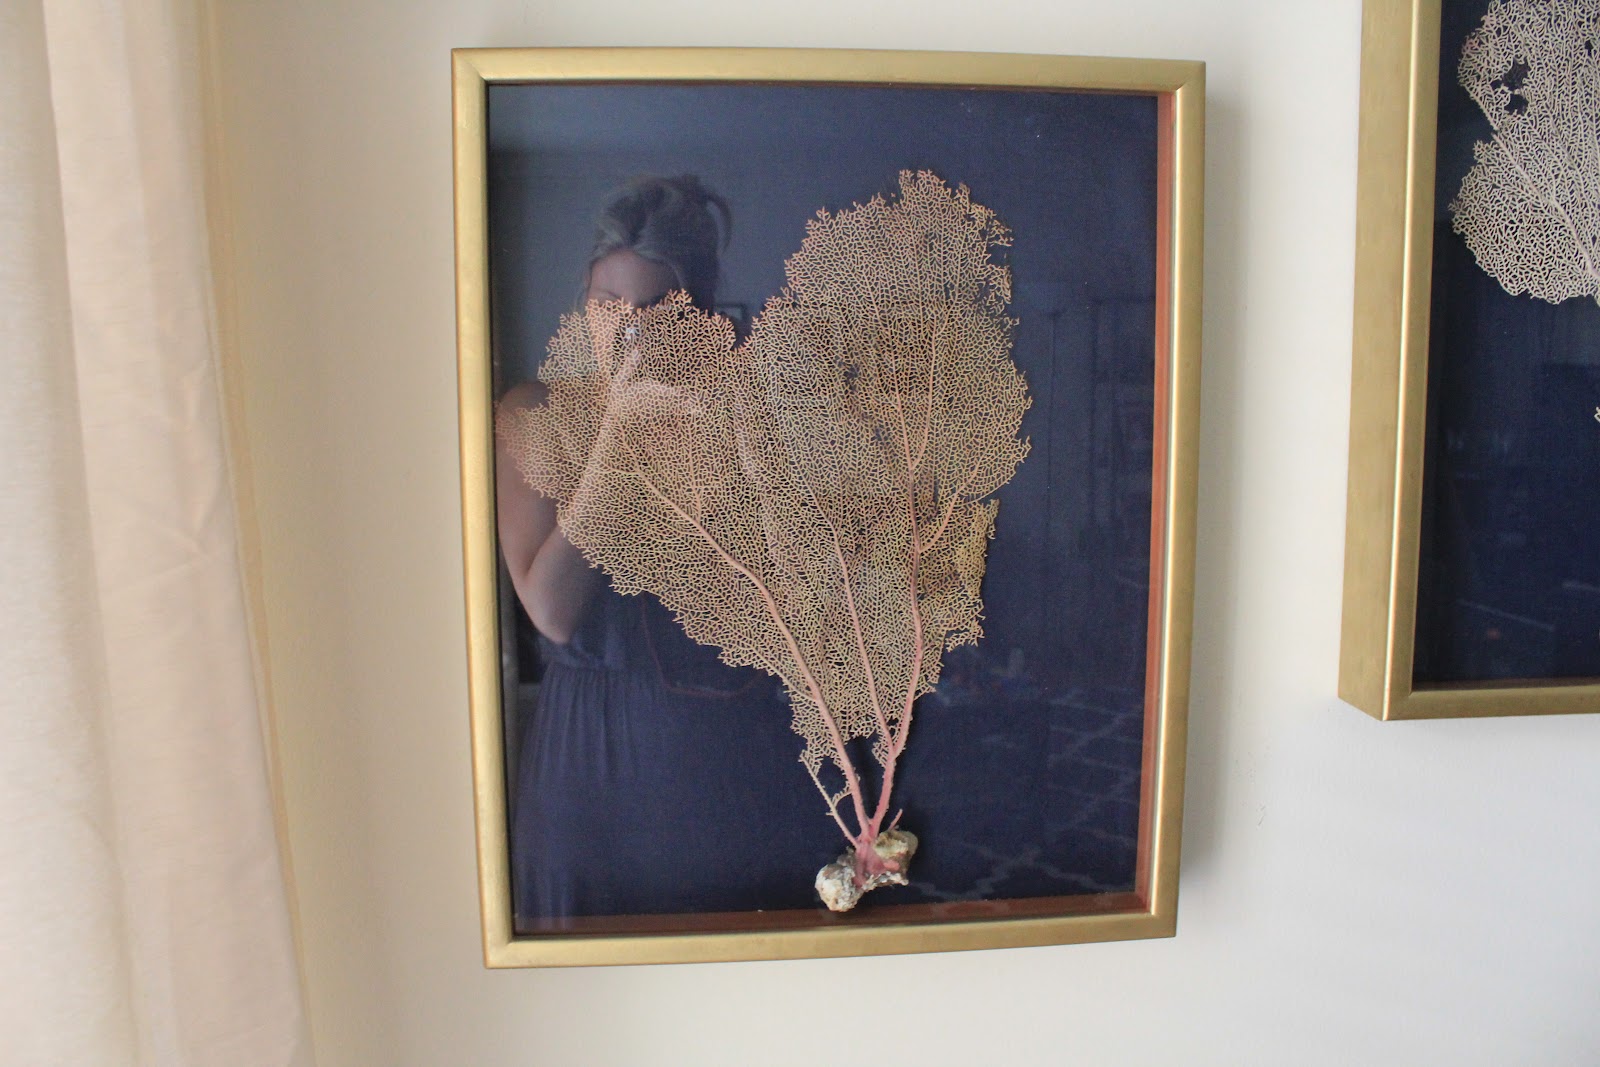
Final steps: I bought half a yard of dark grey blue linen to back the frames.  I just used fabric clue to adhere the fabric to the backing – very technical.  I think the Etsy version uses plaster – if you look closely you can sort of see the texture, but fabric was easier, and I was ok with that.
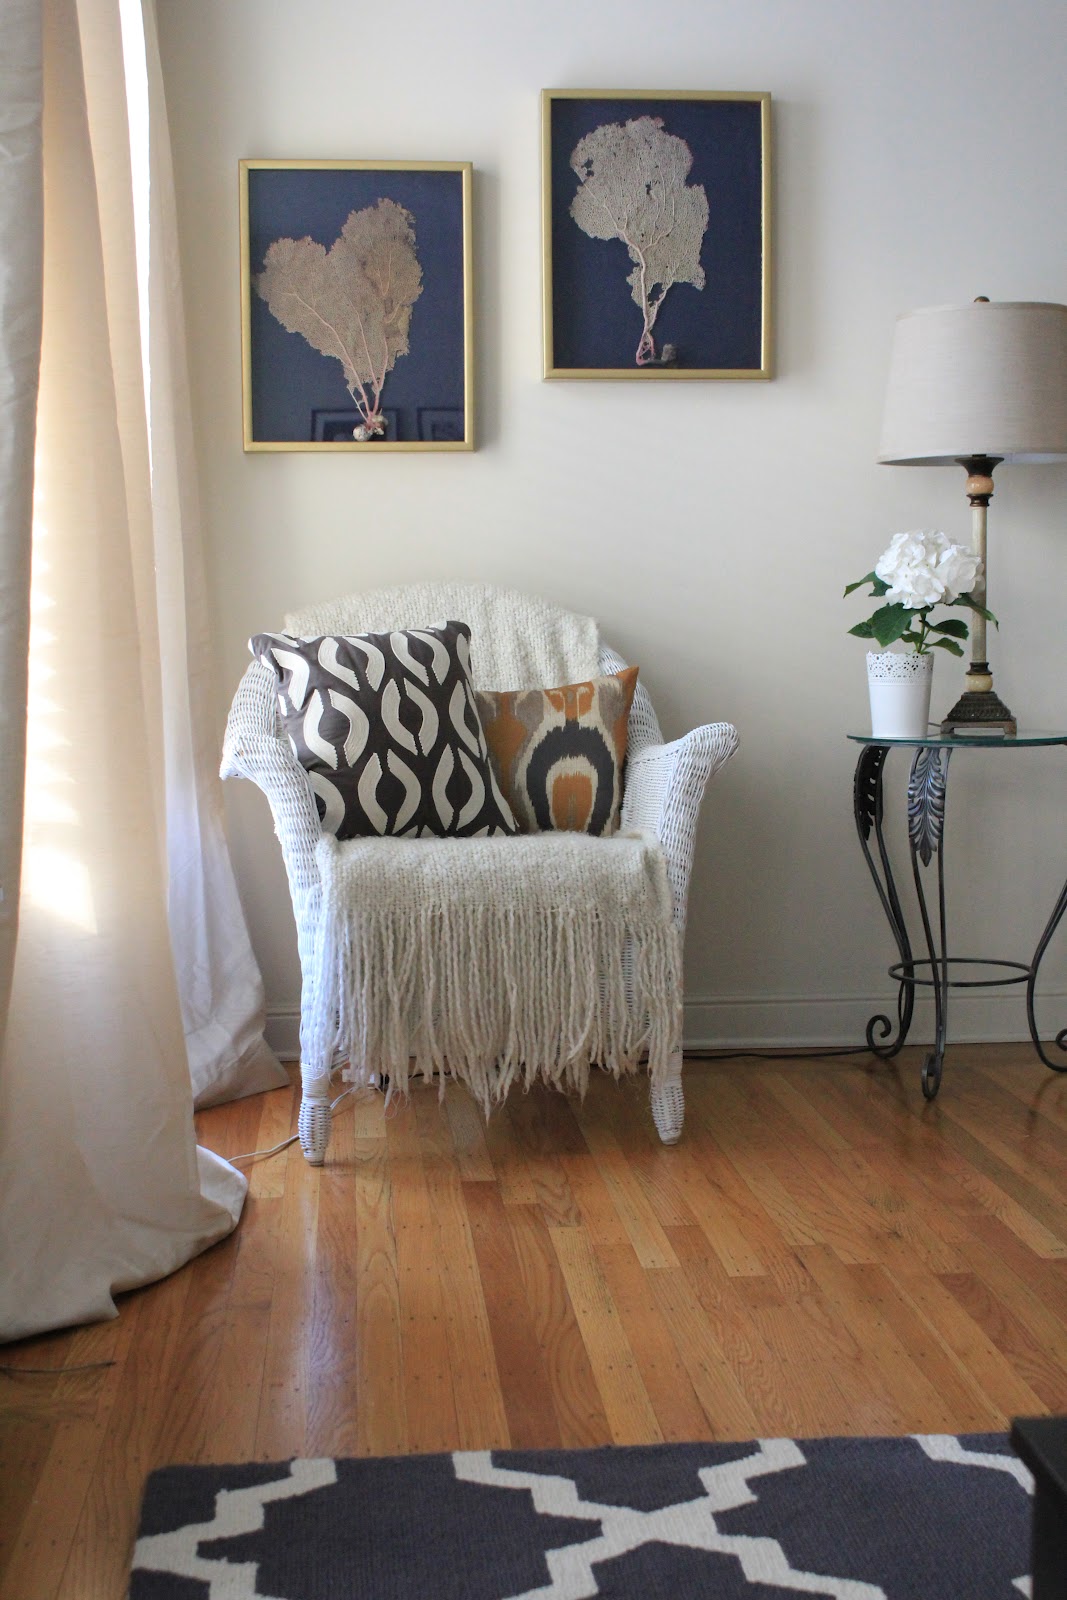
After getting the fabric on there, I positioned the fans on the backing, and used small silver sewing pins to secure them in place – you can’t even see the pins, and it works just fine!  I put the backs into the shadow box frame, wired the backs for hanging, and got a few picture hooks in the wall (after about a month and a half of these sitting on the floor in the dining room).
Originally, I toyed with the idea of tacking decorative frames onto the facade – something with a bit more ornate detail (see the terrible quality iPhone picture  here.  I love the look, but these frames are likely not made of wood, and after all the work of taping and painting, the idea of securing a heavy facade to the front seemed like a lot of unnecessary work.
My mom said she likes them better without the facade, so I’m going to go with that.  Simple is also probably better so this wall doesn’t look like there is TOO much going on.  If we move into a larger place, I may append a more ornate frame like this, but for now, I like them as they are.
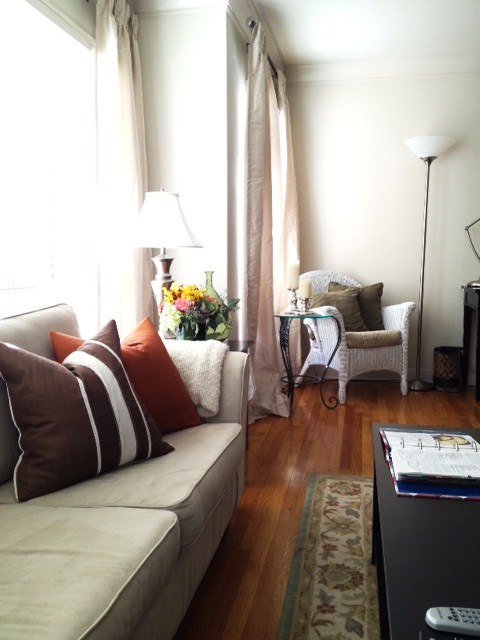
Anyway, here they are hanging in the living room, and I’m pretty happy with the final result.  
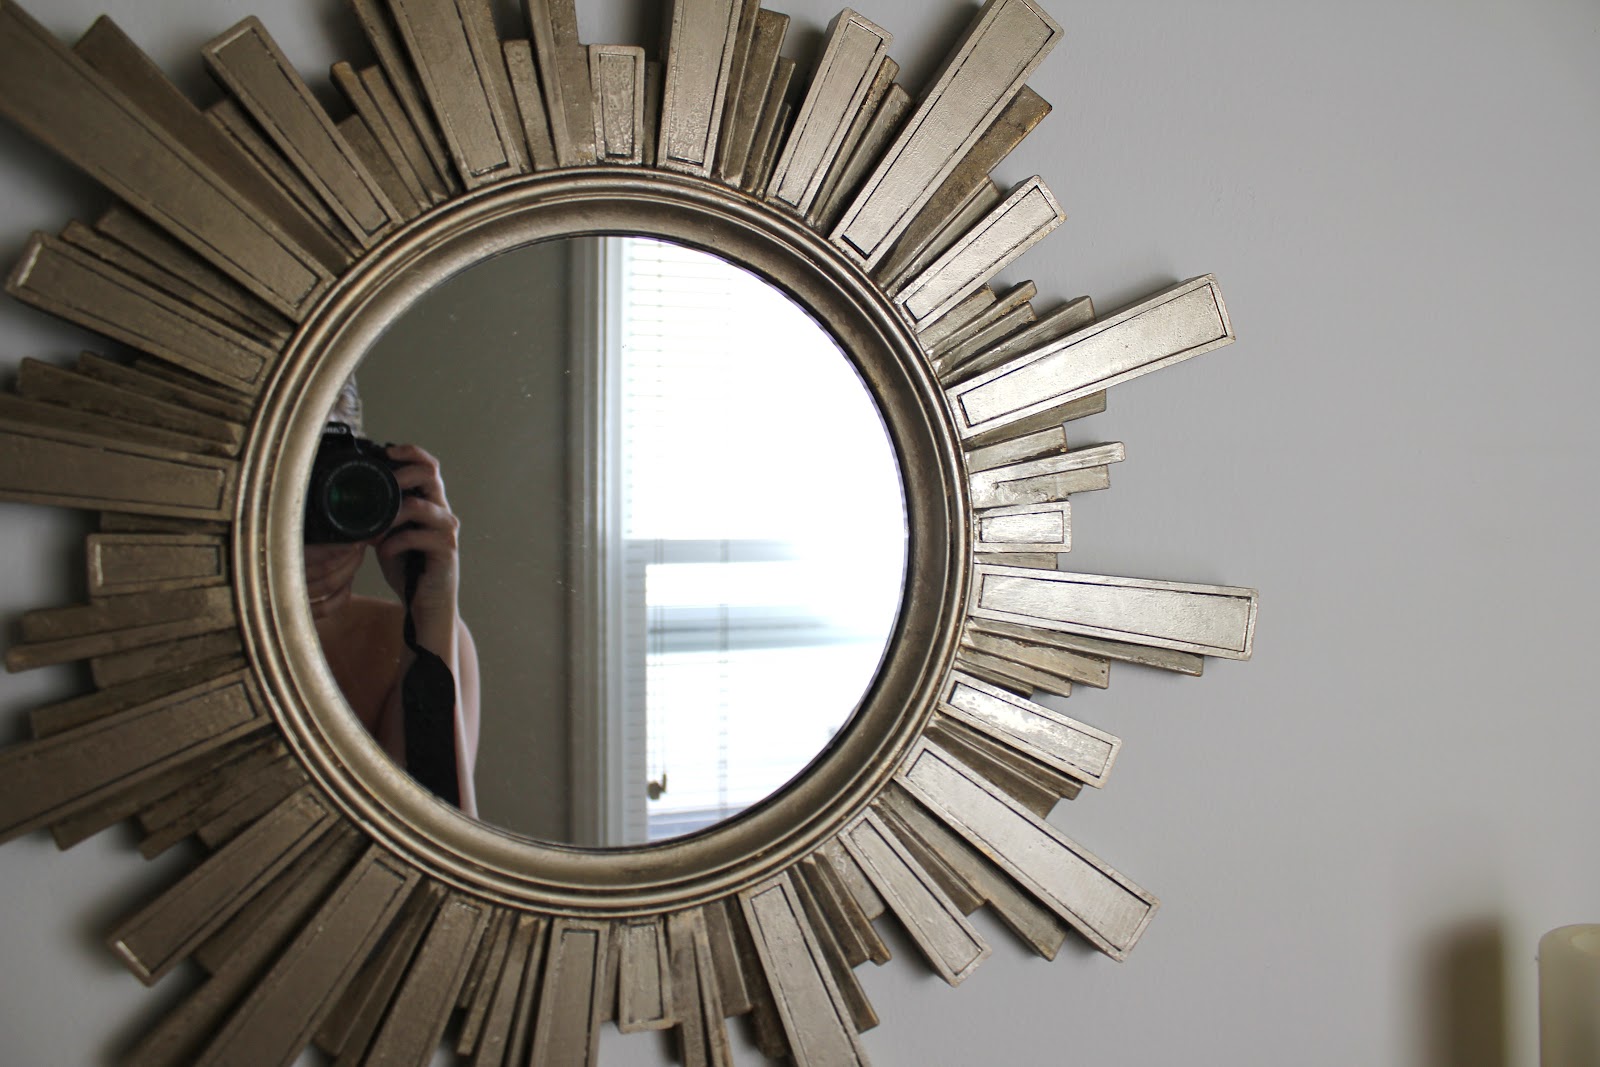
I HATE that you can see my reflection here, but there was no other angle where I could avoid the glare from the windows… dah.
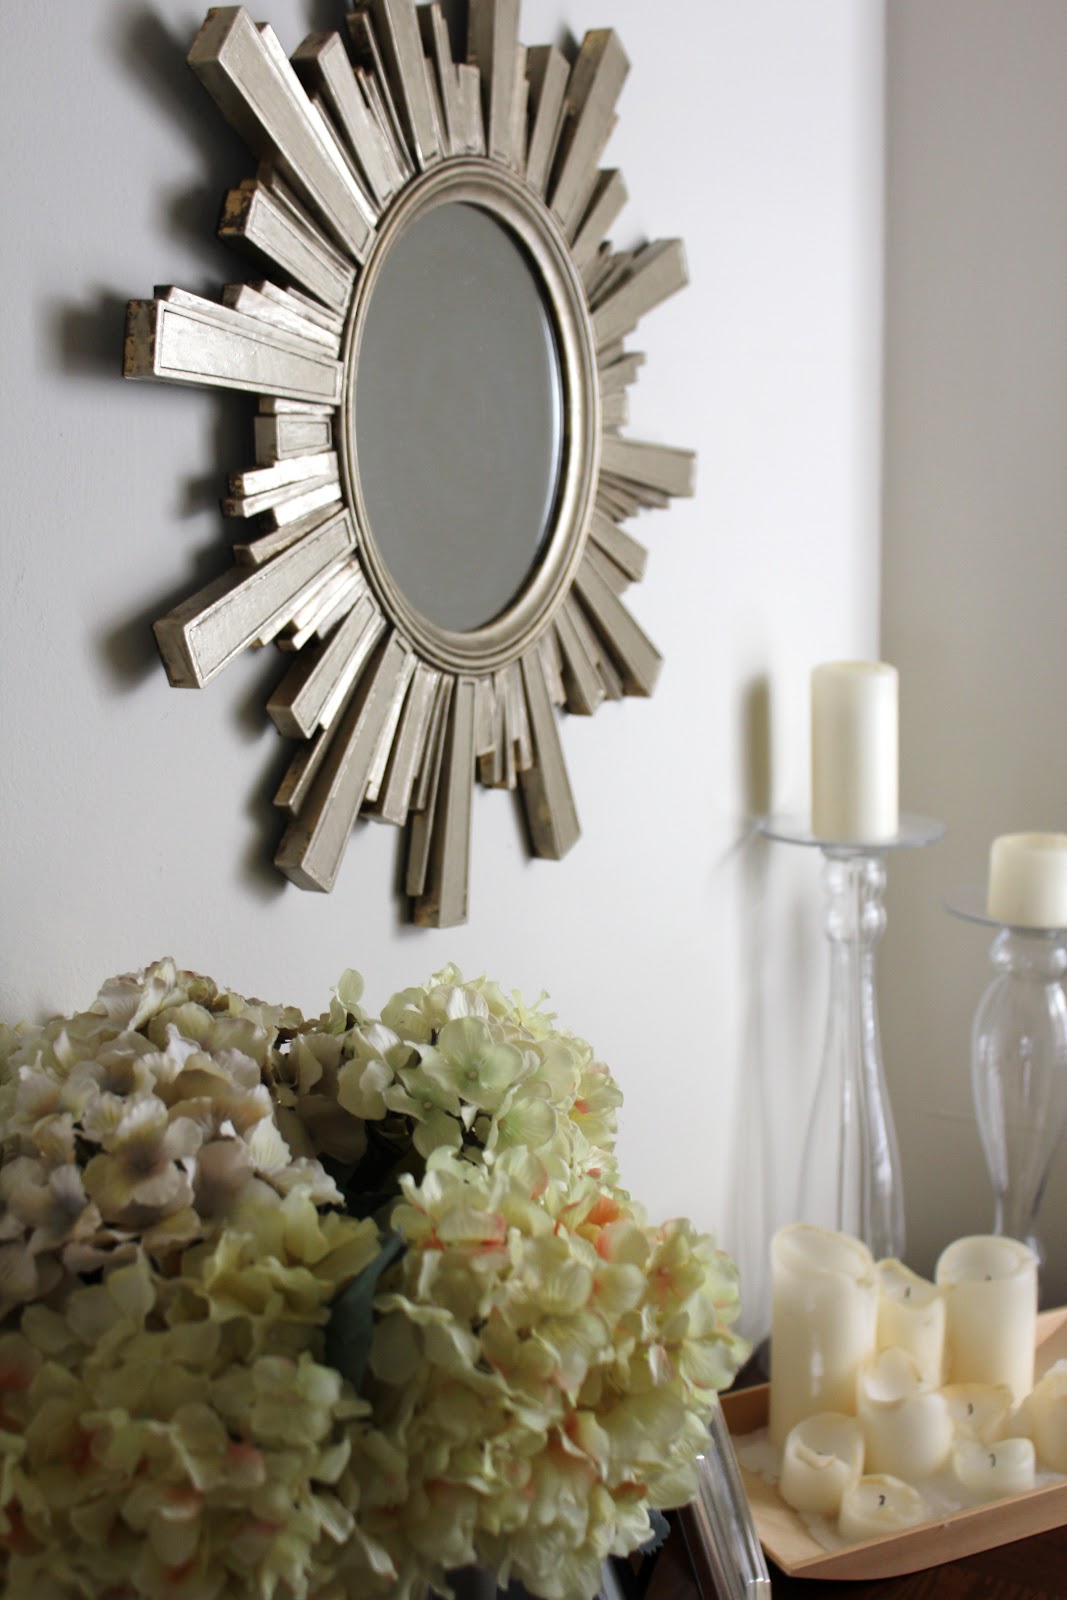
So here it is at dusk – I love how the room looks all lit up at night.  The tones of gold, creme, and amber really comes to life, and the cool greys and blues act as a nice balance (at least I think so).
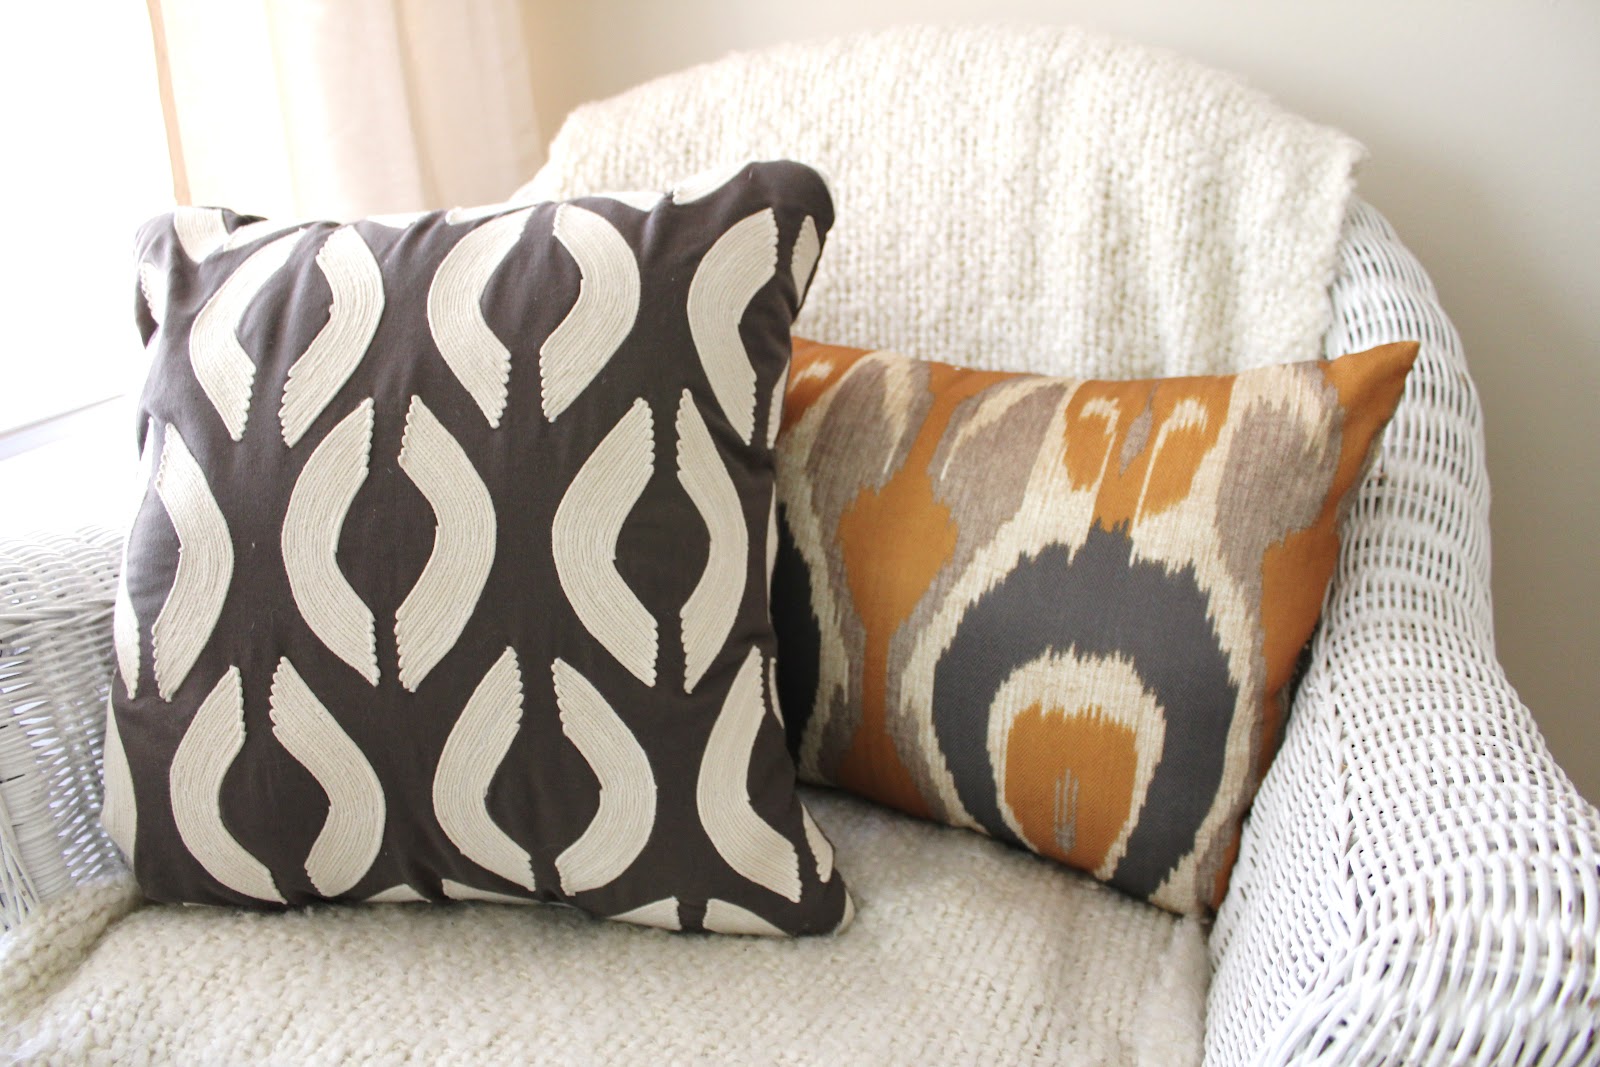
Finally, just wanted to toss in a close up photo of the new throw pillows I picked up randomly.  I had been agonizing over pillows – what colors to go for, what patterns to get.  I picked up the gold and grey ikat from Cost Plus World Market of all places (do you remember this post on my debate over a grey / brown and yellow Ikat… hey now!), and the grey and white pillow from Target (oh, how I love Target.  I went in for toilet paper and came out with throw pillows).

I think they work well together, but I’m a bit worried that its a lot of pattern next to each other.  I’m actually looking at a taupe linen pillow to pair up with the Ikat pillows (there are two), and the grey pillows may live on the sofa.

Anyway, our little home is coming together, and I’m so excited for my honey to come home and see the new sea fans, framed, and hanging in our living room!

DIY Headboard Inspiration

I’ve recently been struggling with the idea of buying a new headboard for our bedroom.  Being completely honest, the headboards I like are WAY outside of my price range, and I just cannot justify spending upwards of $500 for a quality tufted headboard.

Last night, I stumbled across an amazing Pinterest find: 34 DIY Headboard Ideas.  Um, hello, where have you been for the last several months?!
While I am still toying with the idea of making my own tufted headboard, some of these ideas are so cool, it’s really given me some different ideas that are outside of my comfort zone.
First up – Laser cut metal roofing!  Who’d have thunk?  Somehow it has a glamorous feel, despite using the most un-sexy of materials.  Pretty sure Kris would say no, but it’s so creative, I kind of love it!
Talk about getting a bang for your buck – this headboard is just a decal on a bold colored wall – you could easily stencil it on with paint as an alternative, but it’s dramatic, and EXTREMELY cost effective.  Perhaps not my taste, but this would be so fun in a teenager’s room.  16 year old me would have gone wild for this!
A similar idea to the last headboard, this one here uses chalkboard paint so you can have fun with it.  Again, not quite what I had in mind, but such a cool idea!
Take some reclaimed wooden boards, cut to size, nail gun to wall.  Easy, cheap, and very shabby chic.  Where I will find reclaimed wood lying around in SF, I do not know… I also don’t think I’d want that anywhere near my bed if I found it on the street here, but that’s a whole separate issue.
A huge piece of art has taken over this next bed – very chic & very minimalist while being very dramatic.  I love how this looks, but it’s a bit stark for my taste.
Why have I never thought of this before?!  Use a folding screen as a large dramatic headboard.  I recently saw one at Cost Plus for less than $200 – it was natural colored linen with nail head trim… may need to go back and swoop that up!!
Ok, I want to live here!  Look at those amazing old doors propped up behind the bed – amazing.  And that chandelier?!  WOW
Anyway, check out the rest of the article for more unique DIY headboards!
xo

Living Room Updates

Time for a few updates on our living room!

As I mentioned here, I pulled the trigger on a grey trellis rug that I’d been eyeing for months.  I originally thought it was back-ordered until May, but when it arrived early, I was thrilled!  It REALLY brings some life to the room… I think I’m in love.

I literally scoured my hard-drive for some good “before” pictures, and was shocked that it was so hard to find any!  In advance, excuse the poor quality, weird light, etc.  P.S. don’t mind that the edge of the rug is rolled up in this picture – I had JUST layed it out, and since then it’s flattened out 🙂

Before:

I still love the sea-foam colored Persian rug that was in there before, but with strong sunlight from the floor to ceiling windows, and the very neutral colors, the room was feeling very washed out.  The old rug is going to be making a new home in our bedroom, while the grey trellis is here to stay.

After:

A few other small changes – the tall $15 lamp from Target moved across the room (you can see it in the first “before” next to my beloved wicker chair) – we both hate this lamp but it’s here for the meantime.  There are other things on my loooonnnggggg list of “wants”, so it will have to wait.  

The small glass top table moved in between the desk and the wicker chair, and the lamp is actually a total re-purpose.  Remember those tall candlestick lamps from the bedroom post here??  Well a new lampshade later, this little guy is looking much better!  This table was a steal from Craigslist that I bought when I first moved to San Francisco.  It’s not really our taste, but replacing it is not a top priority.

I also won a small battle, and finally got rid of Kris’ HIDEOUS filing cabinet.  The paperwork has been temporarily moved into the black and white chevron print file box under the table next to the TV.
Next up on my grand list?? Replacing all the mismatched pillows with new covers.  They are so shabby, so I am going to have to make some tough decisions.  I want them to have both color and pattern, but nothing too wild.
Also, after looking through these pictures, I notice that we’ve got cords EVERYWHERE.  Must fix that with some strategic taping, and anchors along the walls!!
I love coming home now to my freshened living room, but it is by no means “finished.”  I find myself picking it apart when looking at these photos, and there are still SO MANY things I want to change.  I want to replace both couches, get two lovely Chippendale’s to define the sitting area (remember this post??) Replace the wicker chair with a big comfy overstuffed chair, swap out the wrought iron side table next to the desk, update the art on the wall over the black sofa (maybe a gallery wall here?), and the mirror in the entry needs to find a new home – I’d love to put some shallow shelves up there, but it is what it is.
Anyways, despite my never-ending laundry list of things I want, I always remind myself, I’m only 28, I have years to accumulate pieces I love, and right now I am very happy with the mini updates I’ve made.

Live Beautifully

I am officially in love with Maria Beck’s blog, Live Beautifully, and I am not ashamed to admit that I want her life.  She is a prominent Texan interior designer, who owns her own company.  Her taste is flawless, and her renovations are absolutely stunning – we are talking serious transformations on some of these – tearing down walls, gutting entire floors of homes, etc.  After discovering her site, several hours disappeared a little too quickly as I scrolled through page after page of beautiful design.

What I especially love is how she aims to preserve the integrity of the homes she revamps, and stays true to the era of the home.


This is her most recent kitchen renovation where she made a much smaller kitchen an open functional space for a large family who entertains.

The before and after is really shocking.  She opened up a wall to open the kitchen to the living space, knocked down a wall to expand the kitchen into previously un-used square footage, expanded the island, and extended the cabinets up to the ceiling (one of her favorite tricks, and I have to say, one of the biggest impact changes to every kitchen remodel she does!)


This is one of my favorite dining room transformations – the room is small (compared to some of the expansive Texan homes she works on) but feels grand at the same time.  You wouldn’t know to look at it now, but the room had painted cement tile floors before the transformation (woof).  Thankfully these were replaced with french herringbone wood floors – so pretty (see below)

Her rooms are peppered with all my favorite styles – neutral colored core pieces, lots of dark wood, nail-head trim on everything, high mounted curtains, classic subway tiles (in kitchens and in bathrooms), animal print, lots (I mean LOTS) of white, natural fiber fabrics, grand chandeliers, deep tufting… oh my!  The list goes on!  These rooms look livable, but elegant.  I would not hesitate to sink into the deep fluffy furniture or cook in these kitchens.

Enjoy some of my favorite transformations from her blog, and be sure to check out Live Beautifully – you will fall in love!

Pretty Little Things

ornate vanity tray
So today I want to talk about thoughtful storage and pretty displays.  In a teeny tiny apartment, we don’t have the luxury of a lot of storage, so I’m always looking for pretty ways to display the things we can’t hide.  Not only am I a girl, but I’m a girly girl, so that means I come with a lot of stuff.

In an attempt to streamline our hallway closet, I’ve decided to pull out my prettier products for display, which will free up more space for the practical things I don’t really want out in the open – toilet paper, laundry detergent, and the economy size bottle of Aloe Vera that Kris insisted we purchase because it was a “better value”.  Boys!

Anyway, I’ve been on the hunt for a pretty vanity tray to display my perfumes, jewelry, and lotions.  I want to be sure it is large enough to contain the clutter, and I am looking for something with sweet decorative details to accent the room.  The lovely antique vanity tray (like the above) was my inspiration, but as you can imagine, they are hard to come by without sacrificing a whole paycheck, so I took to Pinterest to seek out some alternative solutions that are just as pretty!

Take a look!

Pick up a weathered picture frame:
Cute idea! (Re-purpose an old frame as a vanity tray. Place a piece of colored paper or fabric inside as a finishing touch.)
You can use fabric, wallpaper, wrapping paper, drawer liners, etc to accent the frame (pink paper above), and give a little character to your new “tray”.

Use an antique looking mirror:
Vanity Tray
For a SUPER affordable alternative: the Ung Drill mirror from Ikea has a similar look – paint it white and then lightly sand or rub on a bronzing treatment for that aged look.

Repurpose an antique tea tray: 
Vanity Tray Displays
Think about using different words in your Craigslist search, since items with the right look could have had a different function in another life.

Look for modern alternatives:
seagrass vanity with tray
If antique isn’t your thing, this breakfast tray does the trick!  Target has some similar options, and the high sides will let you stack even more in there – bangles won’t clatter out!

Give a second life to an old serving tray:
perfect perfume tray.
This is so similar to a serving tray my mom has!  Perhaps once used to serve Turkey at Thanksgiving, it’s nothing a bit of silver polish can take care of!

Grey Trellis Rug: I Pulled the Trigger!

That’s right!  The Homespun Moroccan Trellis Charcoal Rug is mine all mine in 7-10 business days! (Just wait until Kris finds out *devilish grin*) The decision to get this rug has been a long time coming and I could not be more excited!

Rugs USA Homespun Moroccan Trellis Charcoal Rug

My love affair with this rug started with a few rooms I stumbled upon online – several admittedly coming from A Well Dressed Home‘s blog.
Love this woman's entire blog!

A few Google Searches later, I was officially obsessed and needed a grey trellis rug in my house ASAP.  Unfortunately, this rug was on back-order indefinitely!  I hemmed and hawed over other colors, but kept coming back to the grey!  All the reviews said it was a very pretty grey with blue undercurrents – so perfect for our space!  I had accepted defeat, but on a whim, I decided to check the site last week.  What do you know?! It was back!  In less than five minutes, the order was placed, and I was sitting back happily at my desk, flushed with excitement!

(Side note: remember this post and Inspiration Board I created several months back?  This was completed just before I learned that I couldn’t get my hands on that rug!)

Anyways, since creating the above inspiration board, I’d say that I’ve fulfilled about 80% of the ideas! Of course, as things have been hung, bought, and moved around, I have a few other ideas that I’d like to try, so the inspiration will need some tweaks.  The owls are on hold along with the star-burst mirrors.  I am actually now contemplating a gallery wall and a few sea fan art installations… more on that later!

We are also STILL looking at pillows (the seemingly never ending conversation) but I want to put any pillow decisions on hold until we get the new rug. I think it will really transform the space, and maybe I’ll end up hating all my initial pillow options!

Also on the table?  A new sofa.  Macys is having a sale (again) and I am kind of loving the Chloe Fabric Velvet Metro Living Sofa.  Here it is in the sample photo and again from DecorPad.

Macys Stock Photo

DecorPad

The sofa is a great deal, and truth be told, I am dying to get rid of one of the love-seats we currently have.  A nice long sofa will be so nice to stretch out on.

Another secret? As much as I hate Kris’ black love-seat from his bachelor days, I’m almost willing to let him keep it for now, and sacrifice mine because his provides better back support!  Wow, I’ve never sounded more like an old lady.  We need a new mattress, and a slew of other things before a new love seat, so I feel stuck between a rock and a hard place.  Replacing the cushions on mine seems daunting, and re-upholstering his seems WAY out of my league.

Anyways, the rug will make me happy in the short term!  Stay tuned for updates on my little sea fan project 🙂

Ikat Print Pillows

Ok, back to the pillow discussion.  This has been pretty much consuming my thoughts, so I need to start making some decisions!

Unfortunately, my day job has nothing to do with design or decor, so I live vicariously through other bloggers who are invited to fabulous design previews.  Emily of A Well Dressed Home recently posted the below photo from the grand opening of the Bel Air Studio & Design in Dallas, and take a look at those pillows!!  They are SO close to a few I had been looking at last week – I think I should definitely get some, but which ones?!


Ikat Pillows at BelAir Studio & Design – via A Well Dressed Home

Pillow Cover - Decorative Pillow - Throw Pillow - Toss Pillow - Ikat - Chartreuse - Both Sides - 17x17 inch
Kyoozi via Etsy
One Bansuri by Kravet Grey Tan Gold Cream Ikat Pillow Cover 18x18
Home Living via Etsy


Olive and Garland via Etsy

Improvements in the bedroom

      Before:                                          After:
I would like to preface this post by saying, our bedroom is nowhere near to being finished.  I had become so fed up with the glaring white walls, and the hideous $10 blinds that our landlord lovingly installed… so I made a few changes.  Admittedly, we still need a lot of work… A LOT of work.  The real transformation has been in the dresser and nightstands (original post found here).  You can hardly tell the dis-repair of the nightstands in this very poor “before” picture, but they were no bueno.
Still on the agenda is a new mattress.  Ours is just terrible, but the decision between queen or king is holding up the rest of the room’s progress.  Once we decide on a mattress, then I can move onto upholstered headboards, bedding, and wall decor.

Really, not much has actually changed – I got new lamps which I LOVE, and hung a few mirrors, along with a few picture frames (remember those lovely french photo’s from this post) and some curtains.  I look back at the old lamps and think how teeny they look.  The new ones are much more substantial… really liking that.  I hated the idea of just throwing them away, so I am in the purpose of re-furbishing them – that mini DIY project to be posted soon!!

After all the toil to get those quatrefoil mirrors, I am not loving them above the bed.  I think they may be better suited in the hallway or above the TV.  I also think that the row’s of three (three mirrors, three picture frames) is just too matchy matchy, but alas, they will have to stay until other changes are made.

And do you like the new bedding?  I should say… “new” bedding.  Just flipped over the old duvet, stole the chevron pillows from the living room, and laid a cozy throw over the bed (originally because we needed a bit more warmth at night, but it has stayed).

I’ve already got a few ideas cooking, and have been working on a new inspiration board for the bedroom based on my biggest pet peeves and some of the challenges this space has.  Since it’s one of the darker rooms in our place, I’ll need to be strategic… keep your eyes peeled for some ideas here!

Home Decor – Living Room Inspiration

I made some headway last weekend sprucing up the apartment – hanging our gorgeous new piece of art, and revamping my sunburst mirror – however, this week, everything has fallen apart.  I have been so busy with work, and travel, and the HUNGER GAMES (we can get to that later) that everything is a mess. Clothes are all over the place, hamper overflowing, dishes in the sink, and dead flowers galore.  One step forward, two steps back.

I am determined to clean everything from top to bottom, and then I am moving forward with some more small details.  I have a few small projects in the works (one involving sea fans that I am rather excited for) but I am also looking into ordering some new pillow covers off Etsy.
Remember the living room inspiration?
Well I am moving forward on the pillows now.  As it stands, we are working with a total mishmash of whatever came with me from my last apartment.  This leaves us with several sad pillows that are well used (little frays here and there) and there is zero continuity between why they are all together.  I want to stick in the same color palate as I originally designed – browns, aqua, blue, tan, grey, and some yellow
Pair of Ikat decorative pillow covers, spa teal blue, brown and grey, throw pillows
Custom Listing for Riley
Yellow, gray and ivory floral ikat pattern decorative pillow covers, throw pillows
Decorative pillows, Pair of Multi-color gold, yellow, gray  floral medallion decorative pillow covers
ONE Suzani Powder Blue Pillow Decorative Pillow Cover Tapue/Aqua 18 X 18 Inch
Decorative Pillow Cover - Floral Pillow in Gray, Green and Taupe - Accent Pillow - Throw Pillow - Pillow Cover
Decorative Pillow Cushion Cover - Accent Pillow - Throw Pillow - Dwell - Vintage Blossom Azure, Teal, Branch - 20 x 20 inch
That said, I also still find myself to fabrics with pops of color.  Would it end up being to matchy matchy without some other color variations?  Will this end up looking like a sore thumb or afterthought?  That is the problem with Etsy – because most of these shops are a single person running a side business, there are no returns no a lot of it… what do you think?  Are these too much?  Should I stick with the original plan?
Pillow Cover - Decorative Pillow - Throw Pillow - Sofa Pillow - Kravet - 17x17 in - Yellow - Red - Blue - Taupe
Pillow Cover - Throw Pillow - Sofa Pillow - Decorative Pillow - Suzani - On BOTH SIDES  - 20x20 in - Sage Blue - Red - Yellow - Brown
Pillow Cover - Deocrative Pillow - Throw Pillow - Sofa Pillow - Kravet - Ikat - Suzani - BOTH SIDES - 20x20 in - Linen - Pumpkin - Taupe
Pillow Cover - Decorative Pillow - Throw Pillow - Toss Pillow - Ikat - Chartreuse - Both Sides - 17x17 inch
So many options, so little time!