Kalah Blue – Painted Curtain DIY

Who doesn’t love royal blue and white paired together??

No one.  That’s who.

I realize how confusing that double negative sounds… read it again… it makes sense… promise

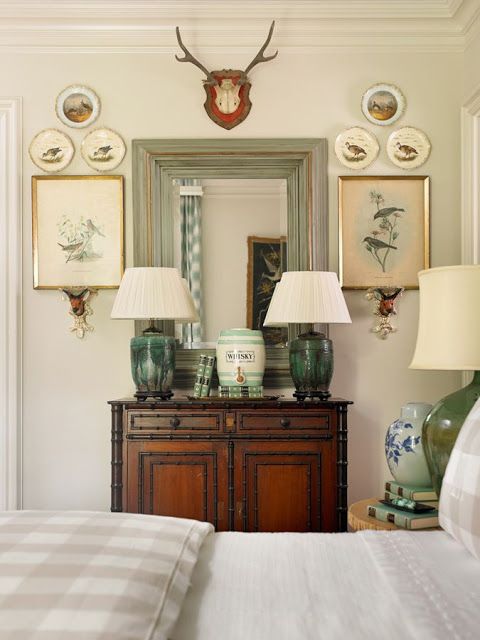
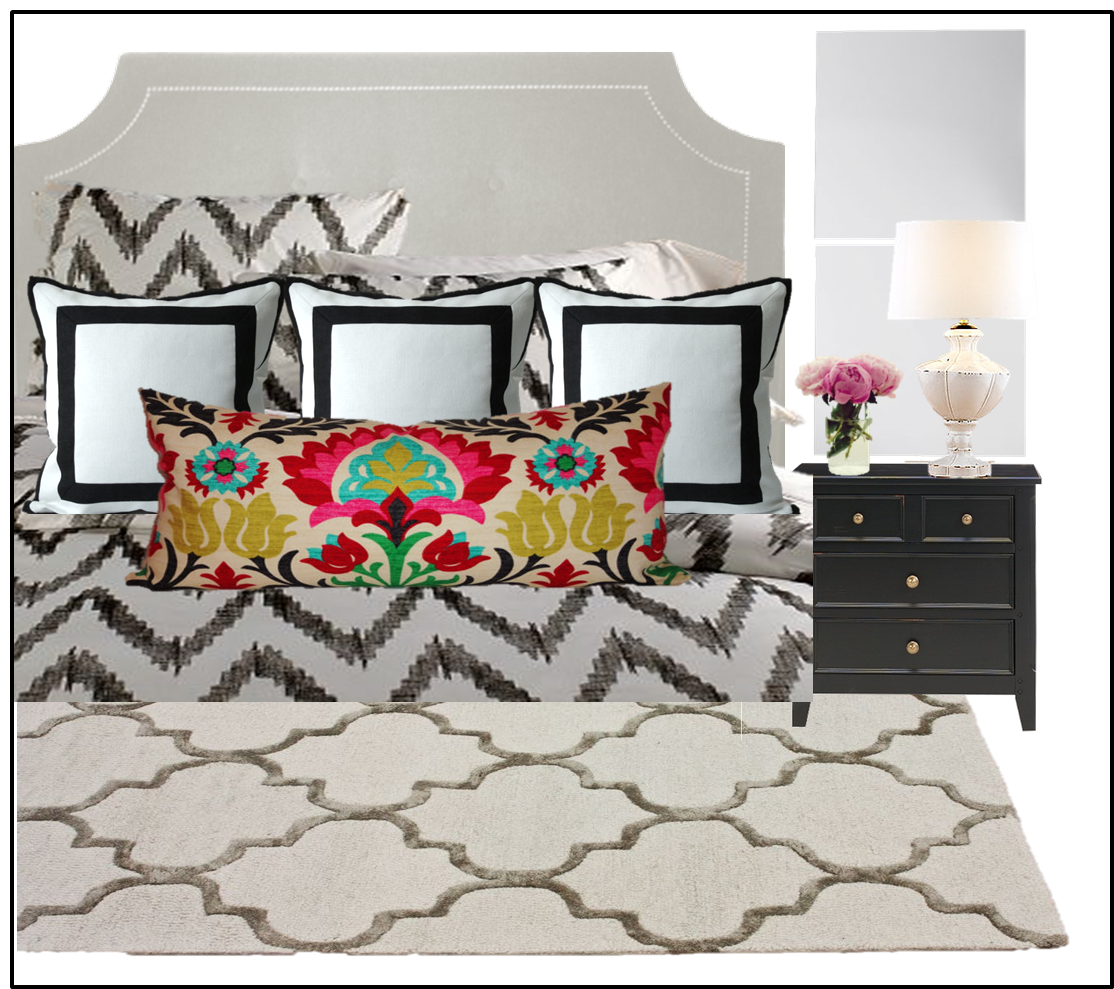
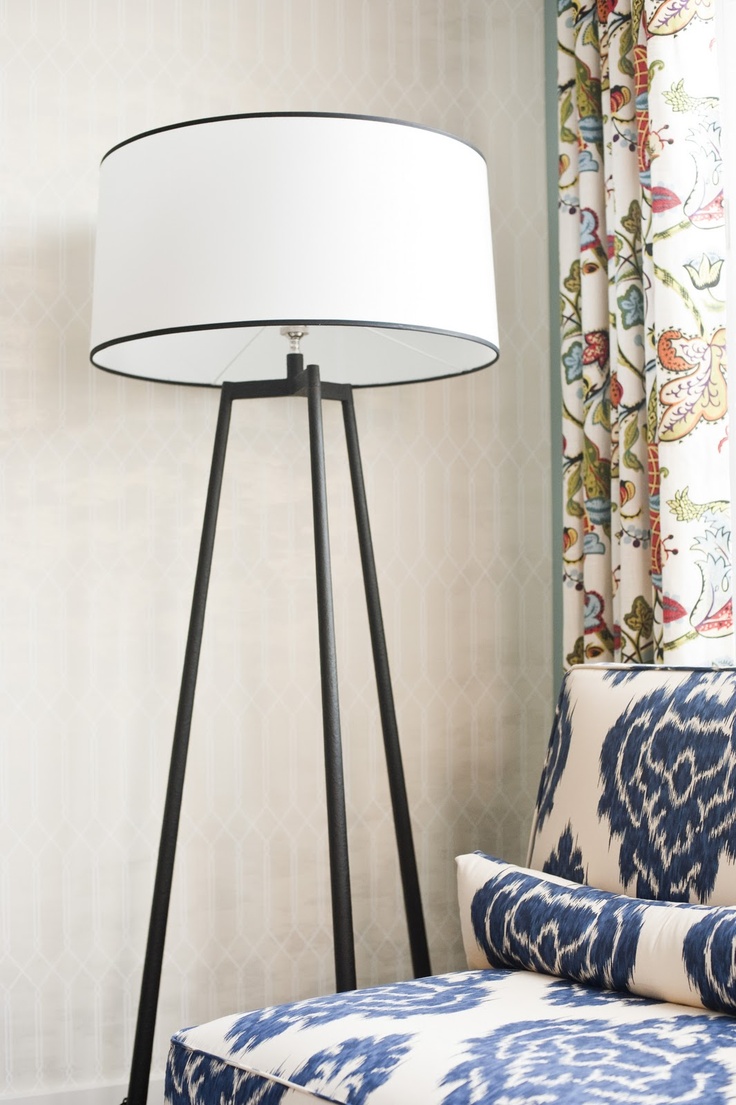
Blue and white is a classic combination for a reason, and one of my all time favorite patterns is the Kalah Blue pattern by Duralee.  You see it everywhere.  Remember this AMAZING bedroom from House Beautiful last year??

Target also has a darn good knockoff of this pattern in a chair that I can no longer find online… if we had somewhere to put it, you can bet your buttons it would be in our house – it’s SOOOO good.

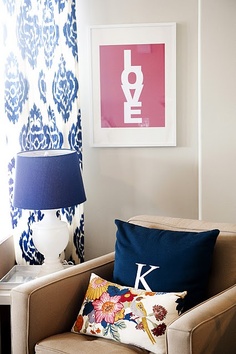
The throw pillows may make an appearance in our house in the next year… perhaps when I’m in my post-Christmas “simplifying phase” in January…

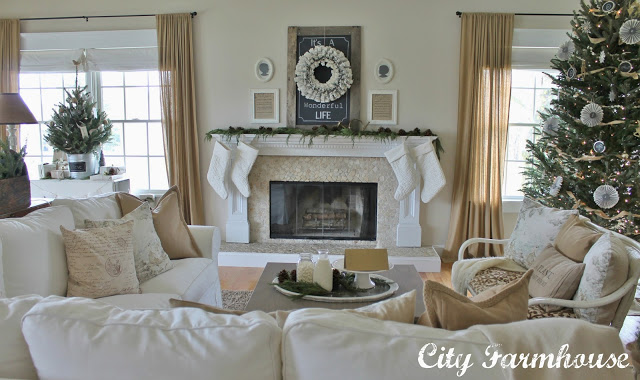
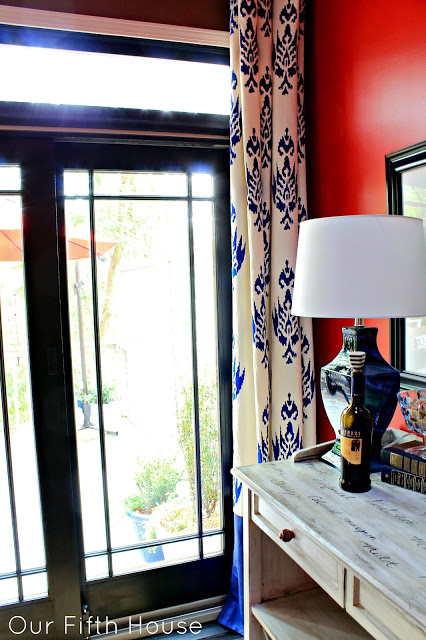
And these curtains??  LOVE.  (Maybe that’s what inspired them to hang that print right next to them… just saying!)

And another pair of curtains… they just bring a little magic to an all white space…

And surprise surprise… more curtains…

Well this post is for a DIY curtain tutorial after all…

Ok, so getting on with it…

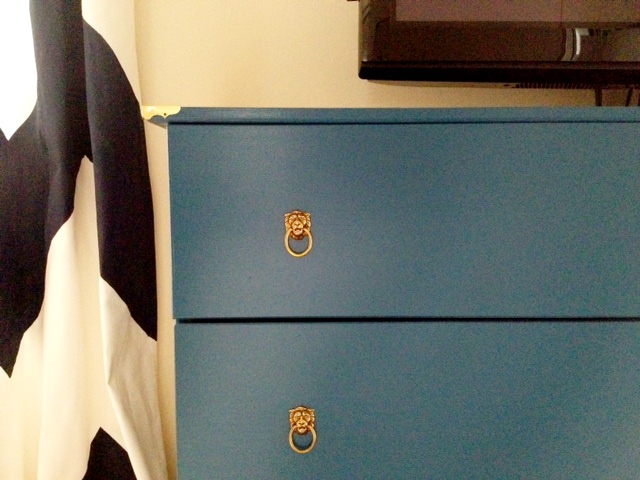
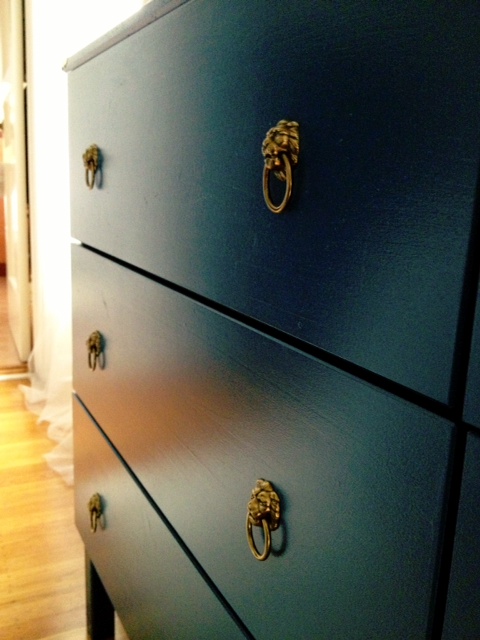
Carmel of Our Fifth House is one of the most talented and successful home bloggers out there.  Her house is TO DIE FOR, and her taste is crazy good.  She makes brave choices mixing deep reds, blues, and experimenting with dark paint (check out the color of her bedroom walls… it’s LOVE).  I love bloggers who take risks, and stay true to their taste – it makes their spaces so unique and fun to read about…

Her blog is one of my daily go-to’s for sure, and after going through the archives for ideas in our own place, I ended up stumbling across her tutorial for painted curtains.  You know I have a bit of a thing for experimenting with painted curtains since it’s a) easy and b) cheap

Past posts about painting curtains can be found here and here

Anyway, I’ll let a few of her pictures speak for themselves…

Ok tell me that those curtains aren’t a CLOSE SECOND to the Kalah Blue, which is PRICEY as anything. The cheapest I was able to find the fabric online was for $20 a yard (not including tax or shipping) at Fabric.com.  For one single curtain panel, you’d need around 4 yards… and when you’re making multiple panels, that adds up REAL quick…

To the rescue is the concept of stenciling… I’ll leave you to Carmel’s tutorial at Our Fifth House for the play by play, but she essentially used a stencil from Olive Leaf Stencils (I believe it was the Ikat Pattern #2) and painted away…

Genius right??  I’m dying to try this myself, but we’re all out of windows in this apartment to adorn… perhaps a sweet friend would be willing to volunteer their windows for a little experiment…

Any takers???

Powder Pink Winter Coat

I need a new coat like I need another hole in my head.  Which is to say, I don’t need a new coat, BUT… how amazing would it be to trot about town this winter in one of these??

Pink Coats

Gianluca Capannolo pink coat / RED Valentino wool coat, $865 / Sartoria Italiana Vintage pleated wool coat / RED Valentino coat / Jigsaw leather coat, $395

A soft pink wool coat!  LOVE. And if Kate Beckensale is on board, I am too!

Amazing with grey, perfect to dress up jeans… Obviously fab with black and white, and the perfect femme touch for leather pants.

AND… if you weren’t already sold it’s a breath of fresh air among the black, grey, and brown colors of winter!  Don’t you want to stand out??

Perhaps this will go on my Christmas wish list this year…..

Inspiration to Reality: Classic, White Living Space

I haven’t done a design board in a while and it’s time to get those creative juices flowing again!

This living room (from Houzz) is pretty much the stuff my dreams are made of…

Open concept.  Neutral Furniture. Classic details. Contemporary lighting and accessories. Worn natural woods.  It’s love.

I put together an inspiration board to get the look (for likely A LOT less than this room cost)… take a peek:

That sofa is actually one of the ones we’d been considering from Pottery Barn – the Carlisle Couch with it’s deep feather stuffed  seat cushions and pretty turned legs.  It’s not cheap, but it’s the core of the room!

To balance out the cost of the sofa, everything else is a bargain find – that rug from RugsUSA is just $1000 right now (with the 60% off discount) for an 8×10′ – great price.

I love the look of the grain sack throw pillows, and the carved wood candlesticks.  The Hicks Pendants are a bit pricey, but they are a classic, and they bring a cool industrial feel to an otherwise classic, clean space.

Juxtaposed against the more natural elements, the mercury glass lamp glams things up, and the dark wood side tables and coffee table really pop against the white walls and white furniture.

Sources:
SofaCandlesticks, Lamp Base, Flour Sack Pillow Covers, End Table, RugPendants,

The Lion’s are Here!!!

My little lion heads brass pulls are here!!
I was SO STOKED to see these come in the mail yesterday – I rushed home from work just to put them on the dresser, and was able to snap a few photos on my phone before it was completely dark.
With the days getting shorter, there was not a lot of natural light left, so the pictures are fuzzy and dark, but you get the idea… the brass pulls are AWESOME!!  Actually, even better than I hoped they would be!
They are actually quite small – the head itself is maybe an inch, but the ring adds to the size.
In the picture below, you can actually see that I hadn’t screwed the pulls on the other side yet… I was too excited (and the light was fading fast), but there will be more pictures to come soon – promise.
What do we think of the decorative brass corner caps??  I looked into options to antique them a bit, but it involves toxic chemicals to strip off the protective film (I read that the natural stripping methods with lemon juice, etc do NOT work).  
I think I’ll pass on the toxic stuff, and either make do as is, or scratch the idea all together.  I think I like how they look, and the little extra detail (almost called it flair… Office Space anyone??) but they are just so perfectly shiny in comparison to my awesome patina’d lion heads…
I think I’ll sit on any big decisions for attaching the end caps for now, and just keep them resting there for the time being…
More pictures to come, and they will NOT be blurry ones… promise 🙂

Chalkboard Frame with Deer Silhouette

I recently stumbled upon a new blog and it’s love.  I discovered City Farmhouse on Pinterest, and after clicking over to the photo’s source, fell down the rabbit hole.  An hour later, I’d completely stalked her entire house, and trust me when I tell you… it’s AMAZING.  What I love the most is that she’s really into up-cycling furniture and decor she already has… I mean how pretty is her living room all done up for Christmas??

A lot of it is found furniture that she’s slapped some paint on, recovered, or made-over in some fabulously creative way.  A girl after my own heart, since money isn’t exactly growing on trees around here…

The coffee table is a prime example of her creativity… the table is originally from Ikea, and she painted it and nailed wooden slats down after giving them an aged finish.  I’ve thought of doing this exact project SO. MANY. TIMES. But I’ve been too lazy, and I felt really unsure of if it would turn out… seeing her gorgeous home has totally inspired me to go for it.

Baby steps though… before I tackle this coffee table makeover, I have a smaller project in mind.

As you well know, I’m kind of obsessed with the idea of mounted antlers… I’ve posted about it twice already (here and here).

It hasn’t been something I’ve actively pursued though because I’m really on the fence about having real antlers in our house (flashbacks of Bambi are haunting me) and in all honesty, I think that a resin deer head would be way too much for our small space.

That said, I saw Jen’s chalkboard stag silhouette and was sold. Game over.

Her full tutorial can be found here, but it consists of a few simple steps… get a frame (with glass), paint the glass with chalkboard paint (after priming), trace the outline of a stag and color it in…
Voila!
So SO awesome, right??  I prefer the thickness of the wood on the chalkboard frame that hangs above her mantel a bit better, but this would be such a fun project to test out, and it’s virtually risk free.  The deer head is temporary – just erase it when you’re sick of it, and there you have it!
I NEED to try this out soon!  No clue where I’ll hang it just yet, but that can be sorted out later!

Brilliant, right??

Mini Mounted Antlers

Sooo… it looks like the antler craze isn’t going anywhere, and call me crazy, but I’m still really digging rooms that include mounted antlers… after our five days of “Indian Summer” last week, it’s feeling a lot like fall.  The nights are getting colder, the leaves are starting to change, and the jammed up cars on our street every morning tell me that all the kiddos are back in school!  I love that mounted antlers are sort of the toned down, gentrified version of the mounted moose head, and brings just a hint of hunting lodge rustic to an otherwise citified space.  Kind of the perfect season decor to welcome autumn, and lead into winter!

One of my favorite examples…

Cool right? It’s “backwoods rednecks” meets “civilized city folk”.  Ha!
The thing I like most about the mounted antlers is that there are no beady animal eyes staring you down… and no fur… just a clean leather mount.
And just look at how lovely these are on a simple white mount against the dark putty colored paint…
Does anyone else totally adore Erin Gates of Elements of Style??  Remember this post about her trip to Brimfield antique show??  And this awesome display of antlers??
It’s clear I like the look of mounted antlers, but did anyone else know that these bad boys are expensive??? They can easily run up to several hundred dollars each!  That’s not going to fly…

I did a little search on Etsy, and came up with a few affordable options (affordable meaning, anything under $100)…

This one is $59 dollars… not bad, but I really dont like the fact that the screws are literally going through this poor deer’s scull…

This one is a definite improvement, however the plaid would pretty much completely clash with the look and feel of everything else in our house… and for $100, it better be perfect.

These ones areMUCH more my speed… it’s ~$110 for all three, but they are faux, so no poor little deer had to die, AND they are white… so clean and pretty.

And this one is perhaps my favorite… a faux deer mount made of resin… well hello there little guy.  I’d love this even more in white, and he’d look quite dapper (I think) dressed up for the holidays – perhaps with a jaunty wreath around his neck… kind of like this:

So what’s your verdict? Are antlers still in, or are they out??  Or in your opinion, were they NEVER in??
Happy Friday!
xo

Le Dinner et Blanc

Have you heard of this??
I hadn’t really either, but it’s a fabulous event that originated in Paris (of course they have to out-chic everyboey), but this is an event P. Diddy would approve of.  Le Diner et Blanc literally means, “The White Dinner” and it’s a trend that’s caught on everywhere.
Our own little city of San Francisco has gotten the memo, and started the tradition a few years ago.
Why do I care??  This is the first year I have tickets to go, and I could NOT be more excited!!!

After looking through literally hundreds of photos of these fab celebrations, I’m thinking sparklers are a MUST, so I ordered a few packages of them yesterday!
With that out of the way, I’ve turned my thoughts to floral arrangements – obviously with the theme of “white” I want to keep the flowers monochromatic.
I loved the groups of different flowers like this photo below:

 I especially love that they are in vintage julep cups… so cute!  And those would be so lovely at night, reflecting the candle light…

I also love the natural feel of incorporating eucalyptus leaves and greenery…

And on the topic of more natural arrangements, there is something about this next one that incorporates berries and clover… so pretty!

Moving in a different direction, I love the staggered height and the clean look of these pale blue bottles with single stems, and small arrangements…

These small arrangements in milk glass are so sweet too – and their low profile would certainly encourage conversation…

This could easily be replicated by wrapping boxes (Kleenex boxes come to mind immediately) in burlap, or even brown butcher paper, and I am LOVING the lambs ear incorporated in the floral arrangement!

I have no idea if white anemone’s are in season, but I’ve always loved the black centers – both natural with the loose pretty petals, but also dramatic from the black…

 This table was just so pretty, I had to include it in my inspiration for floral decor… simple white roses in a glass vase.  Classic all the way…

And although they aren’t in season, pretty white peonies grouped together would be an absolute dream!  So gorgeous!

So what do you think??  What will look most amazing against a background of stars and candlelight??

Looking through all these photos gets me so excited!!!

Can’t wait!

Bedding Sneak Peek

I’ve been busy in the bedroom… get your mind out of the gutter!  I’ve been busy making updates in the bedroom!  We’re still on hold waiting for that darn brass hardware to arrive for our new dresser, but in the meantime, our bedding got a little freshening…

I’d snagged the West Elm ikat duvet on sale, but it was taking forever to ship, so while it was en route, I started thinking of accessories, and styling…  Here’s what I came up with for our bedroom… 

And as of last night, this is where our bedding landed…

Darn close… am I right?!
I made the lumbar pillow from the Waverly Santa Maria Desert Flower Fabric which I LOVE (Kris is still warming up to it), with this easy no-sew pillow cover tutorial.  It literally took me about 15 minutes on Sunday night to whip it up!
You can’t see it in this picture, but the crap storage under the bed is now concealed by a neutral bed-skirt.  Nothing special – we just wanted it to blend in and hide all the random stuff under our bed (board games, surf-board bags, College memorabilia, fake flowers, Christmas ornaments… you name it)

These are just low resolution iPhone photos, and there are more to come – I’m still hunting down Euro shams to cover the plain white pillows, but instead of a black stripe, I think it would be really cool to use a similar ultra-marine blue to the dresser / TV stand…

I know… you guys haven’t seen it yet, but this is still a progress photo.  Looking good though, eh??

Now I’m scheming for some sort of artwork, mirror, clock, fill-in-the-blank to hang over the bed, and surround the TV.  Not that I want to put too many more holes in our walls… but just a little something to draw the eye up.  It’s been looking mighty empty over our gorgeous headboard, and the wall behind the TV is still crying out for something…

I still love our white and blue bedding, and don’t you worry… it WILL be back… but this is a fun change for now…

Ahh, so pretty… but a little too summery right now…

Do you remember what our bedroom used to look like??  Before the blue accents, the bedroom looked like this…

And before that, it looked like this…

And look at the busy dark curtains… what was I thinking??

And remember this??

Yep, lots of changes over the last two years…  It’s so awesome to be able to look back over the evolution of this space…

Succulent Terrarium DIY

Happy Monday!  Hope you all had a lovely weekend.

It’s been hot here, so I spent my weekend outside – we had a full beach day on Saturday, and spent yesterday picnicking and watching the America’s Cup races.

In between all of that, I also worked on a small succulent terrarium…

Considering, I have the brownest of brown thumbs, I think I did ok!

I read up a bit on how to plant these out, and it turns out, it’s quite simple.  You will need:
  – Assorted rocks and pebbles
  – Soil with smaller pebbles and sand mixed in
  – A planter
  – An array of succulent plants
  – A flat counter space that you don’t mind getting a lot a bit dirty

 
A misconception of mine… succulents don’t like water.  They are desert plants, and like to be dry.

WRONG.

No wonder I’ve killed so many already.

It’s not that they don’t like to be watered… they just don’t like to sit in water… thus the pebbles, rocks, and sandy soil.  This all helps with drainage, and will be key to prevent me from killing these plants.

See the rocks down at the bottom??  I spread a solid foundation of rocks and pebbles before planting the succulents, so that when I do lightly water them, the water is able to drain to the bottom, preventing the roots from being boggy and wet.

This also will allow me to water them pretty in-frequently.  Amen to that!

Want to hear something crazy??  West Elm sells similar terrariums for $99 EACH!

This project was nowhere near that much – the glass bowl was from Ikea, ~$10.  The succulents were from Trader Joes, $2.50 each, and I bought about 5.  I’ve had the rocks for years, but they were from Michael’s, and were about $5 for a big bag of them.  In total, this cost me, about $20.

Pretty good, right?!

I had a lot of issues keeping the dirt off the plants when I was adding soil around them, and unfortunately for me, their waxy texture is holding onto that dirt as though it’s life depended on it.  Ugh.

I tried wiping it off, using a duster… I’m hoping that over time, it will go away on it’s own??

I’m pretty pleased with how it all turned out.  Look how pretty and bright green they are!!  I’m doing my best not to kill them this time, although I’m not entirely sure how long they will last.

Wish me luck!

Fall Wreath

We are having a bit of a heat spell right now – the weather has been around 85 in the city, which is rare! We’ve been loving every second of it, but even with the warmth, the light has somehow changed, and we’re starting to feel the first few hints of fall.  The leaves on the tree’s have a twinge of yellow to them, and the days are definitely shorter!

With the first inklings of fall, I decided to revamp our doorway decor – not that I’m going nuts with pumpkins in the house (too soon) but just something a bit autumnal.

I had a pine-cone wreath from last year that was very… brown.  Lots of twigs, acorns, and pine-cones… and it looked so depressing hung up, so I always took it down pretty quickly.
Well, I bought some berries and autumn leaf sprigs at Michael’s (literally $5 for everything with my coupon) and busted out the glue gun.  This is the finished result…

There is still plenty of green in the leaves to keep it feeling fresh, and the color from the berries makes these pine-cones the opposite of dreary.  Lively?  Inspired? Awake (at the least!)…

A gold ribbon (mainly to hold it to the door) finishes it off…

I’m super stoked about how this turned out!  Last Christmas, I’d bought a live boxwood wreath from Trader Joe’s, and it dried beautifully, so that’s been hanging on our door for the last year.  The new fall wreath brings some new life to this space, and if you ask me looks awesome with the brass door knob, key hole, and numbers.

Not that I’m biased or anything, but I think it also looks fetching alongside the new gold leafed frames…

Ok, enough talk of leaves changing, and temperatures dropping… Indian Summer is here baby, and I’m heading outside to soak up the heat!

xoxo